Most riders buy gear like they buy phone cases: does it look good, does it fit, does it kind of say “me”? And then they ride faster than they ever text. That mismatch is where things go sideways—literally.
High-integrity gear isn’t just about “more protection.” It’s about getting the right materials, in the right locations, working in the right way for the speeds, surfaces, and impacts you actually face. This is where we stop shopping by brand hype and start shopping by physics.
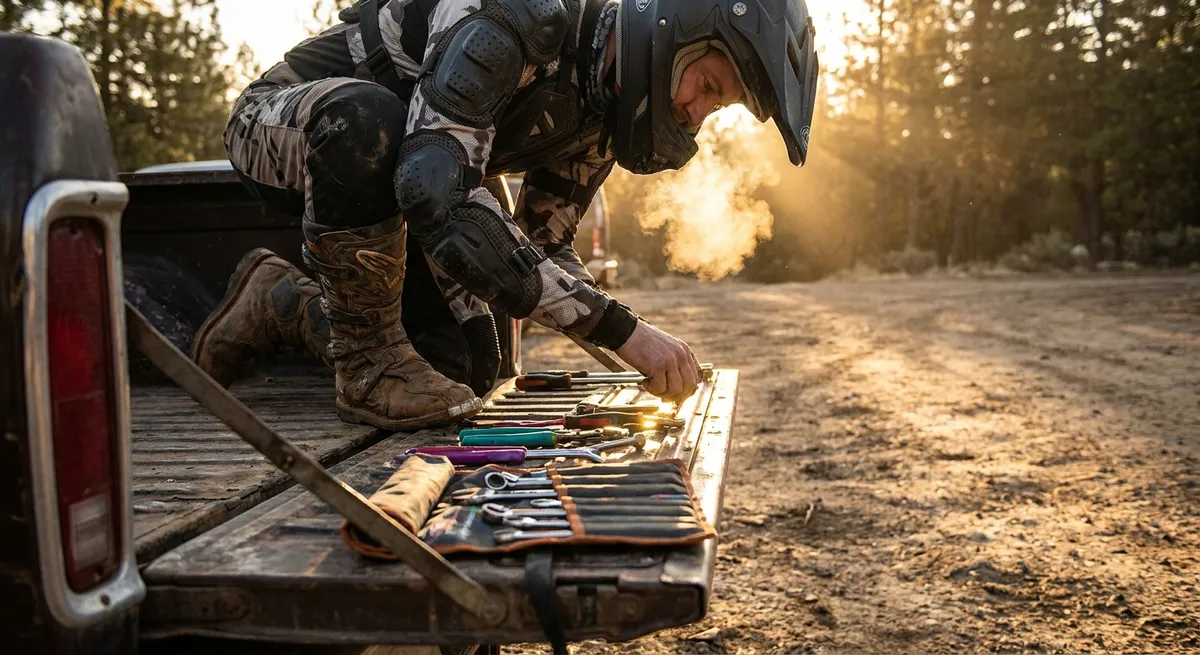
This is your deep dive into building a gear setup that is mechanically honest, thermally stable, and impact-capable at real-world road speeds.
1. Impact Zones and Energy Paths: Dressing for the Crash, Not the Commute
Most riders vaguely know shoulders, elbows, back, hips, and knees are “important,” but the distribution of actual crash damage isn’t guessed—it’s measured.
EN 17092 (the newer apparel standard) defines zones based on impact likelihood:
- Zone 1: High risk (buttocks, outer thighs, outer shoulders, outer elbows, knees)
- Zone 2: Next ring around those areas
- Zone 3/4: Lower-risk regions like inner torso areas
Crash studies and standards testing converge on one conclusion: the majority of abrasion and impact damage happens on the outer surfaces of your limbs and hips during slides and tumbles. That’s where your gear should be structurally overbuilt.
Technical implications for your kit:
Prioritize outer limbs, hips, and seat
If a jacket or pant has the same fabric everywhere, it’s not optimized. You want: - Heavier, multi-layer textiles or high-grade leather in Zone 1 - Reinforced seat and hip areas on pants - Extra abrasion panels on shoulders, elbows, and knees
Chassis structure matters more than brand logos
Look for: - True double layers in high-risk zones (not just cosmetic overlays) - External sliders on shoulders and knees that reduce grab and lever forces - Reduced seam count in impact zones (fewer failure points)
Seam orientation is a safety feature
The best garments move seams out of high-friction zones. A clever design will: - Wrap strong fabric around the impact zone - Move stitching to the “shadow” areas that are less likely to slide on asphalt
Don’t trust “reinforced” claims without location clarity
If the product page doesn’t clearly show or map reinforced zones, it’s marketing, not engineering.
CE class is a starting line, not a finish line
For street speeds, aim for: - EN 17092 Class AA as a minimum for highway use - Class AAA if you regularly ride aggressively or at sustained high speeds
Gear that respects impact zones is gear that’s been designed by someone who has actually looked at crash data, not just a color chart.
2. Abrasion Reality Check: Why Fabric Type and Thickness Actually Matter
“Abrasion-resistant” is one of the most abused phrases in moto gear marketing. Without context, it’s meaningless. Abrasion performance is a function of fiber type, denier, weave, coating, and layering, not just a buzzword.
Here’s how to interpret what you’re buying:
Leather vs textiles: it’s about slide behavior, not fashion
- High-quality, 1.2–1.4 mm cowhide or kangaroo leather tends to have excellent abrasion times and controlled slide behavior. - Leather melts later and grabs less than many consumer-grade synthetics when hot, which reduces tumbling. - But once it’s worn through, it fails; there’s no hidden second layer unless the suit is built that way.
Textile denier and fiber type are non-negotiable specs
For synthetic gear: - Look for high-denier (500D–1000D+) nylon or blends, not generic “polyester shell” for primary impact zones. - Nylon (especially high-tenacity) generally outperforms polyester in abrasion and tear strength. - Aramid blends (Kevlar, Twaron) or ultra-high-molecular-weight polyethylene (UHMWPE, e.g., Dyneema) in key zones dramatically improve slide survival.
Single-layer “protective jeans” are not all created equal
- A basic denim with a light aramid liner at the knees and seat ≠ a woven, high-UHMWPE single-layer jean. - Look for lab-backed claims (EN 17092 class, abrasion time numbers) and fiber content like “UHMWPE” or “aramid blend” throughout the chassis.
Coatings and laminates change slide dynamics
- Polyurethane or PVC coatings improve water resistance but can change how the fabric heats and fails in a slide. - Very slick external surfaces can reduce grab but may concentrate wear in smaller zones. It’s a tradeoff—better with solid testing behind it.
Lab standards are your calibration tool
- EN 17092 uses a Darmstadt machine to quantify abrasion performance. - While the test is not a perfect real-world analogue, CE class (A / AA / AAA) does reflect minimum performance bands. - If a “highly protective” jacket has no CE class for the garment (not just armor), treat that as a red flag.
When you’re comparing gear, strip away the lifestyle marketing and ask: what fiber, what thickness, what test, what zone?
3. Impact Armor: Tuning for Energy, Not Just Comfort
Impact protection is not about wearing “pads.” It’s about managing energy over time and area.
The CE standard for armor, EN 1621-1 (limbs) and EN 1621-2 (back), measures how much force gets through the protector during controlled impacts.
How to read and use armor specs like an engineer:
Level 1 vs Level 2 is a measurable difference
- Level 1 limb armor: average transmitted force ≤ 35 kN - Level 2 limb armor: average transmitted force ≤ 20 kN That’s roughly a 40–45% reduction in force transmission. For high-risk riding, Level 2 at shoulders, elbows, hips, and knees is a smart default.
Coverage area is as critical as impact performance
- A Level 2 pad that leaves half your knee exposed is a fail in real-world geometry. - When you try gear on, assume crash posture: slight crouch, bars turned, feet on pegs. - Armor should still cover bony prominences in that position, not just while standing straight for a mirror selfie.
Armor mobility vs migration
- Softer viscoelastic (memory-foam-like) pads curve and flex well, improving comfort and reducing pressure points. - But if they’re too loose in the pocket, they can rotate away in a crash. - Prefer gear that: - Locks armor with tight, correctly placed pockets - Offers adjustment straps to cinch armor into position (elbows, knees)
Back and chest protection: structural, not symbolic
- Back: aim for EN 1621-2 Level 2, full-length, covering from upper thoracic down to the tailbone region. - Chest: less standardized, but a proper chest protector spreads impact over the ribs and sternum—critical in frontal collisions. - Inserts that feel like thin, floppy foam “placeholders” usually are exactly that: replace them.
Temperature performance and aging
- Some armor stiffens significantly in cold weather, degrading comfort and potentially performance. - If you ride in low temps, test your armor when cold; premium pads often claim a wider temperature operating range. - Replace armor that has visible cracking, permanent deformation, or has been through serious impact.
Armor is the suspension system between you and the kinetic energy of your crash. Treat it like critical hardware, not accessory padding.
4. Thermal and Moisture Management: Preventing Rider Degradation, Not Just Sweating Less
Protection doesn’t matter if your brain is cooked and your reactions are 300 ms late. Heat stress, dehydration, and cold impairment are real performance limiters—on the street and on track.
Good gear manages convection, conduction, radiation, and evaporation in a dynamic environment.
Key technical angles to evaluate:
Layering architecture beats “all-in-one” complexity
Ideally, your kit is designed as a system: - Base layer: Wicking, synthetic or merino, no cotton. Moves sweat away from skin. - Mid layer: Insulating (fleece, loft, or technical softshell) for colder rides. - Shell: Abrasion, wind, and water management.
This lets you tune for 5–35°C without changing the outer protective shell.
Waterproofing systems: Z-liner vs drop-liner vs laminate
- Drop-liner/Z-liner: Waterproof membrane hangs behind the outer shell. - Pros: Cheaper, often more comfortable. - Cons: Outer shell wets out, gets heavy and cold; drying time is poor. - Laminated shells (e.g., Gore-Tex Pro, similar membranes): Membrane bonded to outer. - Pros: Shell doesn’t soak as easily, lighter when wet, better for long rain days. - Cons: More expensive, can be stiffer and warmer in heat.
Venting that actually works at speed
Effective venting: - Has ram-air inlets in high-pressure zones (chest, shoulders) - Uses exhaust vents in low-pressure zones (back, sides) - Flows through the body, not just over it. Pit vents and back exhausts matter more than token bicep vents if you care about system airflow.
Mesh vs solid shell tradeoffs
- Full mesh jackets: Excellent airflow, but often limited abrasion performance unless reinforced with high-spec fabrics in key zones. - Hybrid jackets: Solid, high-denier or leather in impact zones, mesh in low-risk panels. Better protective compromise for hot climates. - Treat ultra-light mesh as a "better than T-shirt" layer, not full highway armor, unless it’s clearly tested to a high CE garment class.
Cold performance: wind blocking is half the game
- Most riders overcompensate with bulk instead of blocking wind. - A thin windproof mid-layer under a protective shell can transform a “3-season” jacket into a real cold-weather tool. - Keep neck, wrists, and waist sealed; small gaps drive huge convective losses at speed.
Your brain, eyes, and hands are your real traction control system. Thermal and sweat management is how you keep that system online and precise.
5. Fit, Stability, and Kinematic Compatibility: Making the Gear Move With You
Protection depends on one thing above all: staying in the right place under dynamic loads. That’s not just a sizing question; it’s a kinematics question.
Think in terms of how gear behaves under acceleration, deceleration, rotation, and slide friction.
Critical fit and movement factors:
Tension paths vs range of motion
- You want a slight pre-curve in elbows and knees so the garment is most neutral in riding posture, not in standing posture. - Stretch panels should be positioned where joints flex (back of shoulders, above knees, along crotch), not just for style.
Armor lock-in under rotation
- Simulate a low-side in the fitting room: - Crouch - Twist your torso - Extend arms like you’re bracing a slide - Armor should stay centered over joints; if it drifts off bone with movement, it’s under-secured.
Boot and pant interface
- Pants should overlap boots enough that no skin or thin sock area is exposed when knees are bent. - For track or aggressive road riding, a taller boot shaft with a snug upper—combined with a tapered pant leg—keeps everything locked where it belongs.
Glove fit: dexterity vs retention
- Fingers should reach full control range (lever, switchgear, throttle roll) without pulling the glove tight across the knuckles. - A secure wrist closure is non-negotiable: in a slide, loose gloves come off. - Look for palm sliders and double-layer palms; this reduces wrist and scaphoid injuries by encouraging sliding rather than grabbing.
Helmet dynamics: not just size, but stability and interaction
- At your typical cruising speed, the helmet should not lift, wobble, or twist when you shoulder-check. - With your jacket’s collar and any neck buff in place, you should still be able to fully rotate your head and tuck without binding. - Wind-tunnel-tuned shells and spoilers make a real difference at highway speeds—less neck fatigue equals more consistent control.
Well-designed gear isn’t “comfortable” in the couch sense; it’s kinematically transparent—it disappears when you ride, and only appears when physics calls your number.
Conclusion
A serious riding kit is not a style decision—it’s a mechanical system built around impact distribution, abrasion management, thermal stability, and kinematic compatibility.
When you evaluate gear like an engineer instead of a catalog shopper, the marketing noise falls away. What’s left is fabric type, layering, test data, armor behavior, seam placement, vent design, and how all of it behaves under real-world loads.
That’s how you build a high-integrity kit: piece by piece, spec by spec, matched to how and where you actually ride.
You don’t need more fear to buy better gear. You need more data—and the willingness to treat your riding equipment with the same seriousness you give your brakes, tires, and suspension.
Sources
- [European Commission – Protective clothing for motorcycle riders](https://ec.europa.eu/growth/sectors/mechanical-engineering/motorcycle-protective-clothing_en) – Overview of standards and safety considerations for motorcycle PPE in the EU
- [Gore-Tex Technical Information – Motorcycle Garments](https://www.gore-tex.com/technology/motorcycle) – Detailed explanations of laminate vs drop-liner constructions and their performance in wet and varying conditions
- [Dainese Safety & Innovation – Standards and Technologies](https://www.dainese.com/us/en/technology/) – Technical breakdown of impact zones, armor technology, and abrasion strategies used in modern moto gear
- [Alpinestars Tech Information – Protection Technologies](https://www.alpinestars.com/pages/tech-features) – Descriptions of impact armor, seam engineering, and material usage in protective garments
- [Centers for Disease Control and Prevention – Heat Stress](https://www.cdc.gov/niosh/topics/heatstress/default.html) – Data on heat stress, cognitive performance, and the importance of thermal management, applicable to riders in hot conditions
Key Takeaway
The most important thing to remember from this article is that this information can change how you think about Gear & Equipment.


