Every motorcycle has a brochure. Very few have a mission profile. Most riders buy gear around trends or isolated safety ratings; serious riders build a system. Your helmet, armor, comms, tools, and luggage aren’t separate purchases—they’re an integrated platform that decides how far, how hard, and how safely you can actually ride. This is about turning your gear from “stuff you own” into a mission-ready kit engineered for real-world miles.
Engineering Your Protective Shell: Helmets and Impact Reality
Helmet shopping shouldn’t start with graphics; it should start with impact dynamics and fitment geometry. Modern lids are engineered around managing linear and rotational acceleration, not just “hard hit vs hard shell.”
The shell material (polycarbonate, fiberglass composite, carbon fiber, or mixed composites) dictates how energy is distributed before it reaches the EPS (expanded polystyrene) liner. Polycarbonate typically flexes more and spreads load but is heavier; composite shells can tune stiffness and crush zones across different regions of the helmet. The inner EPS isn’t one uniform density—better helmets use multi-density or multi-layer EPS to handle low-speed and high-speed impacts differently.
Rotational protection systems—like MIPS or proprietary slip-liner tech—focus on reducing rotational acceleration of the brain, a big factor in concussive and sub-concussive injury. This is especially relevant in off-road and ADV crashes where oblique impacts are common. Face shield optics and mechanism matter too: distortion-free optics, secure locking at highway speeds, and usable detents at partial-open positions affect fatigue, fogging, and visibility in the rain.
Fitment is pure engineering: your head shape (intermediate oval, long oval, round) must match the shell shape and liner contour or the helmet can’t do its job efficiently. Hot spots and pressure points don’t just cause discomfort; they reduce your riding window and can make you subconsciously avoid head movements—slowing your situational scanning. A properly engineered helmet setup is one you can wear, locked and sealed, for hours at a time without thinking about it.
Impact Systems Under the Jacket: Armor, Energy, and Coverage
Most riders talk about jackets; engineers talk about impact zones and energy transfer. Textile or leather is just the outer envelope—the real work happens at the armor and slide interface.
Level 1 vs Level 2 armor (per EN 1621) isn’t marketing; it’s quantified energy attenuation. Level 2 armor allows less transmitted force through to your body under standard impact testing. But there’s more nuance: viscoelastic armor (like D3O, SAS-TEC, etc.) changes stiffness under load, remaining flexible when you move and firming up under impact. That combination improves both protection and wearability, which indirectly boosts safety because you’re actually willing to wear it in every ride, not just “big days out.”
Coverage is the frequently ignored dimension. A jacket with Level 2 shoulder and elbow armor but no chest and minimal back protection leaves big vulnerabilities, particularly for urban and frontal impacts. A dedicated back protector (ideally CE Level 2, full-length, with good lateral coverage) plus at least a split chest protector drastically improves outcomes in head-on, high-side, and impact-with-bars scenarios.
Airbag vests and integrated airbag jackets are the current frontier in rider impact engineering. These systems deploy around the neck, chest, ribs, and sometimes hips in milliseconds, massively increasing the “crumple zone” between you and the object you hit. The critical questions are: detection logic (inertial vs tethered), deployment time, coverage geometry, and reset/recharge complexity. For riders regularly pushing pace or riding in dense traffic, impact systems under the jacket are no longer optional—they’re part of a proper mission-ready kit.
Thermal and Moisture Management: The Physics of Staying Sharp
Comfort isn’t about luxury; it’s about cognitive performance and reaction time. If your body is fighting heat, cold, or moisture, your brain is running background tasks instead of foreground processing the road. Gear should be engineered as a thermal and moisture control system, not just “a jacket and some gloves.”
Base layers do more work than most riders realize. A high-quality synthetic or merino base layer manages sweat phase-change: wicking moisture off your skin, spreading it across a larger surface area, and promoting evaporation where the airflow is. Cotton traps moisture and kills evaporative cooling; it becomes a clingy heat sink in summer and a freezing liability in winter. Compression-style layers also limit fabric flap and hot spots under armor, reducing pressure fatigue.
Mid-layers should be modular and packable. A compact synthetic insulator (or thin down under a protective shell) allows your outer gear to be chosen for abrasion and water resistance first, with temperature tuned by adding or removing insulation. That means you can run a single outer suit across a much wider temperature band, crucial for all-day or multi-day travel where conditions swing 20–30°F (10–15°C).
For the outer layer, laminated vs drop-liner waterproofing is a huge technical decision. Laminated membranes (like Gore-Tex Pro and similar technologies) bond the waterproof layer directly to the shell, reducing water absorption and keeping the garment from becoming waterlogged. Drop-liner designs place the waterproof membrane behind the outer fabric, which can soak and add weight, though they’re often cheaper and sometimes more comfortable off the bike. Vent placement and vent pathways—chest to back, cuff to sleeve exit, neck scoop—are as critical as the jacket’s material, especially for hot climates.
Communications, Data, and Power: The Connected Rider Platform
Electronics on a bike used to mean a GPS and maybe a phone. Now, many riders are building full comms and data stacks—and done right, it can significantly increase safety, efficiency, and endurance.
Helmet comms systems aren’t just about chatting with friends. High-clarity, low-latency audio and reliable noise-canceling allow you to hear navigation prompts and traffic alerts without over-raising base volume, protecting your hearing over long distances. Mesh networking offers more robust rider-to-rider links in groups vs traditional Bluetooth daisy-chains, where one disconnected rider breaks the whole network.
Mount architecture matters. Hard-mounting devices (GPS, phone, radar detector, dash cam) to vibration-prone spots on the bars can damage electronics and produce unreadable screens at speed. Anti-vibration mounts, proper clamp dimensions, and placing devices inside the bike’s natural “still” zones (often near the triple clamp axis) are small but meaningful engineering decisions. Orientation relative to sunlight, glare, and head angle also defines whether your eyes are off the road for 0.2 seconds or 1.0+ seconds per glance.
Power management is another crucial layer. A simple fused SAE lead from the battery can run a trickle charger and occasional air pump; a fully kitted touring or ADV setup might require a dedicated power distribution module (PDM) or CAN-bus-safe controller. This allows safe, fused circuits for heaters, auxiliary lights, GPS, and charging ports, without overloading the bike’s harness. Proper waterproof connectors (Weather-Pack, Deutsch, or OEM-grade equivalents) and strain relief are key to avoiding intermittent faults that only appear at the worst times—heavy rain, night riding, or high vibration off-road.
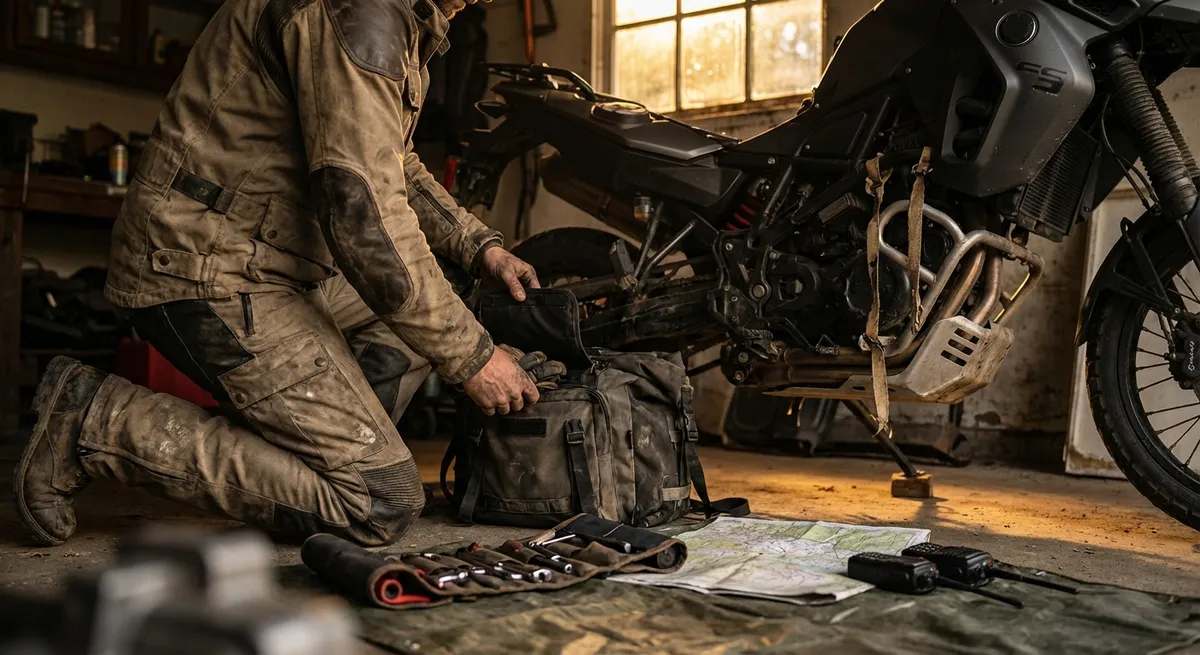
Tools, Repair, and Micro-Logistics: Field-Serviceable Riding
The difference between a minor delay and a trip-ending failure is usually measured in millimeters and minutes—does your kit actually let you fix the things that do fail? A mission-ready gear system assumes that certain problems are inevitable and designs for field-serviceability.
The core tool kit should be bike-specific, not generic. That means you’ve identified every fastener size on your motorcycle that you might reasonably need to touch on the road—axles, levers, body panels, chain adjusters, battery, and critical guards—and verified you have the correct tools, in usable lengths, to access all of them. Many OEM kits miss either leverage (too-short wrenches) or access (wrong head style), which turns a “simple” roadside job into an impossible one.
Tire repair is non-negotiable for distance riders. Tube-type vs tubeless dictates your strategy: tubeless riders should carry quality plugs, insertion tools, and a compact air source (mini compressor is far superior to CO₂ if you’re far from support). Tube-type riders need spare tubes (front can sometimes be used in rear as an emergency measure), levers, and at least enough mechanical advantage to break a bead—either using the bike’s side stand or purpose-built bead tools. Practice at home turns a 90-minute roadside battle into a 25–30 minute controlled stop.
Micro logistics—the actual placement of these tools and repair items—affects your crash and comfort profile. Heavy, dense items (tools, compressor, locks) should ride low and as close to the bike’s center as possible: near the pegs, frame triangle, or low-mounted panniers. Frequently used items (rain liners, mid-layer, visor cleaner, spare gloves) belong in fast-access pockets or top-of-luggage positions, not buried under camping gear. This isn’t just convenience—every unnecessary unpack/repack cycle in bad weather increases fatigue and decision friction, which eventually feeds back into riding errors.
Conclusion
A truly Moto Ready kit doesn’t happen by accident or from a single shopping spree. It’s built like a system: armor stacked under abrasion resistance, thermal layers tuned around your climate and pace, electronics mounted and powered with intent, tools and spares arranged to make the bike field-serviceable instead of fragile. The spec sheet tells you what gear is; your mission profile decides what that gear does. When your equipment is engineered around the riding you actually do, the bike stops being a toy and starts being a platform—one you can confidently push farther, faster, and deeper into the kind of riding that rewires your brain in the best way.
Sources
- [Sharp Safety Helmet Assessment and Rating Programme (SHARP)](https://sharp.dft.gov.uk/) - UK government-backed helmet safety ratings and impact test data
- [Gore-Tex Technology Overview](https://www.gore-tex.com/technology) - Technical details on waterproof/breathable laminate construction and performance
- [SAE International – Motorcycle Protective Clothing and Armor](https://www.sae.org/publications/technical-papers/content/2001-06-0062/) - Research on motorcycle PPE performance and injury mitigation
- [National Weather Service – Heat Safety](https://www.weather.gov/safety/heat-illness) - Explains how heat stress affects human performance, relevant to thermal management in riding gear
- [NHTSA Motorcycle Safety](https://www.nhtsa.gov/road-safety/motorcycles) - Official U.S. guidance and statistics on motorcycle safety and protective equipment
Key Takeaway
The most important thing to remember from this article is that this information can change how you think about Gear & Equipment.


