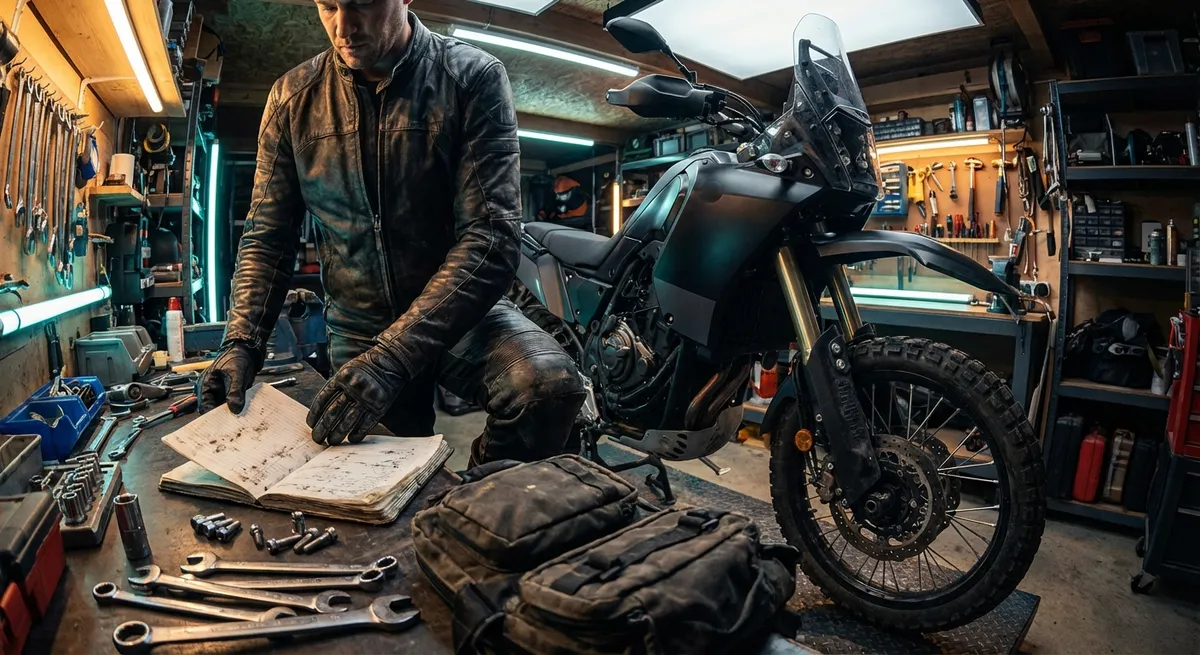
Motorcycle gear isn’t a costume and it’s not just “protection.” It’s a dynamic system of materials, ergonomics, and interfaces that either let you ride at your true potential—or quietly hold you back. Most riders shop by logo, color, and random YouTube takes. Moto Ready riders should be doing something different: matching gear to mission, understanding the physics behind materials, and building a kit that performs as hard as they ride.
This is about engineering your personal riding system, not just buying more stuff.
Defining Your Operating Envelope: Ride Conditions Before Brand Names
Before thinking about brands or aesthetics, define the “operating envelope” of your riding the way an engineer would.
Key variables that should drive your gear decisions:
- Thermal range: What’s your real-world temperature window?
- Commuter in a humid 95°F summer? You need high CFM (cubic feet per minute) airflow and moisture management, not just “mesh.”
- Mountain twisties dropping from 80°F in the valley to 40°F at altitude? Layering and windstop capability matter more than raw vent count.
- Speed regime:
- Urban/suburban: lower max speeds but higher impact frequency and multi-directional threats (doors, side impacts, low-sides).
- Highway/track: higher kinetic energy on impact, more abrasion distance, more importance on advanced armor and outer shell integrity.
- Surface type:
- Pavement only: prioritize abrasion resistance (shell + slide behavior) and impact energy management.
- Mixed ADV / off-road: prioritize mobility, ventilation, impact protection, and snag resistance over maximum slide time.
- Duration:
- 20-minute commute vs. 8‑hour day: fit fatigue, pressure points, and micro-movements in gear become critical over long durations.
Once you can write down your riding envelope in a few lines (“90% city, 10% highway, 45–95°F, heavy summer rain, high humidity”), you stop buying generic “good gear” and start building a purpose-built system.
Technical Point 1: Understand Impact Energy, Not Just “Has CE Armor”
Most riders stop at “CE Level 1 vs Level 2” and never look deeper. That’s like talking about engines only as “big vs small.”
What actually matters in armor:
Test standard & coverage
- The dominant impact standard is EN 1621-1 for limb protectors and EN 1621-2 for back protectors. - Level 1: transmits ≤35 kN of force in test conditions. - Level 2: transmits ≤20 kN (lower = better energy absorption). - But coverage area and shape matter just as much as the number. A perfectly tested Level 2 pad that doesn’t fully cover your knee when you’re in a riding position is effectively compromised.
Material behavior under repeat impacts
- Viscoelastic foams (e.g., D3O, SAS-TEC, etc.): soft in normal handling, stiffen under impact. They’re great for comfort and multi-impact behavior but can change performance with temperature. - Layered foams + hard shells: more bulk, but can spread force better and sometimes perform more consistently across temperatures.
Temperature sensitivity
- Many armors are tested around room temperature (about 20°C/68°F). In real life, they may be: - Baking at 120°F in direct sun inside a black jacket. - Near freezing on a cold morning at highway speed. - Some materials harden dramatically in cold, reducing their impact absorption. If you ride cold climates, test this yourself: flex the armor after being in a cold garage or outside for 20+ minutes. If it turns into a brick, that’s a red flag.
Back protection reality
- Foam “back pads” that come stock in many jackets are often just comfort padding, not certified protectors. Check for the EN 1621-2 marking and level. - A full-size Level 2 back protector that covers from T1 to near the tailbone and wraps the sides slightly is one of the biggest real-world safety upgrades you can make.
Torso and rib coverage
- Standard street gear often has strong shoulder and elbow armor but leaves the ribs and chest as afterthoughts. - Look for integrated chest armor (EN 1621-3) or at least the ability to add it. Broken ribs and lung trauma are common in real crashes, especially with tank/handlebar impacts.
Action step: Open every piece of gear you own. Verify the standard, level, and coverage of each armor piece. If you can’t find the EN marking, treat it as unproven and upgrade strategically.
Technical Point 2: Abrasion Resistance Is a System, Not a Fabric Logo
“Leather vs textile” is oversimplified. What matters is how the entire layers system handles sliding, tearing, and heat build-up.
Variables that define real abrasion performance:
Material type and denier
- Common textiles: 500D–1000D Cordura (nylon), Polyester weaves, high-tenacity blends, and more advanced fabrics like SuperFabric, Armacor, and Schoeller Dynatec. - Higher denier usually means more durability but also more weight and potentially more stiffness.
Single vs multi-layer zones
- Critical zones (shoulders, elbows, hips, knees, seat) should have: - Outer shell (abrasion & tear resistance). - Potential additional reinforcement (leather panels, SuperFabric, or double layers). - Liner/mesh that glides against your skin, reducing burn and shear injury.
Seams and burst strength
- Seams are failure points. CE garment certification (EN 17092) tests seam burst strength. - Look for double or triple stitching in impact zones, with secure overlays. Minimal decorative stitching in slide zones is better.
Fit and “slide behavior”
- Gear that’s too loose can twist in a crash, causing armor to move off impact points and seams to take odd loads. - Properly fitted gear should stay anchored when you simulate a slide: kneel, rotate, crouch, mimic being dragged. If armor migrates off the joints easily, fit is wrong.
Thermal and friction burns
- In a slide, heat buildup between fabric and skin can cause severe burns even without full asphalt penetration. - A smooth, non-snagging inner liner that decouples the shell from your skin is critical. Bare skin against denim or non-technical fabric is a losing game at highway speeds.
Action step: Evaluate your gear using the EN 17092 performance classes (A, AA, AAA when available). Then look beyond the letter and inspect shell material, reinforcement zones, and seam quality.
Technical Point 3: Helmet Performance Is More Than Price and Brand
The best helmet isn’t the most expensive; it’s the one that handles your use case, your head shape, and real-world crash dynamics.
Key performance dimensions to understand:
Standards and what they really test
- DOT (FMVSS 218): US mandatory baseline. - ECE 22.05 / 22.06: European standards with broader impact and rotational testing in newer 22.06. - Snell: often more demanding in certain high-energy impacts but historically more focused on track-style hits. - SHARP (UK): independent rating that shows impact performance at multiple points. - Look for helmets meeting multiple standards; it usually implies broader development and testing emphasis.
Rotational impact mitigation
- Head injuries are often rotational, not just linear—your brain shears inside the skull. - Systems like MIPS, slip liners, or engineered shell/liner combos aim to reduce rotational acceleration. - The science is still evolving, but if you ride aggressively, off-road, or in traffic-dense environments, rotational mitigation is worth prioritizing.
Shell construction and weight balance
- Materials: polycarbonate, fiberglass composite, carbon fiber, and blends. - A lighter helmet reduces neck fatigue and can help you maintain better control late into a long ride, especially under braking or over rough pavement. - But weight distribution matters as much as raw grams. A slightly heavier but well-balanced helmet can feel less fatiguing than a light but top-heavy one.
Ventilation vs noise vs stability
- Touring at 80 mph: you want a shell that cuts buffeting and wind lift, even if it’s a bit noisier. - Urban speeds: airflow and field of view may be higher priorities. - Helmet shape must match your bike setup: a track-oriented race lid may be optimized for tucked riding and can feel wrong in upright ADV use.
Optics & visual performance
- Distortion-free visors reduce eye strain and maintain precise depth perception in corners. - Pinlock-ready or integrated anti-fog systems are non-negotiable if you ride in the wet or cold. Fogged vision is a performance and safety failure, not just an annoyance.
Action step: Stop thinking “premium = safe enough.” Match helmet:
- To your riding posture (naked vs sport vs ADV vs touring),
- To your speed regime,
- To helmet testing data (e.g., SHARP ratings where available),
- And to your head shape (try long oval vs intermediate oval fits; pressure points are unacceptable).
Technical Point 4: Glove Engineering—Where Control Meets Protection
Gloves are your primary interface with your throttle and front brake. They must be surgical in feel and brutal in protection.
Critical technical features that matter:
Palm construction and slide behavior
- Palms take enormous abuse in real crashes—instinct is to put your hands out. - Layers to look for: - Base leather or high-quality synthetic for abrasion. - External palm sliders (often TPU or similar plastic) that help your hand slide rather than catch and twist. - Palm sliders are not just a race gimmick; they’re joint-savers.
Knuckle and scaphoid protection
- Hard knuckle protection is standard, but check that: - The shell is well anchored and doesn’t move off the knuckles when you clench your fist. - There is foam under the hard part to manage impact, not just hard plastic to bone. - Scaphoid and wrist: reinforced zones or sliders on the heel of the palm and outside of the wrist are critical for high-side and low-side incidents.
Finger articulation and pre-curve
- Gloves should be pre-curved to match riding posture, reducing fatigue on long rides. - Excess material at finger tips kills precision feel on the lever. This is not just comfort—it affects your ability to finely modulate braking.
Closure and retention
- A glove that comes off in a crash is a catastrophic failure. - You want: - Wrist closure (tight over the joint). - Gauntlet closure (for aggressive or highway riding). - Short cuff gloves without strong retention are compromises; if you ride at highway speed or push hard, they shouldn’t be your default.
Rain and thermal management
- Waterproof, insulated gloves usually trade some feel for protection from the elements. - If you ride serious rain or cold, pair heated grips or handlebar muffs with a thinner waterproof glove instead of going super-thick and losing control sensitivity.
Action step: Put your bike on a stand or sit static. With gloves on, simulate heavy braking over and over. If you can’t feel the friction point of your lever and modulate with precision, you need a different glove for performance riding.
Technical Point 5: Integrating Electronics and Visibility Without Adding Chaos
Modern riding isn’t analog-only. Electronics—comms, cameras, lights—are now part of the real kit. The question is: are they integrated or just bolted on?
Building a technical visibility and electronics system:
High-intensity, non-gimmick visibility
- Retroreflective materials: properly placed, they light you up like a beacon under car headlights without needing power. Good zones: - Upper back/shoulders - Helmet rear and sides - Outer calf/ankle - Active lighting: auxiliary brake lights at helmet or backpack level can dramatically increase detection distance in traffic.
Helmet comms without compromising safety
- Use mounts designed for your helmet’s shell shape. Avoid drilling or modifying the shell. - Internal speaker and mic placement should not create hot spots or pressure on your temples and jaw over long rides. - Route wires so they cannot snag on a visor mechanism or shell lip.
Battery and cable management
- If you run heated gear, cameras, or GPS, treat cables like you would brake lines: - Clear movement arcs - No sharp pinch points - No loops that can hook on levers, mirrors, or controls - For battery packs in jackets or tail bags, secure them so they won’t become projectiles or impact points in a crash.
Rain resilience and fail modes
- Assume you will ride into a storm with everything powered on. Waterproofing or at least splash protection for: - Comms unit - Helmet camera - Phone mount and charging lead - Know your fail mode: if your phone or GPS dies mid-ride, do you still have route and fuel strategy? Minimal analog backup is part of “gear” thinking.
Cognitive load and distraction
- A technically perfect electronics setup that drowns you in music, calls, and beeps is a riding performance failure. - Configure: - Minimalist audio profiles (nav priority over music, call blocking during aggressive riding or trackdays). - Single-tap, gross-motor controls that you can operate with gloves and without looking.
Action step: Do a full “dry run” in your garage, fully geared, with every electronic device powered on. Move through your entire riding range of motion. Anything that snags, presses, blinds, or distracts gets re-routed, removed, or replaced.
Conclusion
A Moto Ready kit is not defined by price tags or how aggressive it looks on Instagram. It’s defined by how well each component performs under stress: sliding, impacting, sweating, freezing, braking hard, and threading chaos in traffic.
Your gear is your second chassis. It shapes your ability to feel the bike, withstand mistakes, and stay sharp when the ride gets demanding. Treat every piece—helmet, jacket, pants, gloves, boots, electronics—as part of a unified system tuned to your riding envelope, not a random mix of “good reviews.”
Audit what you own. Upgrade the weak links. And from now on, buy like a test rider, not a tourist: materials, standards, fit, and function first. The bike is only half the platform. You are the other half, and your gear is the interface.
Sources
- [NHTSA – Motorcycle Helmet Use and Effectiveness](https://www.nhtsa.gov/motorcycle-safety/choose-right-motorcycle-helmet) – U.S. government guidance on helmet standards, fit, and effectiveness in real-world crashes.
- [Snell Memorial Foundation – Helmet Standards and Testing](https://smf.org/standards) – Technical details on helmet impact testing protocols and performance criteria.
- [European Commission – Protective Equipment for Motorcyclists](https://road-safety.transport.ec.europa.eu/staying-safe/strategic-actions/protective-equipment-motorcyclists_en) – Overview of certified protective gear standards (including EN ratings) and their role in injury reduction.
- [SHARP – Safety Helmet Assessment and Rating Programme](https://sharp.dft.gov.uk) – Independent impact performance ratings for motorcycle helmets, including multi-point testing results.
- [Transport for NSW – Protective Clothing for Riders](https://roadsafety.transport.nsw.gov.au/stayingsafe/motorcyclists/protective-clothing-motorcycle-riders) – Evidence-based discussion of motorcycle clothing abrasion resistance, armor, and design considerations.
Key Takeaway
The most important thing to remember from this article is that this information can change how you think about Gear & Equipment.


