Corner speed isn’t magic—it’s math, grip, and timing. The riders who look “smooth” through a bend aren’t just naturally talented; they’re managing load, tire shape, and chassis geometry with millimeter precision, mostly through how they use the brakes and throttle.
This isn’t a basic “slow in, fast out” primer. This is about using real, technical inputs to make your bike carve cleaner lines, load the tires more intelligently, and stay stable when the road or your pace escalates.
1. Understanding Load Transfer: The Physics Under Your Hands
Every time you touch the brakes or the throttle, you are moving load between contact patches. That weight transfer is your primary tool for grip and stability, not your enemy.
Under braking, inertia shifts mass forward: the fork compresses, rake steepens, trail shortens, and the front tire’s contact patch grows slightly as it flattens under load. Grip increases at the front—but margin decreases if you add lean too aggressively, because that same limited friction circle now has to handle both deceleration and cornering force.
On throttle, load shifts rearward: the shock squats, rake relaxes, trail increases, and the rear tire’s contact patch gets more vertical load. That’s why drive grip is best when you roll on the gas progressively, not abruptly. A harsh roll-on spikes torque at the rear faster than weight can transfer, causing spin or instability.
Think of your bike as a dynamic system, not a static object. You’re not just “slowing down” or “accelerating”—you’re deciding where grip will be available and how the chassis will be oriented as it enters and exits the corner.
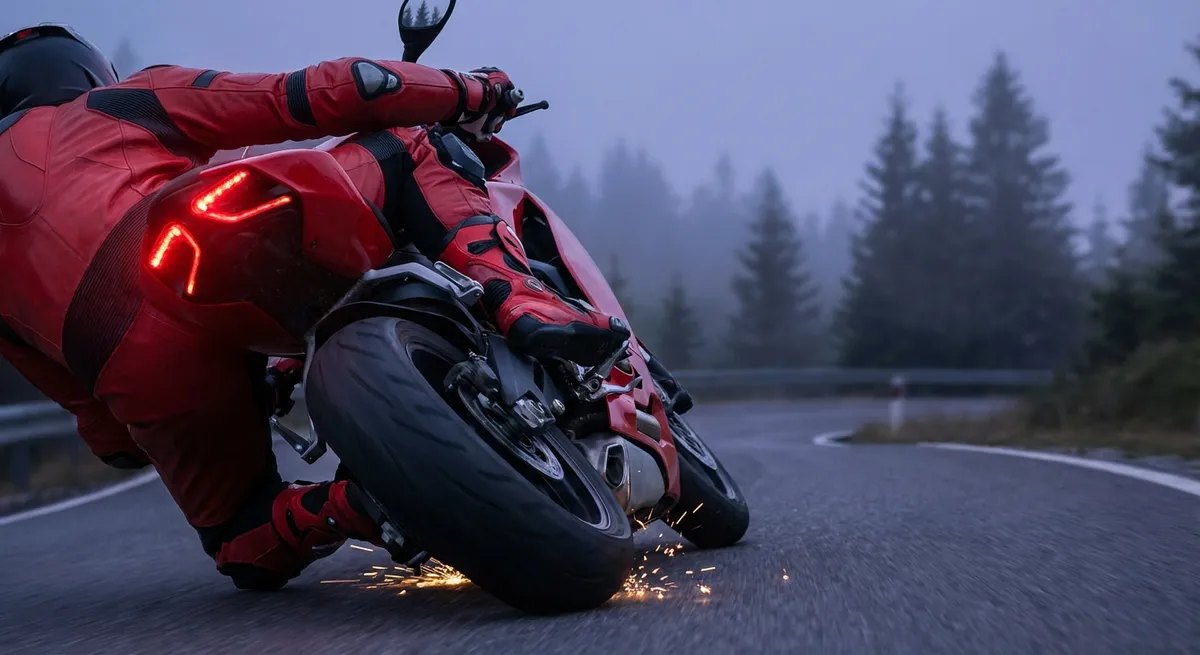
2. Trail Braking as a Chassis Tool, Not a Hero Move
Trail braking is often misunderstood as an aggressive, race-only technique; in reality, when done correctly, it’s simply controlled, tapering brake pressure past turn-in to stabilize the front end and fine-tune your line.
When you hold some front brake beyond initial turn-in, you intentionally keep load on the front contact patch, keeping the fork slightly compressed. That tightens steering geometry and gives you sharper turn-in response and more feedback from the front tire. The key is decreasing pressure as lean angle increases—front brake and lean are inversely proportional.
Technically, good trail braking looks like this:
- Strong, progressive initial brake application in a straight line
- Smooth, linear reduction of pressure as you approach turn-in
- Continued, tapering pressure into the first third (or so) of the corner
- Release timed so that the bike is at or near steady-state lean when you’re off the brake and ready to transition to maintenance throttle
Done correctly, this gives you options. Need to tighten the line mid-corner? Slightly delay your brake release next time so the front stays loaded longer. Need more stability or don’t trust grip? Release the brake a bit earlier and carry a more neutral chassis. You’re not just “braking late”—you’re shaping the corner.
3. Throttle Timing: The Moment Between Stability and Slide
The most underestimated skill in real-world riding isn’t how hard you brake—it’s when and how you introduce throttle after that.
The ideal transition from braking to throttle isn’t an on/off switch. It’s a pivot point where deceleration shifts to very light, stabilizing drive. The moment you completely release the brake, you don’t want the bike “coasting” with no load; a neutral throttle gives the suspension a target to work around, keeping the chassis settled.
Technically, aim for:
- Brake → lighter brake → zero brake → immediate light throttle
- Think in terms of 1–3% throttle initially—just enough to stop deceleration, not enough to cause real acceleration
- Then roll progressively as you approach the exit, matching lean reduction with torque increase
From a tire perspective, this is about managing the friction circle. At maximum lean, almost all grip is lateral (cornering), so longitudinal demand (accel) must be minimal. As you pick the bike up, lean decreases, freeing grip for acceleration. That’s your green light to feed in more throttle. If your roll-on is linked to handlebar angle (less lean = more gas), you’re using the tire the way it was engineered to be used.
4. Line Choice as a Grip Multiplier, Not Just a Path
Lines aren’t just “outside–inside–outside.” They’re load management strategies. A sophisticated line is chosen to:
- Minimize abrupt lean changes
- Maximize time upright on the brakes and on the throttle
- Smooth out radius transitions so the tire works in a predictable, linear way
On the street, a technically sound line prioritizes vision and margin, but the physics is the same. A later, slightly deeper entry that allows you to turn once, cleanly, with a single committed lean angle is almost always better for stability than a shallow, early turn-in that forces mid-corner corrections.
From a chassis perspective, mid-corner line “fixes” often mean sudden changes in steering input at high lean angles, which spike lateral load and unsettle the bike. If your line forces you to steer twice, your initial approach is wrong. Instead, design your line so that:
- You finish most of your deceleration with the bike nearly straight
- You initiate one smooth steering input to your target lean
- You can roll on throttle as soon as you’re off the brake, even if only lightly
Watch experienced riders: the bike describes clean arcs, not jagged shapes. That cleanliness isn’t style; it’s optimized load distribution across the tire over time.
5. Reading Feedback: Turning Sensations into Data
All of this only works if you can feel what the bike and tires are telling you and convert that sensation into actionable input changes.
Front tire feedback:
- A “vague” or “floating” front often means insufficient load (too early brake release, or too fast entry for the load you’re carrying)
- A chattering or pushing front at lean can mean too much combined demand (brake + lean) or an overly aggressive line that tightens mid-corner
- A solid, “keyed-in” front with gentle micro-movements is ideal: you feel surface texture but not panic-level chatter
- Soft, controlled squirm on exit is normal and often indicates you’re using available grip well
- Sudden step-outs or sharp slides suggest either abrupt throttle or poor timing with lean reduction
- A “dead” or wooden-feeling rear might mean you’re not loading it adequately on exit—consider a slightly later, more decisive roll-on as you pick the bike up
- Excessive dive on entry can reduce usable stroke mid-corner; you may need smoother, earlier braking rather than simply “less braking”
- A pogoing or wallowy feel mid-corner often points to mismatched speed, line, and suspension setup—sometimes the fix is rider input, not clickers
Rear tire feedback:
Suspension feedback:
Treat every run through a corner as data collection. Change one variable at a time—brake release timing, throttle initiation point, or line shape—and feel how the bike responds. Over time, those sensations stop being noise and become a language you can read at speed.
Conclusion
Fast, safe, confident cornering isn’t about bravery; it’s about precision. When you understand how load transfer, trail braking, throttle timing, and line choice interact, you stop “surviving” bends and start engineering them.
Riding becomes less about reacting and more about executing a repeatable process:
- Load the front intelligently
- Shape your corner with the brake
- Stabilize with early, gentle throttle
- Design lines that make the tire’s job easy
- Listen to feedback and iterate
That’s how you turn chaos into control, and speed into something you can actually trust.
Sources
- [Motorcycle Safety Foundation – Advanced Riding Tips](https://www.msf-usa.org/downloads/Street_Motorcycling_Booklet_2018.pdf) - MSF’s official booklet with fundamental techniques on braking, cornering, and lane positioning
- [MotoGP University: Braking and Corner Entry](https://www.motogp.com/en/news/2020/05/14/motogp-university-braking/159949) - Technical breakdown from MotoGP on modern braking and trail braking dynamics
- [Kawasaki Technical – Motorcycle Chassis Basics](https://www.kawasaki-cp.khi.co.jp/tech/chassis/index_e.html) - Explains rake, trail, weight transfer, and how chassis geometry affects handling
- [Dunlop Motorcycle Tires – The Science of Traction](https://www.dunlopmotorcycletires.com/about/technology/) - Tire manufacturer’s perspective on grip, contact patch behavior, and load
- [Iowa DOT Motorcycle Operator Manual](https://iowadot.gov/mvd/driverslicense/motorcycle/mc-manual.pdf) - Government-issued manual covering safe braking, cornering, and lane strategies for real-world roads
Key Takeaway
The most important thing to remember from this article is that this information can change how you think about Riding Tips.


