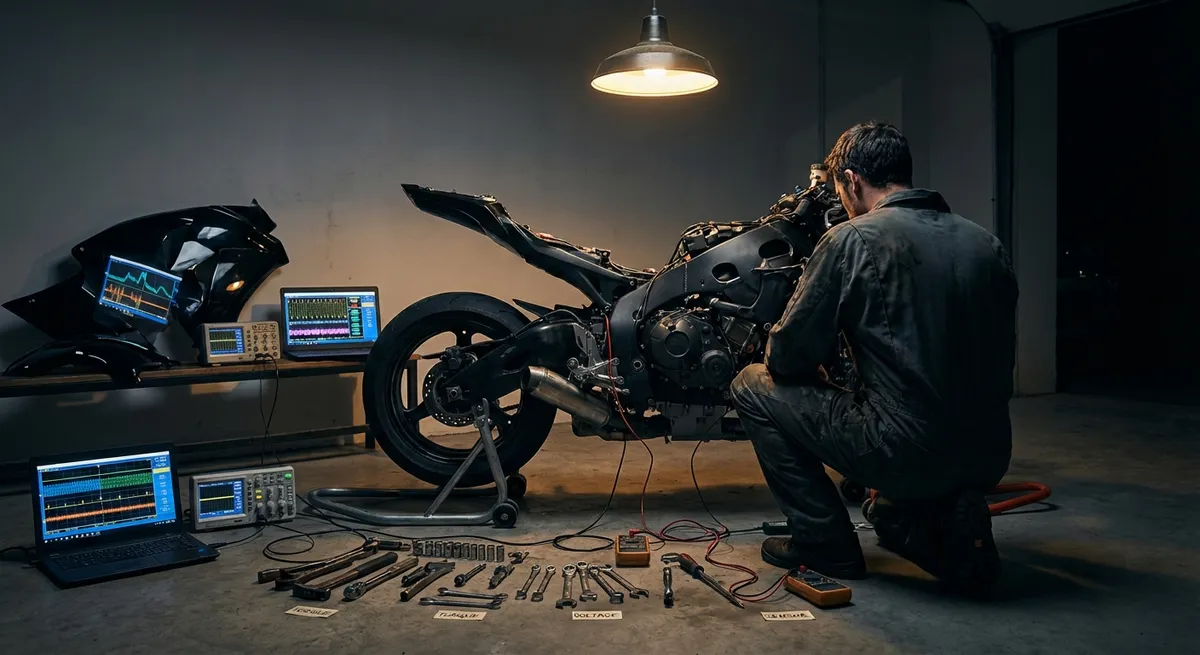
Maintenance isn’t a chore; it’s how you engineer the version of your bike you actually want to ride. Every inspection, torque check, and fluid change is a feedback loop between you, the machine, and the road. Treat your motorcycle like a rolling test rig, and suddenly “maintenance” stops being about avoiding breakdowns and starts being about extracting repeatable performance.
This is maintenance as a system, not a calendar reminder: observe, measure, adjust, validate, and feed those results back into how you ride and how you wrench.
1. Torque Discipline: Fasteners as a Structural System
Every bolt on your bike is a spring, not a plug. When you torque a fastener, you’re stretching it just enough that it clamps components together with predictable force. That clamping load is what keeps your rotor aligned, your triple clamp rigid, and your rearsets from walking loose mid-corner.
Use this mindset when you maintain:
- Think in assemblies, not bolts. Front end, rear suspension linkage, bar/controls, engine mounts, subframe—treat each as a structural system with critical torque paths. When you disturb one part, retorque the whole path.
- Use the right torque pattern. For brake discs, cylinder heads, and triple clamps, follow crisscross or sequence patterns from the service manual. You’re not just tightening; you’re controlling distortion in the component.
- Account for friction. Dry threads vs lightly oiled vs threadlocker can shift actual clamping force by 20–40% at the same torque. Only use lubrication or threadlocker where the manual specifies, and don’t mix products.
- Track “fastener drift.” Each time you retorque a critical bolt (caliper bolts, axle pinch bolts, bar clamps), note how far it had moved. If an axle pinch bolt consistently turns ¼ turn before hitting spec, something is shifting—fork alignment, spacer wear, or insufficient cleaning.
- Use torque as a diagnostic tool. If a fastener repeatedly loosens, it’s not a “Loctite problem.” It’s often vibration resonance, misalignment, or a component under flex. Find the cause before you “fix” it with more glue.
Torque isn’t about obeying a number. It’s how you enforce geometry, rigidity, and predictability in how your motorcycle handles.
2. Chain & Sprockets: Building a Stable Driveline, Not Just “Lubing the Chain”
Your chain isn’t just a wear item; it’s a torsional spring in your driveline. A poorly maintained chain changes effective gearing, introduces snatch in throttle response, and can even move your rear wheel in the swingarm under load.
Maintain your chain like it’s part of your suspension:
- Set slack for the whole range of motion. The chain is tightest when the countershaft, swingarm pivot, and rear axle are in a straight line. If you can, compress the rear suspension (ratchet strap or partner) to this point once, and confirm you still have a bit of slack. Then you know your “on-stand” slack spec is actually safe at full compression.
- Check alignment, not just marks. Swingarm alignment marks are often approximate. Use a chain alignment tool, a straight edge along the rear sprocket, or measure from swingarm pivot to axle on both sides. Misalignment chews sprockets and induces weird handling.
- Use wear patterns as feedback. Hooked teeth on the drive side of the rear sprocket suggest aggressive acceleration and late replacement. Shiny side plates and stiff links indicate inadequate cleaning, not just low lubrication.
- Lube for environment, not habit. Wet wax-based lubes for wet climates/commuter use, light oils for dry performance use where frequent reapplication is acceptable. Over-lubing collects grit and becomes a grinding paste.
- Measure stretch by pitch, not “feel.” Count a set number of links (e.g., 20), measure center-to-center, and compare to spec. When total elongation hits the manufacturer’s limit (often around 1–2%), the chain is done—even if it “looks fine.”
A well-maintained chain and sprocket set makes throttle input feel like a direct command, not a suggestion that travels through slack and slop before anything happens.
3. Brake Feel as a Measurable Output, Not a Mystery
Most riders describe brakes in vague terms: “spongy,” “firm,” “grabby.” Turn those impressions into a controlled experiment, and your brake maintenance goes from reactive to surgical.
Think of your brake system as a pressure translator:
- Pad compound vs temperature window. OEM pads are often designed for low dust, low noise, and wide temperature range. If you ride aggressively or do track days, you may be running at the edge of the compound’s ideal friction window, which shows as fade after several hard stops. Consider a higher-friction pad with published μ (coefficient of friction) curves that match your use.
- Use lever travel as a diagnostic metric. Mark your lever (or master cylinder housing) with tiny reference lines. After a proper bleed and pad bed-in, note “normal” lever travel under a firm stop. Over weeks, if travel increases without obvious fluid loss, suspect micro-bubbles, line expansion, or pad knock-back from rotor runout.
- Measure rotor runout and thickness. Use a dial indicator and micrometer, especially if you feel pulsing. Even slight runout can push pads back, lengthening lever travel every rotation. Check against service limits in the manual.
- Flush fluid by boiling point, not just calendar. Track or mountain riders should monitor brake fluid dry/wet boiling points and change before fluid degrades toward its wet boiling point. Hygroscopic absorption lowers boiling point and increases compressibility.
- Bed-in as a controlled process. Heat-cycle new pads and rotors with a series of progressively harder stops to evenly transfer pad material. This creates a uniform friction layer that stabilizes feel and minimizes judder.
Brakes are your primary data link between brain and asphalt under deceleration. Maintaining them with measured, repeatable steps gives you consistent bite, linear feel, and trust at the lever.
4. Suspension Health: Reading the Chassis Through Your Maintenance
Suspension maintenance isn’t just seals and oil changes; it’s about keeping your geometry and damping characteristics consistent over time. As fork oil shears, bushings wear, and linkages dry, your bike silently rewrites its own handling script.
Anchor your suspension maintenance to performance, not mileage alone:
- Inspect seals and stanchions as a system. A leaking fork seal is rarely “just a seal.” Microscopic pitting, bugs dried to the chrome, or slight tube bending can tear new seals quickly. Always clean and inspect the slider surface and check for straightness if leaks recur.
- Monitor static and rider sag regularly. Even with no clicker changes, springs can fatigue over long service lives. If your sag numbers creep without adjusting preload, your spring rate is changing. That’s a trigger for replacement, not “just more preload.”
- Service intervals by usage intensity. Track and aggressive canyon riders shear fork oil far faster than touring riders. Viscosity breakdown changes damping behavior, effectively softening your fork and shock over time. If your baseline settings start feeling vague or bouncy, don’t just twist clickers—consider fluid and internal wear.
- Grease suspension linkages like they’re steering. Dry bearings in the shock linkage or swingarm don’t always squeak first; they bind, changing how the rear compresses and rebounds. This shows up as unpredictable grip loss and harshness more than obvious noise.
- Record clicker settings after service. Post-service, log compression, rebound, preload, and sag. As you ride, adjust and annotate. If you find a setup that transforms stability or grip, those numbers are part of your maintenance “golden config,” not just “a feel.”
Healthy suspension makes your bike obedient under load—corner entry, mid-corner bumps, and hard drive out. Maintenance is how you keep that obedience from drifting season to season.
5. Electrical & Charging: Treating Voltage Like a Vital Sign
Modern motorcycles are rolling networks: sensors, ECUs, ABS modules, ride-by-wire, quickshifters, TFTs. All of it is riding on the backbone of a charging system that many riders ignore until a no-start or random dash light appears.
Treat your electrics like a monitored subsystem:
- Baseline your battery. With a multimeter:
- Engine off, fully charged: ~12.6–12.8 V (lead-acid), ~13.0+ V (lithium, depending on chemistry).
- Idle: typically 13.2–14.5 V.
- 3–5k rpm: stable near spec (often 14.0–14.6 V).
- Check voltage under load. Turn on high beam, brake light, and accessories, then check voltage at idle and 3–5k rpm. A system that only “just” keeps up at rpm may fail in cold weather or with more accessories.
- Inspect grounds as critical components. Many intermittent issues trace back to corroded or loose ground points. Pull, clean with a wire brush or Scotch-Brite, apply dielectric grease where appropriate, and retighten. Do this especially on main frame and engine ground straps.
- Visually map your harness stress points. Look for tight bends near the steering head, under the seat latch, or where the harness passes subframes. Zip ties that are too tight can cut into insulation, leading to intermittent faults that mimic sensor or ECU failures.
- Log electrical changes like software revisions. Add heated grips, auxiliary lights, or a GPS? Note current draw and where you tapped power. Use fused distribution blocks instead of piggybacking on random OEM circuits. When issues crop up, your log tells you what changed and where to probe first.
Record these numbers when things are healthy. Deviations later become clues.
Voltage and connectivity are as fundamental as oil pressure. When you treat the electrical system as a monitored, documented network, “mystery faults” become traceable events instead of superstitious gremlins.
Conclusion
Maintenance isn’t about “keeping the bike running.” It’s how you close the loop between mechanical design, riding style, and actual road performance. When you torque with intent, treat your chain as driveline engineering, tune brakes with measurable feedback, maintain suspension to preserve geometry, and monitor electrics like vital signs, your motorcycle stops being a slowly decaying object and becomes a continuously tuned instrument.
You’re not just preventing failure—you’re shaping how the machine thinks, reacts, and survives at speed. That’s the kind of maintenance that belongs on a test bench, not just in a garage.
Sources
- [Motorcycle Safety Foundation – Maintenance Tips](https://www.msf-usa.org/downloads/Maintenance_Tips.pdf) - Practical baseline guidance on critical motorcycle maintenance areas and inspection habits
- [U.S. National Highway Traffic Safety Administration (NHTSA) – Motorcycle Safety](https://www.nhtsa.gov/road-safety/motorcycles) - Data and recommendations on motorcycle safety, including the impact of mechanical condition
- [Brembo Technical Area – Brake System Insights](https://www.brembo.com/en/company/news/technical-insights) - Technical explanations of brake components, performance, and maintenance considerations
- [Park Tool – Chain Wear and Measurement Fundamentals](https://www.parktool.com/en-int/blog/repair-help/chain-wear-and-replacement) - In-depth explanation of chain stretch, measurement methods, and replacement criteria (bicycle-focused but mechanically applicable)
- [Yamaha Motors – Owner’s Manuals & Service Information](https://www.yamahamotorsports.com/motorsports/pages/owner-s-manuals) - Example of OEM service data, torque specs, and maintenance intervals for modern motorcycles
Key Takeaway
The most important thing to remember from this article is that this information can change how you think about Maintenance.


