Cornering is where street riding stops being transportation and becomes a craft. Where most people just “turn the bars and lean,” you can treat every corner like a solvable engineering problem: inputs, forces, timing, and margin. This isn’t about going faster for the sake of speed—it’s about carving lines with such precision that the bike feels wired into your nervous system and the road turns into a solvable equation.
This guide breaks down five deeply technical, rider-controlled variables that dramatically shape how your bike behaves in real-world corners. None of them require race track speeds. All of them require attention, discipline, and a willingness to ride with engineering-level intent.
1. Entry Load Management: How You Arrive Dictates How You Corner
Most riders obsess over lean angle and “mid-corner bravery.” The real game is won 50–100 meters before the turn-in point, where you decide how the suspension, tires, and geometry will be loaded at corner entry.
When you brake, weight transfers forward, compressing the fork, steepening rake and reducing trail. This quickens steering but also reduces stability. Roll off abruptly without braking, and you still transfer weight forward, but in a less controlled way. Roll in gently on the throttle and you start to move load rearward, unloading the front slightly and stabilizing the bike.
An engineered entry sequence might look like this:
- Initial setup brake: Firm, progressive brake to bring speed down and compress the fork in a controlled way. You’re intentionally steepening geometry for precise, quick turn-in.
- Micro-release before turn-in: Ease off the brake slightly before you initiate the lean. This lets the fork extend just enough to restore a usable amount of trail for stability at the actual lean angle.
- Neutral hands, deliberate lean: Initiate the turn mostly with body and lower-body pressure, not with a sudden bar shove. The fork is now in a predictable part of its travel—not fully topped out, not fully packed.
- Early, minimal throttle pickup: Once lean is established and the bike is pointed toward your chosen line, feed in just enough throttle to stabilize the suspension. You’re not “accelerating”; you’re managing load.
The entry goal isn’t “slow enough to make it” but “load state you can predict.” That means:
- Fork in mid-stroke, not bottomed or topped
- Front tire loaded enough for feel, not overloaded into vague understeer
- Rear slightly lighter but not fully unloaded or chattering
You’re not braking to lose speed; you’re braking to choose geometry.
2. Throttle as a Suspension Tool, Not an On/Off Speed Switch
On corner exit, a lot of riders think: “Now I accelerate.” That mindset makes you late, abrupt, and unpredictable. Instead, treat the throttle like a primary suspension control that also happens to change speed.
When you add throttle, you’re doing three things:
- Transferring load rearward
- Extending the fork slightly
- Increasing rear tire slip ratio (the difference between wheel speed and ground speed)
The sweet spot is gentle, continuous throttle application from just after turn-in to the exit, matching engine torque to the increasing available traction as the bike stands up.
Technically, you’re aiming to:
- Keep the front tire lightly but consistently loaded for steering feel
- Avoid abrupt rear squat that changes your steering geometry mid-corner
- Maintain a stable slip ratio at the rear tire—tiny, controlled micro-slip that gives grip, not a slide that scares you upright
Practically, you can train this by:
- Picking a constant-radius corner you know well
- Entering at a conservative speed
- Focusing on one continuous throttle roll from apex to exit, no corrections, no chops
- Reviewing: If you had to chop or adjust more than once, your entry speed or apex choice was wrong
Think of throttle not as “more/less speed” but as “more/less pitch and weight transfer.” Speed is just the side effect.
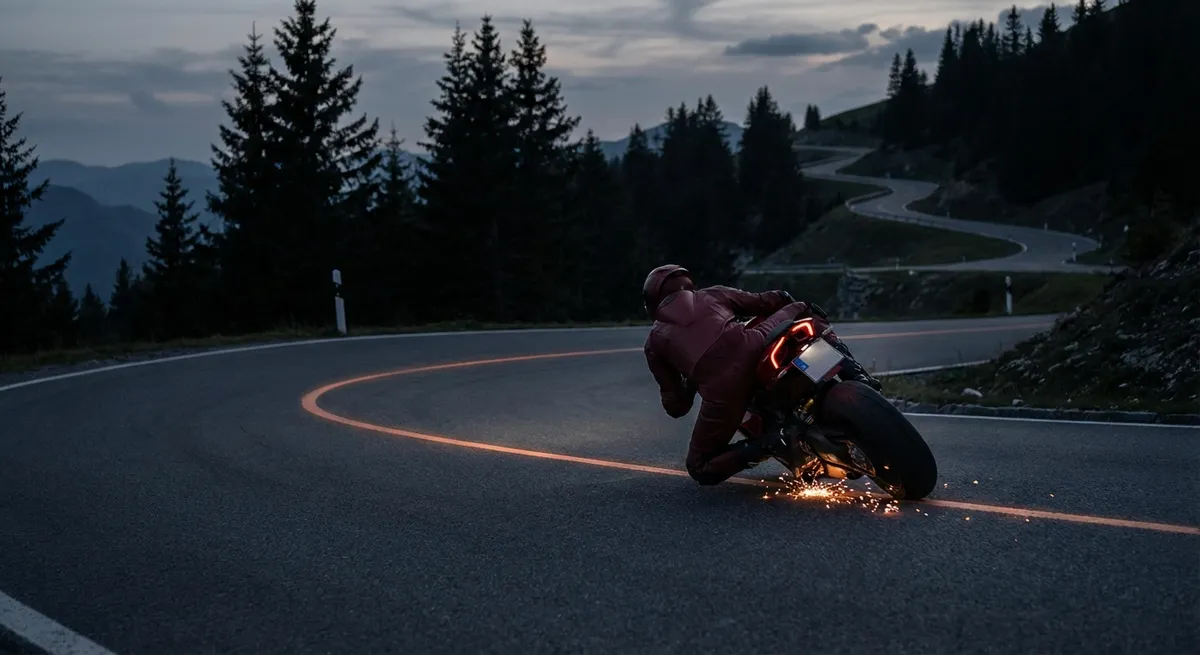
3. Micro-Positioning Your Body for Tire Load and Chassis Freedom
Hanging off isn’t about looking like a racer; it’s about giving the chassis a more favorable set of forces to work with. You’re trying to reduce the lean angle needed for a given corner speed and allow the suspension to operate in its best range.
From a technical standpoint, body position influences:
- Effective combined center of mass (you + bike)
- Required lean angle for a given lateral acceleration
- How freely the bike can roll underneath you
For street riding, you don’t need full race body position, but you absolutely benefit from deliberate, repeatable micro-positioning:
- Pre-position before turn-in: Move your hips and upper body toward the inside while you’re still upright or only slightly leaned—not once you’re already leaned over.
- Inside hip off, not both cheeks: Slide your inside hip toward the tank’s inner edge; keep your outside leg locked on the tank for stability and feedback.
- Upper body toward the mirror: Aim your sternum toward the inside mirror or inside clip-on, keeping your spine long, not hunched.
- Relaxed inside arm, anchored outside arm: Let the bike lean underneath a stable torso rather than you yanking the bars into lean.
The engineering payoff:
- For the same speed, you run slightly less lean angle, which increases tire contact patch and margin
- The suspension stays closer to mid-stroke, where damping works best
- The bike feels “free to move,” giving earlier and clearer feedback when you’re approaching traction limits
You’re shaping the combined system (you + bike), not just “leaning more.”
4. Line Strategy: Vision, Vanishing Points, and Dynamic Apexing
Most riders think of “the line” as a single path; skilled riders think in families of lines that flex with traffic, surface, and visibility. The tool that unlocks this adaptability is a technically trained vision strategy, not just “look where you want to go.”
The key concept is the vanishing point—the furthest point along your lane where the road edges appear to converge. Its behavior tells you how tight the corner is getting:
- If the vanishing point moves toward you quickly, the corner is tightening; you need to delay your apex and scrub more speed.
- If it moves away from you, the corner is opening, and you can begin to accelerate and stand the bike up.
Combine that with dynamic apexing:
- Early apex: You hit the inside too soon, forcing increased lean or mid-corner corrections when the radius tightens or you meet an oncoming vehicle.
- Late apex: You stay wider, longer, enter the corner with more of the lane visible, and arc in later, which gives you better sight lines and stronger exit control.
A technical approach to line choice on the street:
- Default to a delayed, safety-biased apex that maximizes sight distance and space from oncoming traffic.
- Keep a small safety margin from the road edge to account for gravel, tar snakes, or drainage irregularities.
- Constantly update your line based on how the vanishing point moves, not how confident you feel.
Your goal is not “ideal geometric line” but maximum information line—the path that gives you the best data, the most time to react, and the cleanest load changes.
5. Grip Interpretation: Reading Asphalt Like a Mechanical Engineer
Traction isn’t a binary “grip/no grip” condition. It’s a continuously changing envelope that your tires are sampling in real time. The more you can read the surface like an engineer, the more you can ride at a confident pace without gambling.
Start with visible surface cues:
- Texture: Coarse aggregate (visible stone) generally offers stronger mechanical keying than smooth, polished asphalt.
- Color: Dark, “oily-looking” patches often indicate polished or contaminated areas; lighter patches can be newer, rougher asphalt or resurfaced sections with better grip.
- Tar snakes and paint: Thermoplastic road markings and sealing strips usually offer reduced friction, especially when wet or hot.
- Shadows and water: Shaded areas stay cooler and wetter longer; mixed-surface temperatures can mean wildly different grip levels in the same corner.
Then link those visuals to feedback channels:
- Front tire feel through the bars: Slight lightening, micro-wiggles, or a vague, “greasy” sensation often precedes an actual loss of grip.
- Rear tire through the seat and pegs: Early, controllable micro-slips feel like a very subtle lateral smear—not a sudden step-out.
- Suspension movement: Over-damped suspension can glide over grip changes and hide them from you; under-damped setups can exaggerate them.
A technical rider doesn’t just react to a slide. They:
- Visually anticipate low-grip segments and adjust entry speed and lean angle to keep demands within the tire’s comfort zone.
- Use smoother transitions of throttle and brake when crossing paint, tar, or surface changes.
- Accept that in compromised conditions, the primary performance metric is margin, not speed.
Trail braking, body position, and throttle control all plug into this: your technique exists to keep the bike operating inside that shifting traction envelope, never hammering its edges.
Conclusion
Cornering mastery isn’t magic, and it isn’t bravado. It’s an accumulation of deliberate, technical choices: how you load the chassis on entry, how you use the throttle as a suspension control, how you position your body to reduce required lean, how you choose lines based on information instead of instinct, and how you interpret grip like a mechanical system, not a mystery.
Ride with that mindset and every corner becomes a test stand. Every ride is data. The payoff isn’t just pace—it’s a level of control where your bike stops feeling like a machine you operate and starts feeling like a dynamic system you’re co-engineering in real time.
Sources
- [Motorcycle Safety Foundation – Cornering Tips](https://www.msf-usa.org/downloads/Street_Motorcycling_Tips.pdf) - Practical cornering and control fundamentals from a leading training organization
- [California Superbike School – The Throttle Control Rule](https://superbikeschool.com/blog/the-throttle-control-rule) - In-depth discussion of how continuous throttle application stabilizes the motorcycle
- [BMW Motorrad – Riding Dynamics and Cornering](https://www.bmw-motorrad.com/en/experience/stories/road/riding-tips-cornering.html) - Manufacturer-backed explanation of cornering behavior, body position, and safety margins
- [SAE International – Motorcycle Braking and Cornering Dynamics (Abstract)](https://www.sae.org/publications/technical-papers/content/2010-32-0036/) - Research-based insight into how braking and cornering forces affect motorcycle stability
- [Federal Highway Administration – Pavement Surface Characteristics](https://highways.dot.gov/safety/proven-safety-countermeasures/pavement-surface-characteristics) - Technical background on how pavement texture and conditions influence traction
Key Takeaway
The most important thing to remember from this article is that this information can change how you think about Riding Tips.


