Reliability isn’t just “it starts every time.” Real reliability is dynamic: the bike remains structurally tight, predictably responsive, and thermally stable when you’re asking everything from it—hard acceleration, repeated braking, and long, hot highway runs. This isn’t luck; it’s the result of disciplined, technical maintenance that respects how loads move through the chassis, suspension, brakes, and engine over time. If you want a motorcycle that feels newly precise even with real miles on it, you have to maintain it like a mechanical system, not a collection of parts.
This article dives into five technical maintenance points that dramatically affect how your bike behaves at speed and under load. None of them are glamorous—but together, they determine whether your machine feels vague and tired or sharp and confidence-inspiring.
1. Structural Integrity: Fasteners, Frames, and Functional Torque
Motorcycles are load paths in motion. Every bolt is a node where forces transfer—cornering loads into the frame, braking loads into the fork and triple clamps, drive loads into the swingarm and rear hub. When those fasteners lose proper clamp force, your bike doesn’t just “rattle,” it moves differently.
A maintenance plan that respects structural integrity isn’t about randomly tightening bolts; it’s about controlled torque and sequence. Frame, subframe, engine mounting, and suspension pivot bolts should be torqued to spec with a calibrated torque wrench, preferably in the order specified by your service manual. Over-torqueing can be as harmful as under-torqueing: stretch a bolt past its yield point and clamp force actually drops over time, causing micromovement and fretting between components.
Engine mount bolts are particularly critical. They don’t just “hold the engine in”—they define how the engine behaves as a stressed member and how vibrations propagate through the chassis. Loose mounts can change the flex behavior of the bike mid-corner, while unevenly tightened mounts can introduce strange vibes or steering feel.
Enthusiasts should build a “structural checklist” that’s revisited at least annually or after any hard impact (big pothole, track incident, or off-road drop). That list should minimally include: triple clamp pinch bolts, axle pinch bolts, engine mounts, subframe fasteners, handlebar clamps, rearset brackets, brake caliper mounts, rotor bolts, and swingarm pivot hardware. Clean threads, proper torque, and threadlocker where specified turn a gradually loosening bike back into a tightly resolved machine at speed.
2. Steering Precision: Head Bearings, Axle Alignment, and Front-End Geometry
If the front of your motorcycle feels vague, wanders in crosswinds, or develops a “nervous” headshake at speed, there’s usually a mechanical origin long before you blame aerodynamics or “that model just feels light up front.” Steering precision lives or dies in three places: head bearings, fork alignment, and wheel/axle alignment.
Head bearings aren’t just about the classic “notch at center” diagnosis. Too loose, and the bike will shimmy, feel delayed in its initial turn, and react unpredictably to small steering inputs at speed. Too tight, and the bike will resist small corrections and feel dead or “stuck” mid-corner. Correct preload is specific: just enough to remove play without causing drag. Tapered roller conversions are popular for durability, but they must be carefully torqued and rechecked after initial bedding-in, as they can settle and lose preload.
Fork alignment is often overlooked after tire changes or service. If the fork legs are slightly twisted relative to each other when the axle and pinch bolts are tightened, the fork bushings and seals operate under side load. That translates into stiction, inconsistent damping feel, and a front end that doesn’t respond smoothly to small bumps. The fix is procedural: install the wheel per the service manual, torque the axle, and then with one side’s pinch bolts loosened, compress the forks several times to self-align the legs before final tightening.
Finally, check that the front and rear wheels are correctly aligned mechanically, not just by trusting the swingarm marks. Misalignment can create subtle steering pull, weird turn-in differences between left and right corners, and rapid tire wear. Some riders use alignment tools or string methods to verify that both wheels track in the same plane. A properly aligned front end transforms feedback, especially at higher speeds where small geometric errors are magnified.
3. Thermal Stability: Cooling System Discipline for Real-World Loads
Thermal management is what separates a bike that runs “fine around town” from one that stays consistent on a hot, loaded highway or in heavy stop-and-go traffic. Modern engines are thermally dense; once the cooling system drifts out of spec, small issues snowball into heat soak, detonation risk, and accelerated oil breakdown.
Coolant type and mixture matter more than most owners treat them. Using an appropriate ethylene glycol–based or approved long-life coolant at the recommended concentration ensures predictable boiling points, corrosion protection, and water-pump seal compatibility. Plain water with a “track day additive” may work in a race environment with frequent flushes, but for a street machine enduring long service intervals and mixed conditions, you want the chemical protection of a correct coolant formula.
Radiator fins deserve careful, non-destructive cleaning. Bent fins reduce effective surface area, and packed bugs or dirt form an insulative blanket that pushes operating temperature upward under load. Use low-pressure water and a soft brush, and straighten badly deformed fins gently with a small tool if needed. Check that the radiator cap is the correct pressure rating and in good condition; a weak cap lowers the system’s boiling margin and can cause intermittent overflow that’s misdiagnosed as “just hot weather.”
Thermostat function and fan operation should be periodically verified. A stuck thermostat—either open or closed—can sabotage warm-up or overload the system once hot. Fans should activate consistently at the ECU’s set temperature; a dead fan or weak relay may only reveal itself in urban riding or high ambient heat. Periodic coolant flush intervals aren’t just about contamination; fresh coolant restores corrosion inhibitors and maintains pump efficiency. When the cooling system is right, engine behavior—idle quality, throttle response, and power delivery—remains stable even when the environment is trying to push it over the edge.
4. Brake System Consistency: Heat, Hydraulics, and Pad Interface
Brakes are a thermal and hydraulic system, not just “pads and discs.” Consistent, predictable braking at high speed or on long descents depends on the condition of the fluid, the state of the pad/rotor interface, and the mechanical integrity of the calipers and master cylinder.
Brake fluid is hygroscopic; it absorbs moisture over time, lowering its boiling point. Once fluid starts boiling during heavy braking, you get compressible vapor in the lines, which feels like sudden sponginess or a lever that comes closer to the bar. Riders who push hard in mountains or on track days should treat brake fluid as a consumable, not a lifetime fill—typically changing it annually, or more often under severe use. Using the manufacturer-recommended fluid (often DOT 4 for street bikes) ensures compatibility with seals and expected boiling-point performance.
Pad selection and bedding are critical. Performance-oriented pads require proper bedding-in to establish a uniform transfer layer on the rotor surface. If you skip this or mix pad types without resurfacing rotors, you can end up with uneven friction characteristics and vibration (often mistaken for “warped discs”). Rotors should be inspected for thickness, runout, and surface condition. Light glazing can often be corrected with appropriate scuffing before re-bedding pads; deep grooves or bluing indicate a deeper heat-management or pad-choice issue.
Calipers need mechanical stability: mounting bolts torqued to spec, slider pins (in floating calipers) clean and lightly lubricated with high-temp brake grease, and pistons free to move smoothly. Sticking pistons cause uneven pad wear and inconsistent pressure distribution across the pad face, which reduces ultimate braking performance and feel. At the master cylinder, a correctly adjusted lever with proper free play ensures that the compensating port is uncovered at rest, allowing thermal expansion of fluid without pre-loading the system.
A well-maintained brake system doesn’t just stop harder—it stops the same way every time. That consistency is what allows riders to brake late, trail brake with confidence, and manage emergency stops without surprises.
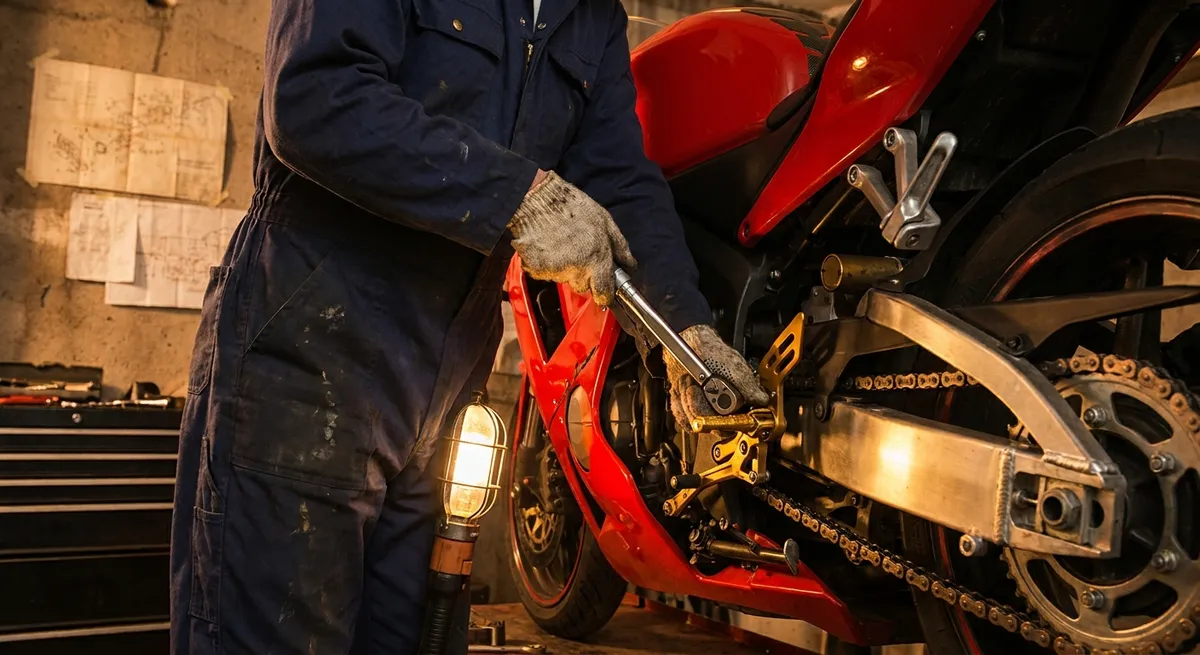
5. Drivetrain Smoothness: Sprocket Alignment, Chain Behavior, and Load Transfer
Power delivery is more than horsepower numbers; it’s how cleanly that force gets from crankshaft to rear tire under real loads. Drivetrain maintenance that focuses on geometry and alignment can turn a harsh, chattery bike into one that feels composed and mechanically refined when you roll on and off the throttle.
Correct sprocket condition and alignment are foundational. Worn teeth (hooked or thinned), cupped wear patterns, or misalignment between front and rear sprockets all introduce fluctuating chain tension and noise. That fluctuation shows up as surging during steady throttle, snatchy response when transitioning on/off throttle, and accelerated wear on the chain and output shaft spline. Replacing chain and sprockets as a set maintains proper engagement geometry and avoids “teaching” a new chain to run in a worn path.
Chain slack should be set based on swingarm geometry, not just whatever the sticker says without context. The critical moment is when the front sprocket, swingarm pivot, and rear axle are in line; that’s when the chain run is at its tightest for a given setting. Bikes with significantly modified ride heights or different shock lengths alter this relationship, so recommended slack may not be ideal anymore. If you frequently carry a passenger or luggage, verify slack in that loaded state, as the swingarm angle changes and can reduce effective slack.
Lubrication is more than just spraying random lube. O-ring and X-ring chains primarily need external lubrication for the roller-to-sprocket interface and to prevent corrosion; the internal pins are sealed. Over-lubing with a heavy adhesive spray can fling onto brake components and attract debris, turning into an abrasive paste. Under-lubing, especially in wet or dirty environments, increases friction and noise. A quality chain cleaner and a controlled application of an appropriate chain lube go a long way toward maintaining smooth, quiet power delivery.
Finally, check rear hub bearings and cush drive rubbers. Worn cush rubbers exaggerate driveline lash, making throttle transitions jerky and unsettling the chassis mid-corner. Replacing tired rubbers and verifying bearing health restores a clean, linear connection between your right hand and the rear tire, improving both comfort and traction feel.
Conclusion
A motorcycle that feels solid, predictable, and eager at speed isn’t just a product of its original engineering—it’s a reflection of the mechanical discipline you apply over its life. Structural torque integrity, precise steering components, disciplined thermal management, consistent braking hydraulics, and refined drivetrain geometry are the backbone of dynamic reliability. None of these tasks are exotic, but executed with care and technical understanding, they transform any bike from “it works” to “it feels engineered again.”
Treat your maintenance not as chores, but as an ongoing conversation with the machine about how it handles load, heat, and motion. Do that, and your motorcycle won’t just stay running—it will stay ready.
Sources
- [NHTSA Motorcycle Maintenance and Safety Tips](https://www.nhtsa.gov/road-safety/motorcycles) - U.S. government guidance on motorcycle safety and the importance of proper maintenance
- [Honda Powersports Owner’s Maintenance Information](https://powersports.honda.com/owner-resources) - Official service and maintenance recommendations from a major OEM, including torque, fluids, and inspection intervals
- [Yamaha Motors – Motorcycle Care and Maintenance](https://www.yamahamotorsports.com/motocare) - Manufacturer guidance on routine care, brake system service, and cooling system checks
- [University of Nebraska – Brake System Basics](https://transportation.unl.edu/brake-systems) - Educational overview of brake system behavior, heat, and hydraulic considerations
- [Kawasaki Service Information and Owner Support](https://www.kawasaki.com/en-us/owner-center/owner-support) - OEM technical references and maintenance schedules relevant to modern motorcycles
Key Takeaway
The most important thing to remember from this article is that this information can change how you think about Maintenance.


