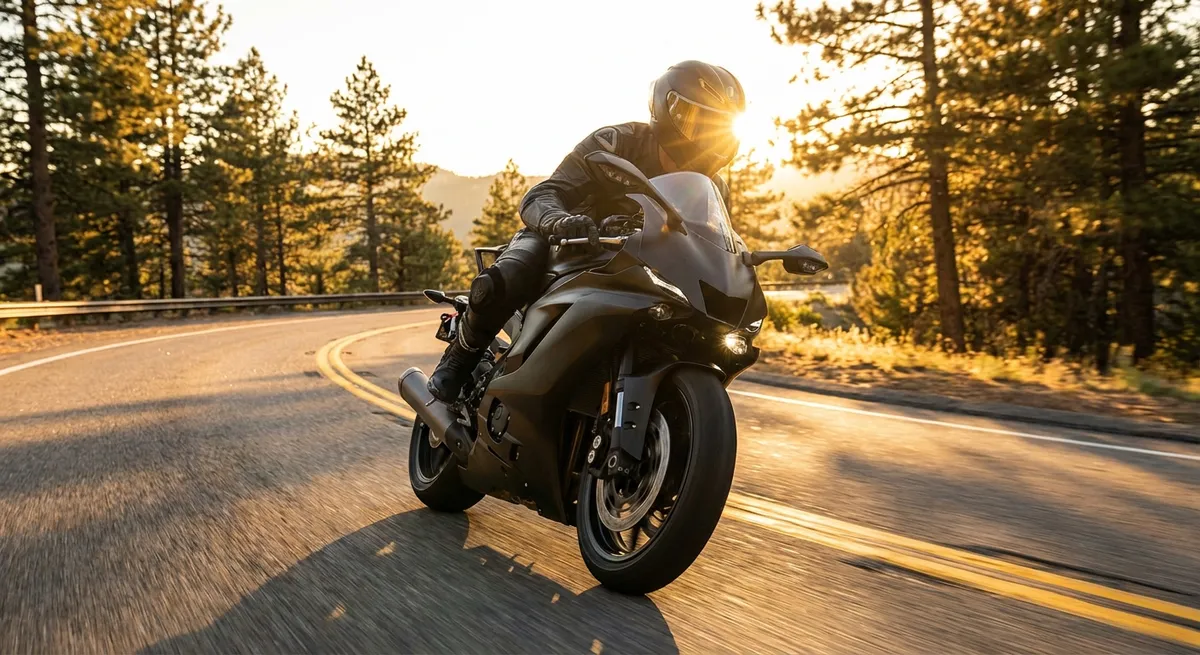
There’s a moment mid-corner when the bike feels weightless, the bars go neutral, and the road unwinds like it was designed just for you. That isn’t luck. It’s engineered — with vision, timing, and precise control of load and geometry. This is where riding stops being “turn the bars, lean the bike” and becomes applied dynamics.
This guide breaks down five technical cornering concepts that serious riders can actually use on normal streets — not in theory, but in the messy, imperfect world of camber changes, patched asphalt, and distracted drivers.
Vision Lag and the “Future Grip” Mindset
Every input you make to the bike is chasing where your eyes used to be. That delay — the lag between what you see, what your brain decides, and what your hands/feet do — is where corners are won or lost.
At road speeds, your brain needs roughly 0.7–1.5 seconds to see → process → react. At 50 mph (about 22 m/s), that’s 15–33 meters traveled after you’ve already seen something before your input fully manifests. If your vision is anchored near the front wheel, you’re constantly late, forcing mid-corner corrections that load and unload the chassis unpredictably.
Instead, think of your eyes as hunting for “future grip”: look past the entry and into the early apex, then past the apex to the exit, then to your escape routes beyond. You’re not just drawing one line — you’re constantly simulating three or four possible lines and choosing the safest, most stable one. When you look deeper, your brain smooths your inputs, your steering gets lighter, and the bike naturally tracks a cleaner arc with fewer corrections.
Practically, this means: as you approach a corner, do a rapid scan — entry surface, oncoming lane, apex area, exit visibility, escape routes (shoulder, gap between cars, wider part of road). Then lock your primary vision to the exit while using your peripheral vision to monitor the near field. The goal isn’t to “look far” as a slogan, but to connect what you see 3–5 seconds ahead to what your hands and feet are doing right now.
Throttle as a Chassis Tool, Not Just a Speed Control
On corner entry, most riders think in terms of “on the brakes / off the brakes / roll on throttle.” The advanced version is: “Where is my weight sitting on the contact patches, and what is the suspension doing about it?”
Rolling off the throttle transfers load forward, compressing the fork, increasing front-tire grip but reducing rear grip and shortening wheelbase slightly. Rolling on does the opposite — more load rearward, extending the fork, often adding stability but slightly reducing front grip. The magic is in using tiny throttle changes to stabilize the bike mid-corner, not to “go fast.”
On a well-set-up bike, the most stable mid-corner state is a slight maintenance throttle — just enough to keep the bike from decelerating. This neutralizes excessive fork dive, keeps the chassis neutral, and helps maintain consistent tire loading. If you chop the throttle at lean, the weight rushes forward, the rear unloads, the geometry steepens, and the bike can feel twitchy or want to tighten the line abruptly.
Train this deliberately: on a known, safe corner, enter at a moderate speed. As you lean in and finish most of your braking, smoothly transition to a just-cracked-open throttle before the apex — not to accelerate, but to “catch” the weight transfer. Feel for that moment when the bars go almost weightless and the bike seems to hold its line with minimal input. That’s the balance point where your throttle is acting as a fine-tuning chassis tool rather than an on/off speed switch.
Micro-Trail Braking for Line Authority
You don’t need maximum attack-level trail braking on public roads, but you absolutely benefit from micro trail braking — carrying a small amount of front brake past turn-in to fine-tune line and load.
When you maintain a light brake pressure (often just 2–10% of available force) as you begin to lean, you’re doing three critical things:
- Keeping the fork slightly compressed, which lowers the front, steepens rake/trail a bit, and gives you sharper turning authority.
- Maintaining consistent front-tire loading, avoiding that “sudden release then sudden load” that happens when you snap off the brake, then immediately ask for cornering grip.
- Giving yourself a “line adjuster” — you can gently increase or bleed pressure to tighten or relax your turn radius without abrupt steering inputs.
What matters is smooth pressure release: think of the lever as a dimmer, not a light switch. As lean angle increases, you gradually reduce brake pressure so that total demand on the front tire (braking + cornering) stays within its grip envelope.
On the street, this isn’t about late-braking heroics. It’s about line discipline and control when a corner tightens unexpectedly or the camber goes negative. Practicing micro-trail braking in a parking lot or empty, predictable road (light pressure, small lean, focus on smooth release) builds the muscle memory you’ll rely on when a blind corner is sharper than you thought.
Camber, Crown, and the Hidden Geometry of Public Roads
Real roads are not flat tracks. They’re crowned, patched, and sometimes designed more for drainage than for vehicles at lean. Understanding how camber and crown influence grip and line is a huge step toward stable cornering.
Positive camber (road banking toward the inside of the corner) effectively helps support cornering forces — your tire’s lateral load is partially “caught” by the slope, letting you get away with a bit more lean or speed for the same grip usage. Negative camber (road sloping away from the inside of the turn) does the opposite, increasing the lateral work the tire has to do to hold the same line.
On crowned roads, the highest point is usually the center; both sides slope away for drainage. Entering a corner from near the centerline and drifting outward means you may be transitioning from near-neutral camber to slightly negative camber, even though the curve radius hasn’t changed. The bike will feel like it wants to run wider, and the same lean angle suddenly doesn’t buy you the same turning effect.
You can plan for this:
- On unknown roads, be conservative with speed when you can’t read the camber ahead.
- Visually track the edge of the pavement and any painted lines — they reveal how the surface is sloped.
- Expect less margin on off-camber decreasing radius turns; prioritize line over speed and keep more buffer in your lean and throttle.
This awareness lets you separate two sensations: “I’m going wide because I’m too fast” vs. “I’m going wide because the road is falling away under me.” Both require a response, but knowing why helps you choose the smoothest, safest correction (gentle line tightening, small speed bleed, or delayed throttle) rather than panicked mid-corner grabs.
Elastic Lines: Planning Escape Space into Every Corner
A lot of riders think in terms of a single “ideal line.” On real roads, the smarter approach is what you could call an elastic line — a primary path with built-in options to expand or contract depending on what reality throws at you.
Before turn-in, do a quick, structured mental checklist:
- Entry: Can I brake hard here if the corner tightens or traffic appears?
- Mid-corner: If there’s gravel or a car over the line, where can I stand the bike up and go?
- Exit: If a vehicle pulls out or stops, do I have space to straighten and brake, or a clear lateral escape path?
Your chosen line should preserve at least one direction where you can safely straighten the bike and apply serious braking: usually toward the outside edge on entry and mid-corner, sometimes toward the inside on exit if visibility and surface allow it.
Technically, this means you avoid “painting yourself into a corner” with overly tight, aggressive entries that consume all your lean and all your lane early. Instead, delay turn-in slightly, run a later, wider apex, and keep a margin of lean and lane width in reserve until you see the exit fully. This late-apex style not only improves your sightlines but also keeps your line elastic — expandable to tighten or widen based on new information.
The payoff: when something goes wrong mid-corner, you’re not out of tools. You have space to reduce lean, add controlled braking, or alter trajectory without crossing into oncoming traffic or off the edge of the road. It’s not just “ride your own ride”; it’s engineer your line so that your backup plans are already built into the geometry of your path.
Conclusion
Cornering mastery on real roads isn’t about scraping hard parts or chasing speed; it’s about engineering stability and options. When you manage vision lag, use throttle as a chassis control, deploy micro-trail braking, read camber like a track map, and design elastic lines with escape routes, you’re not just surviving corners — you’re shaping them.
The flow-state feeling you’re chasing is the byproduct of solid physics and repeatable technique. Build those deliberately, and the confidence — and speed, if you choose to use it — will come as a side effect, not the goal.
Sources
- [Motorcycle Safety Foundation – Cornering](https://msf-usa.org/library.aspx) - MSF materials on cornering strategy, visual skills, and lane positioning
- [U.S. DOT – Roadway Cross-Sectional Elements](https://www.fhwa.dot.gov/design/roadway/) - Explains road crown, camber, and drainage design that affect real-world cornering
- [Yamaha Champions Riding School – Brake and Cornering Concepts](https://ridelikeachampion.com/blog/) - Advanced technical discussion of trail braking and cornering dynamics
- [California Superbike School – Throttle Control Article](https://superbikeschool.com/sbsarticles/throttle-control/) - In-depth look at how throttle affects stability and cornering
- [NHTSA Motorcycle Safety](https://www.nhtsa.gov/road-safety/motorcycles) - Data and guidance on motorcycle crash factors and rider behavior
Key Takeaway
The most important thing to remember from this article is that this information can change how you think about Riding Tips.


