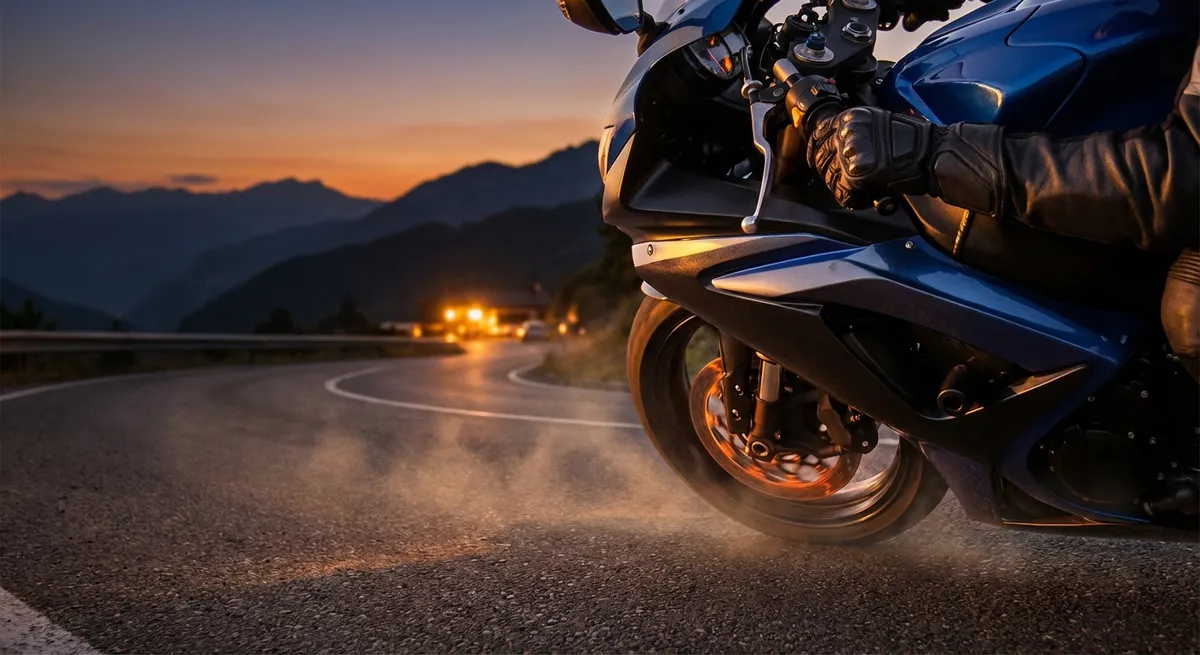
Braking is the part of riding where physics stops being theory and becomes survival. Every time you reach for the lever, you’re managing weight transfer, tire load, friction, and heat in real time. Most riders “kind of” know how to brake. Very few know how to build repeatable, technical braking habits that work the same in a decreasing-radius corner, a panic stop, and a wet commute.
This isn’t about just “brake earlier” or “two fingers on the lever.” This is about understanding what’s happening at the contact patch and programming your hands and feet to extract maximum braking force without crossing the line into a lockup or ABS chaos.
Below are five technical braking points that matter if you actually care how your motorcycle stops.
1. Build Brake Pressure, Don’t Just Grab the Lever
The biggest difference between a casual rider and a technical rider is how the initial brake application feels. Sloppy riders grab; precise riders build pressure.
When you first touch the front brake, the tire is lightly loaded. As you squeeze, inertia throws weight forward, compressing the fork and increasing the vertical load on the front tire. That load is what lets the tire generate more braking force without sliding. If you grab a big handful too early, you demand more grip than the tire can supply at that moment, and the tire either chatters, triggers ABS, or locks (on non-ABS bikes).
Technically, you want a ramp in brake pressure: light touch → firm squeeze → peak pressure. Think in milliseconds, not seconds. At 60 mph (about 27 m/s), every tenth of a second of delay is nearly 9 feet of extra distance. You’re not braking slowly; you’re loading the tire quickly but progressively.
Practice this in a parking lot: pick a marker, apply the front brake with a clean, smooth ramp to firm pressure. Feel the fork compress, feel your weight go into your palms, feel the front tire dig in. If your ABS never chatters and the fork never really compresses, you’re under-braking. If the ABS instantly goes crazy or the front feels loose or skittish, you’re grabbing instead of building.
2. Understand Deceleration Limits: Your Body Is a G-Force Sensor
Your bike doesn’t care what you think is hard braking; it only cares about the available friction between the tire and the road. But your body is actually a very good deceleration sensor—if you learn how to read it.
Modern street tires on clean, dry asphalt can support over 1 g of deceleration (often in the 0.9–1.2 g range in controlled tests). That’s race-car-level braking. Yet most riders never come close because they back off when it feels aggressive rather than when the tire actually runs out of grip.
Use your body to gauge decel:
- Light braking: you feel your weight tip into your palms, but your torso is almost stable.
- Medium braking: your core is working, your wrists are loaded, your head wants to nod forward.
- Hard braking: your arms are braced, your core is fully engaged, your helmet is trying to move forward on your head, and the rear of the bike feels light.
Technical braking practice means occasionally exploring that “hard braking” zone in a controlled environment so your nervous system learns, this is still okay, the tire still holds. The first time you feel near-max braking shouldn’t be when a car pulls out in front of you at 70 mph.
Set up a straight-line braking drill: from 30, 40, then 50 mph, progressively increase front brake pressure until you get close to ABS intervention (if you have it) or you can just barely sense rear-lightness. Measure stopping distance with roadside markers or cones. Your perceived hardness will recalibrate toward what the tire can actually handle.
3. Rear Brake: Stabilizer, Not Primary Stopper
The front brake does the heavy lifting; the rear brake is the stability instrument. Technically, as weight transfers forward, the load on the rear tire drops, reducing how much braking force it can apply before locking. At high deceleration, the rear contributes surprisingly little stopping power but a lot of chassis behavior control.
Used well, the rear brake:
- Damps chassis pitch and squat during aggressive front-brake application.
- Keeps the bike settled on downhill braking zones or sketchy surfaces.
- Trims speed in low-speed maneuvers and tight u-turns without upsetting balance.
- Can help tighten your line mid-corner on some bikes when applied gently and smoothly.
Used badly, it:
- Locks and causes rear-end skids, especially upright and unloaded.
- Confuses inexperienced riders into thinking “skid = skill,” when it’s actually just wasted distance.
- Can cause the ABS to intervene repeatedly, lengthening stopping distances.
Technical habit: treat the rear brake as a fine adjustment tool. As you roll on firm front-brake pressure, add just enough rear to feel the rear suspension “take a set” without chirp or ABS pulsing. Roll out of it early as speed scrubs off and the chassis stabilizes.
Practice this by doing front-only stops, then combined front+rear stops, and noticing the difference in pitch, feel, and stopping distance. On many street bikes, the sweet spot is 80–90% front, 10–20% rear pressure during hard braking on good tarmac.
4. Trail Braking on the Street: Grip Accounting, Not Hero Mode
Trail braking has been mythologized into some kind of racer-only secret technique. In reality, it’s simply this: you carry some braking force past the turn-in point, gradually releasing it as lean angle increases.
From a technical standpoint, you’re managing a finite traction budget. Each tire has a limited grip “pie”; you can spend it on braking (longitudinal force), cornering (lateral force), or some combination. The more you lean, the more of the pie is consumed by lateral force, leaving less room for braking.
Trail braking done correctly on the street is conservative, not aggressive:
- You initiate braking earlier and more smoothly while upright.
- You maintain a small amount of brake pressure (often 5–20% of your upright peak) as you lean in.
- You bleed off that pressure as the bike approaches your chosen lean angle and turn speed.
- You use the brake lever not just to slow, but to set front tire load and sharpen turn-in.
The benefits:
- You keep the front tire loaded, which improves feel and front-end feedback.
- You gain more flexibility: if the corner tightens, you still have braking “in hand.”
- You reduce mid-corner panic because you haven’t committed all your braking to the upright phase.
The key limiter is grip. On the street, you don’t know the exact friction level—gravel, paint, dust, or coolant can be waiting. So your trail braking margin must be generous. Don’t chase racetrack-style lean + brake combinations; aim for small overlaps with a huge safety margin: for example, 70–80% of max braking while upright, fading to 10–15% as lean builds, then to zero as you reach steady-state cornering.
Practice on known, clean corners with clear visibility. If you feel ABS intervention when leaned or the front feels vague or pushy, you’re using too much of the grip pie for braking at that lean angle.
5. Heat, Fade, and Feel: When Your Brakes Change Under You
Brakes are heat machines: they convert kinetic energy (your speed) into thermal energy (heat in pads, discs, calipers, and fluid). More speed, more mass, more stops, and steeper descents all mean more heat. Technical riders pay attention to how their brakes change when hot.
Key technical failure modes:
- Pad fade: The friction material overheats and the coefficient of friction drops. Lever feel might stay similar, but braking force per unit pressure decreases. You pull harder and stop less.
- Fluid fade (boiling): Brake fluid absorbs heat, water content boils, and gas bubbles compress. Lever travel increases, feel goes spongy. This is dangerous because your hand might hit the bar before you reach needed line pressure.
- Glazing: Overheated pads can form a smooth, glassy layer, reducing friction and feel. Stopping distances lengthen even after everything cools down.
On the street, you’re unlikely to hit extreme track-level fade on modern systems if they’re healthy—but heavy bikes, loaded touring, long mountain descents, or aggressive canyon runs can push brakes hard enough to matter.
Technical habits to build:
- Pay attention to consistency. If lever travel starts increasing over a series of hard stops, you may be flirting with fluid boil or pad issues.
- Use engine braking to assist on very long descents, but don’t rely on it as a substitute for good brakes. You’re not “saving your brakes” if you still need to stop hard at the bottom.
- Maintain your system: high-quality DOT 4 or DOT 5.1 fluid changed at least every 1–2 years; inspect pad thickness and condition; check for rotor bluing or warping.
- Understand that ABS doesn’t fix fade. ABS assumes your brakes can generate force. If the pads or fluid are fading, ABS just modulates a weakened system.
If you ever feel the lever suddenly go long and soft in repeated hard use, that’s a technical red line—back off, let the system cool, and inspect. A system that surprises you once will surprise you again, and next time might be at the worst possible moment.
Conclusion
Braking isn’t a reflex you leave to panic; it’s a skill you engineer into your riding. Precise line pressure build, honest use of your body as a decel sensor, intelligent rear-brake usage, conservative street trail braking, and understanding heat behavior turn braking from “hope it works” into a repeatable, measurable technique.
Spend time in a safe, controlled environment and push your braking on purpose instead of by accident. Learn what your tires, your suspension, and your hands can do together. When you finally need everything your brakes can give, that won’t be the first time you’ve asked for it—and your stopping distance, and your confidence, will show it.
Sources
- [Motorcycle Safety Foundation – Braking and Cornering Basics](https://www.msf-usa.org/downloads/Street_Motorcycle_Tips.pdf) – Official MSF guidance on street braking, body position, and basic technique
- [U.S. NHTSA – Motorcycle Safety](https://www.nhtsa.gov/road-safety/motorcycles) – Government data and recommendations on motorcycle crashes, braking, and safety factors
- [BMW Motorrad – ABS Pro and Braking Dynamics](https://www.bmw-motorrad.com/en/experience/stories/technology/abs-pro.html) – Technical explanation of modern motorcycle ABS and behavior while braking in corners
- [KTM – Brake Technology Overview](https://www.ktm.com/en-int/ktm-world/ktm-technologies/brakes.html) – Manufacturer-level view of modern motorcycle brake components and performance considerations
- [SAE International – Brake System Fundamentals](https://www.sae.org/publications/books/content/r-321/) – Engineering-focused reference on brake system design, heat, and fade characteristics
Key Takeaway
The most important thing to remember from this article is that this information can change how you think about Riding Tips.


