Most riders “maintain” their bikes. Very few engineer their maintenance. The difference shows up at 40,000 miles—when one bike feels vague, rattly, and reluctant, and the other still feels tight, precise, and eager to lean. This isn’t luck or brand magic; it’s mechanical discipline applied to the right systems.
This guide is about that discipline. Not “change your oil, check your tires,” but the deeper, load-bearing maintenance decisions that determine whether your motorcycle ages like a race chassis or a rental scooter. We’ll walk through five technical points that matter far more than most owners realize—and how to execute them like a pro.
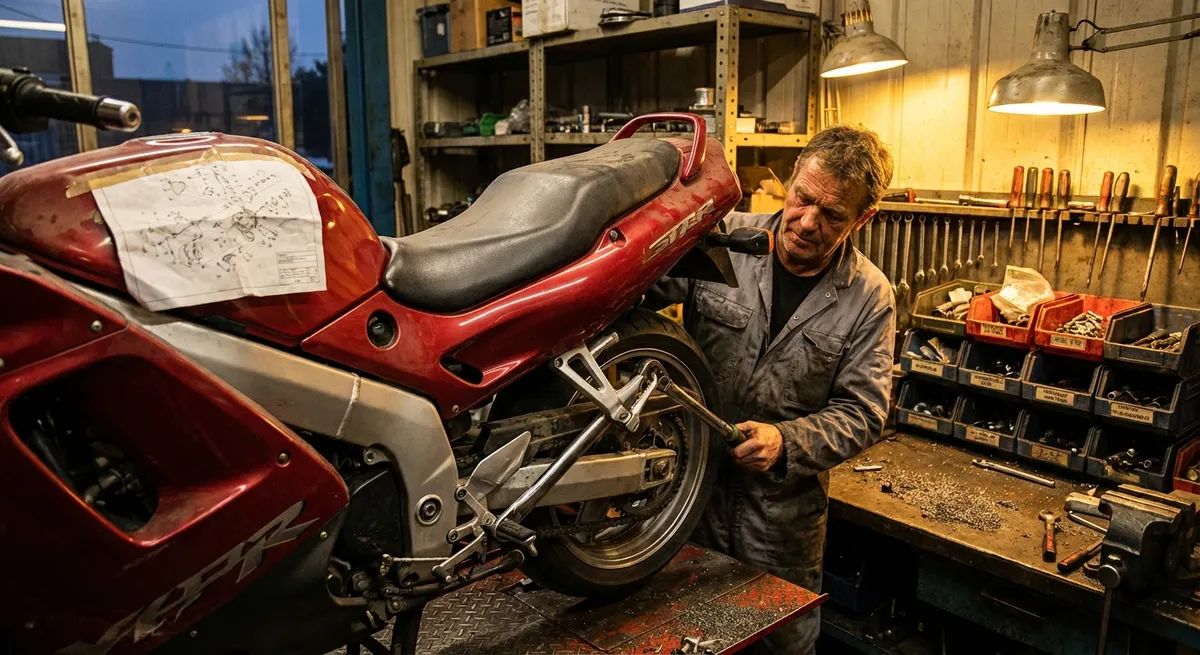
1. Chain and Sprocket System: A Drivetrain, Not a Wear Item
Most riders treat their chain as a consumable. In reality, the chain–sprocket assembly is a precision power transmission system, and how you maintain it directly affects throttle response, gearbox wear, and rear suspension behavior.
A modern O-ring or X-ring chain is designed to keep factory-applied grease inside the pin–bushing interface. Your job is to (1) prevent corrosion on the outer surfaces, and (2) keep the chain running clean and correctly tensioned. Over-lubing creates an abrasive paste; under-lubing invites rust and stiff links. The ideal approach is thin-film lubrication on a clean chain.
Technically, chain tension should be set with the suspension at its point of maximum chain tightness—when the countershaft, swingarm pivot, and rear axle are in a straight line. Most manuals approximate this with a static slack range, but if you’ve changed ride height, rear shock length, or gearing, the stock spec can be wrong. A chain that’s too tight loads the countershaft bearing and shock linkage; too loose hammers the gearbox and causes snatchy on–off throttle behavior.
Inspect sprocket teeth critically: hooked teeth, sharp tips, or a polished “ramp” on the drive side indicate improper chain tension or lubrication history. Always replace chain and both sprockets as a complete set. Mixing new and old components leads to accelerated wear and a noisy, inconsistent drive feel.
Key disciplines:
- Clean with a soft brush and a chain-safe cleaner—avoid aggressive solvents that can attack seals.
- Lube when the chain is warm after a ride so the carrier penetrates better.
- Measure slack at multiple wheel positions to detect tight spots—this often appears well before obvious visual wear.
- Listen and feel: a healthy chain is quiet and consistent; rhythmic noise or pulsing through the pegs is a red flag.
2. Steering Head and Wheel Bearings: The Hidden Precision in Your Handling
Many riders chase better handling with new tires, springs, and valving—but ignore the bearings that define the motorcycle’s geometry in motion. If the steering head and wheel bearings are not in top condition, no amount of suspension tuning will give you clean, predictable feedback.
Steering head bearings (often tapered roller on modern machines, ball bearings on some older ones) control how the front end pivots under load. Over time, impacts from potholes, hard braking, and wheelies can create brinelling—tiny indentations in the bearing races. You feel this as a notch when the bars pass through center, especially with the front wheel off the ground. That notch is not “normal wear”; it is a physical step the bearings must climb over. The result is vague initial turn-in, self-centering resistance, and instability in mid-corner corrections.
Correct maintenance means periodic disassembly, regrease with a high-pressure, high-temperature bearing grease, and torqueing to spec with proper preload. Too tight and the bike will resist steering and weave over bumps; too loose and it will feel nervous and imprecise. The right setting allows the bars to fall side-to-side smoothly with a light nudge—but without free play or clunk when you apply the front brake and rock the bike.
Front and rear wheel bearings deserve the same scrutiny. Any play at the rim with the wheel unloaded, grinding when spinning by hand, or localized drag indicates it’s time to replace them. Remember: wheel bearings see both radial and axial loads during cornering and braking; if they’re not perfect, the tire contact patch is constantly moving relative to the chassis, erasing the precision you thought you bought with premium rubber.
Technical habits:
- Check steering movement with the front end lifted—feel for notchiness at dead center.
- With the wheel off the ground, attempt to move it side-to-side at the rim—any click indicates trouble.
- Replace bearings as sets and use quality components; cheap bearings are false economy.
- After servicing the steering head, perform a test ride specifically focused on low-speed steering feel and mid-corner corrections.
3. Thermal Management: Cooling System Discipline, Not Just “Don’t Overheat It”
Your cooling system isn’t just there to prevent overheating; it’s managing the operating window in which your engine delivers optimal power, efficiency, and longevity. Thermal stability is a performance parameter, not a comfort feature.
Engine metals expand differently with temperature. Clearances for pistons, valves, and camshafts are engineered around a target operating range. Running too cool (stuck-open thermostat, missing shrouds, or over-aggressive fans) can increase wear and reduce fuel atomization efficiency; running too hot (clogged radiator, old coolant, failing water pump) accelerates oil breakdown and can cause detonation and pre-ignition.
Coolant is a chemical system—its job is to raise boiling point, prevent corrosion, and stabilize temperature. Over time, corrosion inhibitors and anti-cavitation additives degrade. Coolant that “looks fine” can be chemically exhausted. Old coolant allows micro-corrosion in aluminum passages and radiators, leading to reduced flow and hot spots. Follow the interval, not your eyeballs.
Radiator fins are another often-abused component. Bent or clogged fins reduce heat rejection. Straightening fins with a dedicated comb and carefully washing bugs and debris from the front side (using low-pressure water at an angle, not directly blasting) can restore significant cooling capacity. Also inspect hoses for bulges, cracks, or soft spots that indicate internal degradation; a failed hose on a hot engine can be catastrophic.
Key checks:
- Replace coolant per the manufacturer’s time/mileage spec, using the correct type (silicate-free for many aluminum engines).
- Test the thermostat in hot water if you suspect early or late opening.
- Monitor actual fan cycling behavior; a fan that never comes on or never switches off is a problem, not a curiosity.
- After any cooling system service, bleed the system fully—air pockets cause localized overheating even if the gauge looks normal.
4. Brake System Integrity: Beyond Pads and Rotors
Brakes are usually “maintained” when they squeal or feel weak. The technical approach is to treat the braking system as hydraulics-first, friction-second. Fluid, seals, and line condition are as important as pad material and disc thickness.
Brake fluid is hygroscopic—it absorbs moisture from the atmosphere through hoses, seals, and reservoir vents. That moisture (1) lowers the boiling point, risking vapor lock under hard braking, and (2) promotes internal corrosion in calipers, master cylinders, and ABS modules. Even if you never ride hard enough to boil your brake fluid, corrosion byproducts and dissolved contaminants change the way the system behaves under pressure.
Fresh fluid matters more than most riders think. A firm, linear lever feel with predictable bite point is a hydraulic achievement first and a pad/rotor interaction second. Flushing with the correct DOT-rated fluid (never downgrade from DOT 4 to DOT 3; follow your manual, especially on ABS bikes) on a strict time interval—not “when it looks dark”—keeps the system consistent. Remember: color is a terrible indicator of boiling point or water content.
Caliper maintenance is just as crucial. Dust seals harden, piston surfaces accumulate baked-on pad dust, and slide pins (on floating calipers) often run dry or corroded. These issues cause uneven pad wear, dragging brakes, increased fuel consumption, and heat-soak of pads and discs. Pulling calipers, cleaning pistons with a suitable cleaner, lightly lubricating slide pins with a high-temp brake-specific grease, and ensuring free piston movement will dramatically improve braking feel.
Technical checkpoints:
- Replace brake fluid every 1–2 years regardless of mileage, more often if you ride hard in mountains or on track.
- Inspect hoses for cracking, bulging, or chafing; consider braided lines where appropriate for more stable lever feel.
- Measure rotor thickness and run-out, not just visual appearance. Warped or below-minimum rotors compromise both safety and feedback.
- After any brake work, test at low speed in a safe area to verify lever travel, bite, and ABS function before resuming normal riding.
5. Electrical Health: Voltage Discipline for a Modern ECU Bike
On a carbureted bike with minimal electronics, a weak battery is an inconvenience. On a modern ECU-driven machine with ride-by-wire, ABS, traction control, and CAN bus communication, poor electrical health can masquerade as fuel, ignition, or sensor problems and quietly ruin your riding experience.
A healthy charging system is a triad: battery, stator, and regulator/rectifier. The battery is an energy reservoir and buffer; the stator generates AC power; the regulator/rectifier converts it to DC and clamps voltage to a safe range (typically around 14.0–14.5 V while running). If any leg of this triad is compromised, you may experience intermittent warning lights, random error codes, or erratic behavior from systems that depend on stable voltage, such as throttle response or ABS intervention.
AGM and lithium batteries require different charging strategies and have different failure modes. An AGM will often give you some warning (slower cranking, dimmer lights); a lithium can appear fine until it suddenly isn’t. Either way, periodically load-testing the battery or at least checking resting voltage (around 12.6–12.8 V for a healthy AGM, higher for some lithium chemistries per spec) and charging voltage at the terminals is critical. Overcharging (regulator failure) cooks batteries and can damage ECUs; undercharging (weak stator or bad connections) leaves you running off battery until the inevitable shutdown.
Ground paths and connectors matter, too. High resistance at a corroded ground or partially oxidized connector doesn’t always blow a fuse—it just causes voltage drop under load. That drop can be enough to upset sensor readings, fuel pump pressure, or ignition performance. Periodic inspection of main grounds, cleaning and re-tightening, and using dielectric grease on critical connectors is a technical maintenance step, not an optional “nice-to-have.”
Core practices:
- Measure battery resting voltage after sitting at least several hours; document it over time.
- With the bike running at idle and around 4–5,000 rpm, measure charging voltage at the battery terminals.
- Inspect and clean main grounds, starter relay connections, and battery terminals at least annually.
- If you add accessories (heated gear, auxiliary lights, GPS), do so through fused circuits and, ideally, a relay-switched distribution block—never by stacking everything on the battery posts.
Conclusion
A motorcycle doesn’t suddenly “get old”; it gradually reflects the sum of every maintenance decision you’ve made—or skipped. When you treat chain tension, bearings, cooling, brakes, and electrics as engineering systems rather than consumables, the entire character of the bike changes. Throttle pickup becomes sharper, steering more communicative, braking more confidence-inspiring, and the engine more consistent across conditions.
This is how you build a machine that still feels mechanically honest at 40,000 miles: by focusing your maintenance on the load-bearing systems that define how the bike transmits power, manages heat, converts grip into deceleration, and feeds current to its electronic brain. Do this with discipline, and your “used” motorcycle will feel anything but.
Sources
- [Motorcycle Safety Foundation – T-CLOCS Inspection Checklist](https://msf-usa.org/downloads/T-CLOCS_Inspection_Checklist_2020.pdf) - Official pre-ride inspection framework highlighting critical systems to monitor
- [BikeMaster / Cycle World – How to Maintain Your Final Drive Chain](https://www.cycleworld.com/how-to-maintain-your-motorcycles-final-drive-chain/) - Practical and technical guidance on proper chain care and adjustment
- [U.S. Department of Transportation – Brake System Safety](https://www.nhtsa.gov/equipment/brakes) - Background on brake system function, safety fundamentals, and component integrity
- [Yamaha Motors – Motorcycle Owner’s Manuals](https://www.yamahamotorsports.com/motorcycle/owners-manuals) - OEM reference for cooling system service intervals, brake fluid specs, and torque values
- [Battery University – How to Charge and Maintain Motorcycle Batteries](https://batteryuniversity.com/article/bu-902-how-to-charge-a-motorcycle-battery) - Detailed technical overview of battery behavior, testing, and proper charging practices
Key Takeaway
The most important thing to remember from this article is that this information can change how you think about Maintenance.


