Every fast, focused ride starts long before you thumb the starter. It starts in the layers pressed against your skin, the armor shaping around your joints, and the materials managing heat, impact, and abrasion at highway speeds. Gear isn’t “extras” for real riders—it’s an engineered system that decides how much performance you can actually use, and how much control you keep when things go sideways.
This isn’t another “wear a helmet and gloves” checklist. This is about treating your gear like a modular performance package: tunable, measurable, and upgradeable—exactly the way you think about suspension, tires, and braking.
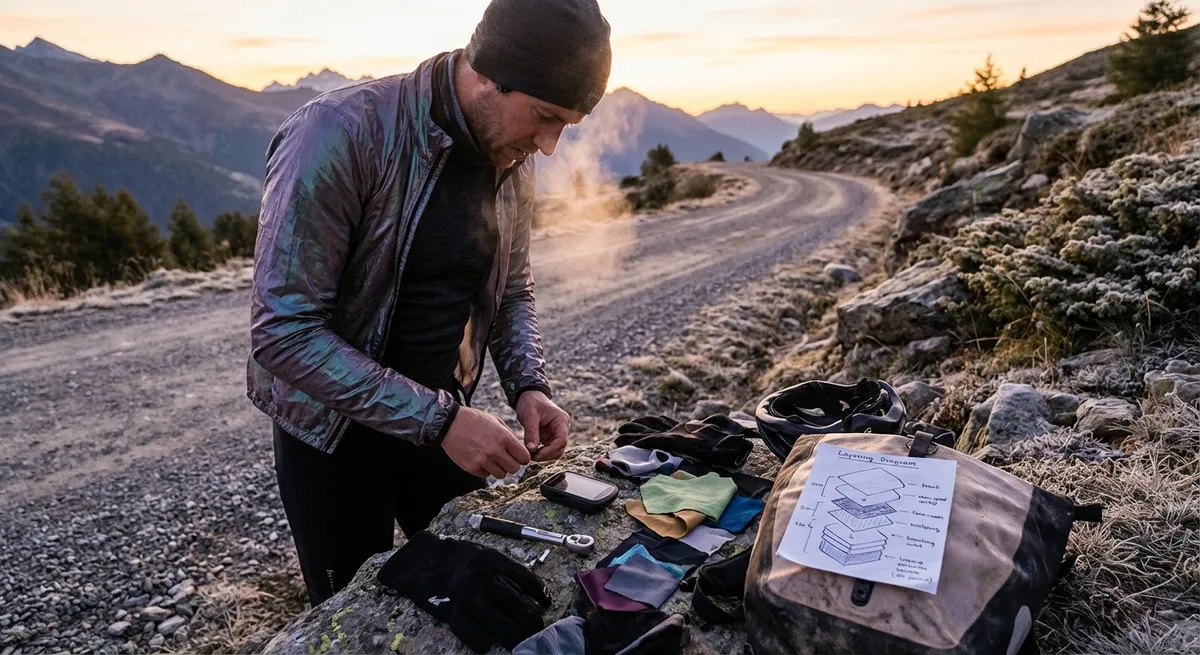
Building a Performance Stack: From Base Layer to Shell
Think of your gear as a layered system with defined roles, not a pile of random garments.
- Base layer = climate control + friction management. A technical base layer (synthetic or merino) pulls sweat away from the skin and reduces shear forces between body and outer garments. Cotton holds moisture and increases friction, which can worsen skin injuries in a slide and accelerate fatigue on long rides.
- Mid layer = thermal modulation, not bulk. Fleece or insulated mid-layers should trap air without restricting joint articulation. If you can’t fully extend your arms and rotate your shoulders in a riding stance, that layer is costing you precision on the controls.
- Outer shell = impact and abrasion chassis. The jacket and pants form the mechanical barrier that interacts with the road. Their job is to manage kinetic energy via abrasion resistance, tear resistance, and armor positioning—not simply to “feel thick.”
The engineering mindset: treat each layer as having a clear performance spec. Test your stack in riding position, not standing in front of a mirror. If a layer bunches at the back of the knee, pinches at the elbow, or pulls across the shoulders, it will steal fine motor control at speed.
Technical Point 1: Abrasion Engineering – What Your Fabric Is Actually Doing
At 60 mph, the road behaves like aggressive sandpaper. What separates “walk away” from “weeks of skin grafts” is measured in seconds of slide time and the fabric’s ability to stay intact under heat and load.
Key technical details enthusiasts should care about:
- Material type matters.
- Leather (1.2–1.4 mm cowhide or kangaroo): extremely high abrasion resistance when maintained; race-grade suits routinely survive multi-second slides.
- High-denier synthetics (e.g., 500D–1000D Cordura): lighter and more weather-flexible, but typically need reinforcement in impact zones to match leather performance.
- Single-layer denim “moto jeans” without reinforcement: usually catastrophic in a real slide; the weave and cotton fibers fail quickly under friction heat.
- Slide time vs. speed. Independent testing (e.g., Darmstadt abrasion tests, Cambridge/EN 13595 legacy data) shows that not all “CE approved” textiles behave equally. For a given speed, you want materials that maintain integrity for multiple seconds of sliding, not just fractions.
- High-impact zone mapping. Critical zones (shoulders, elbows, hips, knees, seat, outer thighs) need either thicker leather, multi-layer constructions, or advanced fibers like aramids (Kevlar™, Twaron™) or UHMWPE (Dyneema®, Spectra®).
- Seam engineering. A strong fabric with a weak seam fails at the stitching first. Look for:
- triple or safety stitching in critical areas
- bonded or high-tensile thread
- internal reinforcement panels (not just decorative external patches)
If you treat abrasion resistance like tire compound choice—matching material to use case—you’ll start making gear decisions based on real performance, not just style and branding.
Technical Point 2: Impact Management – Armor Types, Placement, and Coverage
Impact protection isn’t just “CE armor included.” It’s a tuned system that manages deceleration loads on your bones and soft tissue.
Key technical considerations:
- CE levels and zones.
- EN 1621-1 (limb armor): Level 1 allows higher transmitted force than Level 2. For aggressive riding or high-speed commuting, Level 2 in elbows, shoulders, hips, and knees is worth the marginal bulk.
- EN 1621-2 (back protectors) and EN 1621-3 (chest protectors) follow similar Level 1 vs Level 2 logic.
- Armor construction.
- Viscoelastic (D3O-type): soft and flexible until impact, then stiffens to disperse energy; great for comfort and coverage.
- Layered foam + hard shell: more traditional; the shell spreads impact, foam attenuates it; can be bulkier but effective if well-fitted.
- 3D mesh / honeycomb structures: high ventilation with good energy distribution, especially in back and chest units.
- Fit and stability. The best armor fails if it rotates away from the joint:
- Armor pockets should position protectors exactly over the patella, humeral head, and olecranon when in riding position.
- Tightening straps (biceps, forearms, calves) and correct jacket length help keep armor anchored during a slide and tumble.
- Coverage area vs point protection. Wide coverage over a joint often adds more real-world protection than a small “perfectly rated” pad. Look for extended zones over collarbones, rib cage edges, and side hips, not just the center of the joint.
Treat armor the way you think about brake pad compounds: not just “do I have them,” but “are they the right spec and correctly positioned for the loads I’m generating?”
Technical Point 3: Environmental Control – Ventilation, Waterproofing, and Thermal Balance
Power and precision mean nothing if your brain is cooked or your hands are numb. Gear must actively manage heat flux and moisture, not just “keep you dry.”
Core technical elements:
- Membrane types and behavior.
- Microporous membranes (e.g., Gore-Tex, eVent): use micro-holes to allow water vapor out while blocking liquid water; performance depends heavily on pressure, temperature gradients, and cleanliness.
- PU coatings/laminates: cheaper, often less breathable, can feel clammy during long exertion.
- Construction methods.
- Z-liner: membrane hangs behind the outer shell; more cost-effective but can hold water in the outer layer, adding weight and cooling you through evaporative chill.
- 2-layer or 3-layer laminates: membrane bonded directly to outer shell (and sometimes an inner liner), reducing water absorption, drying faster, and often improving durability at seams.
- Ventilation channel design.
- True direct-to-body vents that bypass the membrane move significantly more air.
- Intake + exhaust strategy matters: chest and bicep intakes + upper back and rear shoulder exhausts can create a pressure-driven airflow path at speed.
- Glove and boot microclimate.
- Waterproof gloves that don’t manage moisture well from the inside can lead to sweat accumulation, chilling your hands once ambient temps drop.
- Perforated summer gloves and vented boots drastically improve reaction speed by keeping extremities in an optimal sensory temperature band.
When you spec your gear the way you’d spec a cooling system—matching vent area, membrane type, and insulation to your environment—your focus and reaction time stay in the green zone far longer.
Technical Point 4: Ergonomics as a Control System – Fit, Articulation, and Feedback
Ergonomics is not comfort for its own sake; it is mechanical efficiency and signal clarity between you and the motorcycle.
Areas where fit becomes a performance parameter:
- Pre-curved geometry.
- Sleeves and legs cut for a riding position reduce material bunching at elbows and knees. Excess fabric here can translate to delayed fine movement at the controls and increased fatigue over long stints.
- Stretch panels and gussets.
- Accordion stretch at shoulders, lower back, knees, and crotch allows you to shift body position aggressively without fighting your gear.
- Inserted stretch textiles (e.g., high-tenacity stretch fabrics) behind knees, inner thighs, and underarms reduce resistance to movement while maintaining abrasion resistance in the primary impact zones.
- Grip interfaces.
- Palm materials on gloves affect bar feedback: too thick = muted feel; too thin = high vibration and potential blistering.
- Silicone or rubberized finger zones help in wet conditions but should not limit micro-adjustments on the throttle or brake lever.
- Collar, cuff, and waist tuning.
- A poorly sealed collar can buffet at speed and channel water down your back.
- Cuffs must integrate with gloves: under-the-cuff vs over-the-cuff systems each have implications for water routing and ease of emergency removal.
Think of ergonomic tuning like adjusting lever reach or rearset position: tiny changes in fit yield very real differences in precision, input smoothness, and fatigue accumulation.
Technical Point 5: Integration and Redundancy – Making Your Gear Work as a System
High-level riders don’t think in isolated gear pieces—they think in systems with overlap and fail-safes.
System-level considerations:
- Overlap zones.
- Ensure jacket-to-pant overlap covers the lumbar area fully in a full tuck and when standing. This prevents exposed skin in a slide and helps keep back armor centered.
- Check glove-to-sleeve and boot-to-pant overlaps in riding posture and while moving around the bike; aim for at least several centimeters of coverage margin.
- Attachment systems.
- Full 360° jacket-pants zippers dramatically reduce the chance of garments separating in a crash.
- Chest and back protectors integrated into a suit or worn as a separate armored vest should not conflict with each other’s positioning or create pressure points.
- Redundancy in critical functions.
- Don’t rely on a single element for a life-critical function. Example: if your jacket vents double as your main waterproof closure path, have a backup plan (inner rain liner or packable shell).
- Eye protection: visor + sunglasses or clear visor + internal sunshade; failure of one should not leave you blind or squinting at speed.
- Electronics and comms accommodation.
- Gear should allow stable routing for intercom wires, action camera mounts, or battery packs without introducing pressure points or snag hazards.
- Internal pockets for phones or emergency beacons should be reachable with gloved hands and not sit directly over high-impact bony areas if avoidable.
- Visibility without sacrificing function.
- Reflective materials placed on moving body parts (arms, calves) are more noticeable to drivers than static patches.
- High-contrast color blocking on helmets and jackets increases conspicuity without needing a head-to-toe neon suit.
Treat your gear like a multi-layer safety net with overlapping coverage areas and backup paths. The goal is graceful degradation—if one component fails, the rest still buys you time, protection, and control.
Conclusion
The fastest riders on the road aren’t always the ones with the most horsepower—they’re the ones whose entire system is dialed: chassis, controls, and the equipment wrapped around their body. When you start viewing your gear as an engineered stack—abrasion chassis, impact system, climate control, ergonomic linkage, and integrated redundancy—you unlock more of your real riding potential.
Stop thinking “jacket, pants, gloves” and start thinking “performance envelope.” Build your kit with the same precision you bring to sag measurements and tire pressures, and your reward will be measured in control, confidence, and the ability to walk away when physics decides to run a destructive test.
Sources
- [Gore-Tex Technology: How It Works](https://www.gore-tex.com/technology/how-it-works) - Technical overview of waterproof-breathable membrane behavior and construction methods
- [RevZilla Motorcycle Gear Safety Standards Guide](https://www.revzilla.com/common-tread/motorcycle-gear-safety-standards-explained) - In-depth explanation of CE ratings, armor certifications, and garment standards
- [NHTSA Motorcycle Safety Focus](https://www.nhtsa.gov/road-safety/motorcycles) - U.S. government data and recommendations on motorcycle crashes and protective gear relevance
- [Queensland Government: Protective Clothing for Riders](https://www.qld.gov.au/transport/safety/rules/motorcycles/protective-clothing) - Evidence-based guidance on motorcycle clothing, materials, and coverage
- [SHARP Helmet Safety Scheme](https://sharp.dft.gov.uk/) - UK Department for Transport program detailing helmet impact performance and test methodology
Key Takeaway
The most important thing to remember from this article is that this information can change how you think about Gear & Equipment.


