Motorcycling isn’t magic—it’s applied physics strapped to a combustion event. The riders who look “smooth” aren’t born that way; they’re running repeatable techniques, grounded in mechanics and human factors, over and over. If you want to ride harder, safer, and more precisely, you don’t need vague advice. You need technical tools you can execute on every ride.
This guide breaks down five engineering-grade riding concepts you can apply immediately. No fluff—just field-tested techniques that translate directly into more control, more feedback, and less “what just happened?” moments on the road.
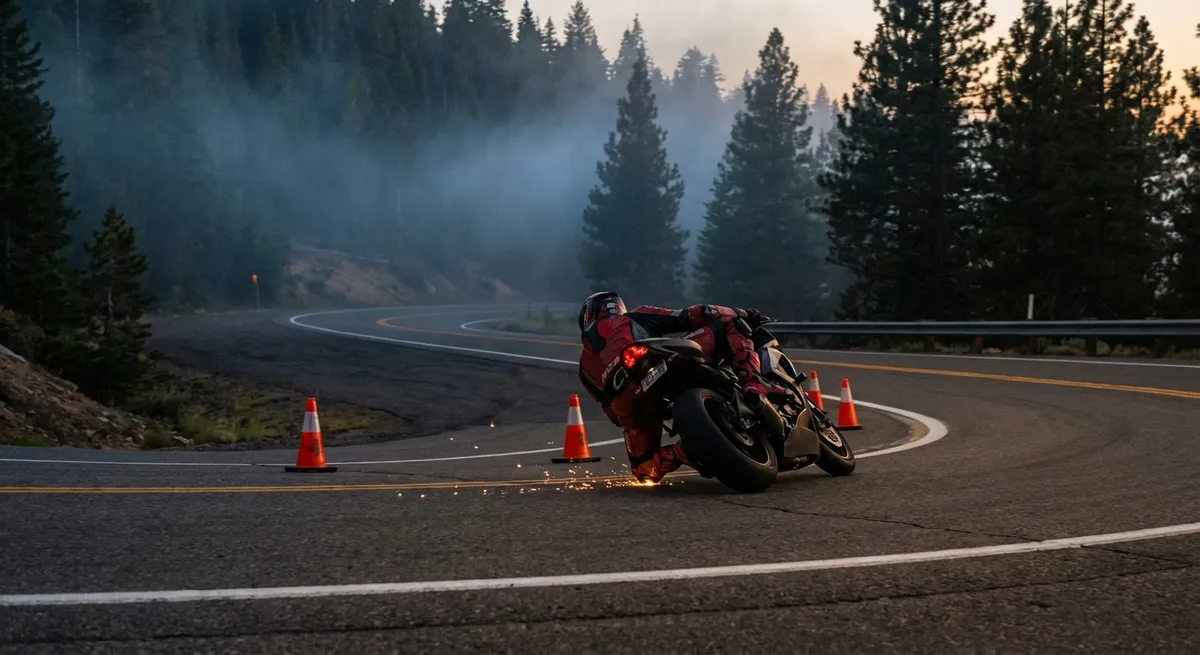
1. Load Path Management: How You Put Weight Into the Bike
Your motorcycle doesn’t care what you feel; it only reacts to where you put load into the contact patches. Every input—brake, throttle, steering, body—creates a load path through the chassis into the tires. Managing that path is the difference between predictable grip and surprise slides.
On straight-line braking, ideal load transfer moves weight forward progressively, compressing the fork and slightly increasing front tire contact patch size. If you snap the brake on, the fork reaches the end of its travel too quickly, steepening rake and reducing trail faster than the tire can build grip. That’s why “gradual initial squeeze, then build pressure” isn’t just coaching talk—it’s mechanically required for stable geometry changes.
Mid-corner, you want your weight and forces to project along the plane of the tire’s lean angle. If your upper body is out of alignment—say, your head is still upright while the bike leans—your center of mass is fighting the lean, forcing the tire to work harder to generate the same cornering force. Slightly shifting your torso toward the inside of the turn and keeping your head roughly over the inside grip or mirror effectively reduces required lean angle for a given speed, giving you a grip buffer.
At the pegs, think of vertical load as a way to “route” your weight. Standing slightly or loading the outside peg in a corner doesn’t magically add grip, but it helps stabilize the chassis by feeding more force through the rigid frame and less through your arms. That decouples your upper body from bar inputs, reducing unintended steering oscillations. The more deliberate you are about where you load the bike, the calmer and more predictable it becomes.
2. Throttle as a Chassis Tool, Not Just a Speed Control
Most riders treat the throttle as an on/off speed control. Advanced riders treat it as a continuous chassis adjustment tool. Your chain pull angle, rear suspension extension, and weight distribution are all being rewritten every time you move your right wrist—even a few percent.
When you roll off the throttle mid-corner, engine braking shifts weight forward, unloads the rear, and can increase lean angle for the same radius if you don’t adjust your line. A sudden, large roll-off can spike the front tire’s workload as it gains more vertical load and lateral demand simultaneously. That’s why unplanned “chop the gas” moments in corners often feel sketchy, even if you’re below the tire’s actual grip limit.
A disciplined “maintenance throttle” approach stabilizes all of this. Once you’ve committed to lean and entry speed, you want a very slight positive throttle—just enough to keep the rear from fully unloading. This helps the rear suspension sit in the middle of its stroke instead of topping out, keeping geometry constant and improving compliance over bumps. You’re not trying to accelerate yet; you’re trying to freeze the bike’s attitude.
As you approach the apex and can see the exit, you then start a smooth, linear roll-on. Think of it as “draw a straight line of throttle increase from apex to exit,” matched to your available sight line and room. This progressive roll-on shifts load rearward, slightly raises the front, and lengthens wheelbase—exactly what you want for a stable, hooked-up drive out of the corner.
The technical key: never “step” the throttle in chunks. Every bump or plateau in throttle position translates into a bump in chain tension and rear suspension reaction. Aim for a single, clean, continuous curve of throttle change through the corner, not a series of corrections.
3. Brake Pressure Profiling: Building the Perfect Deceleration Curve
Braking is not a single event; it’s a pressure profile over time. The best riders don’t just “brake hard”—they control how fast braking force ramps up, how steady it stays, and how it decays as they release. That curve needs to match available grip, suspension travel, and corner entry demands.
On initial application, your job is to let the front tire “wake up” and build grip before demanding peak deceleration. A proper pressure profile starts with a very quick but not instantaneous ramp: about 0.2–0.3 seconds from first contact at the lever to strong braking. This lets fork compression and tire deformation happen together, preventing a harsh geometry spike. Think: fast squeeze, not jab.
Once the fork is compressed and the tire is fully loaded, you can carry a constant deceleration level. This “plateau” phase is where you do most of your slowing, and it should feel solid but not panicked. If your head is snapping forward or you’re death-gripping the bars, your profile is too aggressive or inconsistent. Smooth, high but stable pressure is the goal.
Trail braking—the art of carrying some brake past turn-in—is simply an extended, controlled decay of that pressure through the corner entry. As you lean, you must feed out brake pressure at a rate that frees up enough grip for cornering. More lean = less brake. The decay should be smooth and continuous from upright to your maximum lean, generally ending right around or just before apex.
A useful self-check: if you can’t describe your braking sequence in discrete phases (ramp up → hold → decay), you’re probably riding with on/off braking instead of a controlled pressure curve. Practicing this deliberately, even at moderate street speeds, translates directly into better emergency braking and more confidence at higher pace.
4. Vision Bandwidth: Running a Two-Layer Visual System
“Look where you want to go” is kindergarten advice. Serious riding requires a two-layer visual strategy: a far-field planning layer and a near-field execution layer, running in parallel. If your eyes are only doing one job at a time, you’re already behind.
Your far-field layer (typically 3–8 seconds ahead, depending on speed) is for trajectory planning: where is the road going, what hazards exist, where are your reference points, and what is your exit direction? On a twisty road, this means consistently lifting your gaze to pick up vanishing points, surface changes, and cross-traffic well before they influence your bike.
Your near-field layer (roughly 0.5–2 seconds ahead) is for surface detail and fine adjustments: potholes, gravel patches, tar snakes, manhole covers, painted lines. This is where micro line changes happen—small bar or weight shifts to avoid specific threats without blowing up your general path.
The high-level play: your mind alternates focus between these two, but your eyes must constantly feed both. Practically, this means softening your gaze—avoid hard “staring” at one spot. Your default should be tracking the far exit, with quick, flicking scans downtrack for surface checks, then back up to the exit. The road should feel like it’s moving toward you, not like you’re tunneling into a single point.
Training tip: on a known stretch of road or a safe practice area, verbally call out what your far-field is doing (“tightens left,” “crest then right,” “intersection ahead”) and what your near-field is showing (“gravel right side,” “manhole center lane”). This forces your brain to run both layers instead of collapsing everything into one overwhelmed reaction.
5. Tire Temperature and Pressure: Treating Grip as a Managed Variable
Most riders talk about grip like weather—something that just happens to them. In reality, your available traction on any given ride is largely dictated by two controllable parameters: tire pressure and tire temperature. Treating these like tunable variables instead of background conditions immediately upgrades your feel and safety margin.
Street riders often run manufacturer-recommended pressures meant for full load, higher speeds, and longevity. In solo, spirited riding, those pressures can leave your tires running cooler and less compliant than ideal. A modest, informed reduction (for example, 2–3 psi below max recommended for solo sport riding, while still within manufacturer limits) can help the tire deform more, build temperature, and increase mechanical grip. But going too low overheats the carcass, slows steering, and can risk carcass damage—this is not guesswork territory.
Temperature is the hidden half of this equation. On a cold morning, your first few corners on “cold” tires may have drastically reduced grip compared to the same lean angles after 20 minutes of riding. Street tires don’t need race-tire levels of heat, but they absolutely do need some internal flex and use before they perform at their best. Riding aggressively on a cold tire set is essentially asking a low-energy rubber compound to do high-energy work.
A practical, technical habit: check your tire pressures cold at home with a decent gauge, then monitor how the bike feels after 20–30 minutes of riding. If the bike feels harsh and skittish even when warm, you may be over-pressured. If it feels vague, slow to turn, or if the sidewalls look visibly over-flexed, you may be under-pressured. When possible, measure hot pressures after a spirited session and compare to your cold values—you’ll start to see your own pattern of pressure rise, which tells you how hard you’re working the tire.
The goal isn’t to chase a “perfect number” you read online; it’s to understand how pressure and temperature interact on your bike, with your weight, in your conditions—and adjust within safe, manufacturer-approved ranges to keep the tire working in its designed window.
Conclusion
Riding “better” isn’t mystical. It’s the sum of very specific, very repeatable techniques you can engineer into your habits: how you load the bike, how you use the throttle to stabilize the chassis, how you shape your braking pressure over time, how you divide your visual bandwidth, and how you manage the physics of your tires instead of praying to them.
Pick just one of these technical points and dedicate a week of riding to it—consciously, deliberately. Then rotate to the next. Over time, you won’t just feel smoother; you’ll have a mental model of why the bike is doing what it’s doing under you. That’s when riding stops being reactive and starts becoming precise, intentional, and deeply addictive.
Sources
- [MSF Basic RiderCourse Rider Handbook (Motorcycle Safety Foundation)](https://msf-usa.org/basic-ridercourse/) - Foundational principles on vision, braking, and control from a leading rider training organization
- [BMW Motorrad Rider Training – Riding Techniques](https://www.bmw-motorrad.com/en/experience/world-of-bmw/rider-training.html) - Manufacturer-backed insights into advanced riding techniques and chassis control
- [Bridgestone Motorcycle Tire Tech Info](https://www.bridgestonemotorcycletires.com/en-us/motorcycle-tires/learn/technical-information) - Detailed guidance on tire pressure, temperature, and load characteristics
- [U.S. NHTSA Motorcycle Safety Overview](https://www.nhtsa.gov/road-safety/motorcycles) - Data-driven context on motorcycle dynamics and safety considerations
- [University of Wisconsin–Madison: Motorcycle Dynamics Lecture Notes (Archived PDF)](https://minds.wisconsin.edu/bitstream/handle/1793/64530/Motorcycle_Dynamics.pdf) - Technical background on motorcycle stability, load transfer, and tire forces
Key Takeaway
The most important thing to remember from this article is that this information can change how you think about Riding Tips.


