Motorcycle gear isn’t just about surviving a crash. If you think like an engineer, it’s also about managing information: what you see, what you hear, what you feel, and how clearly others can see you. When you treat your helmet, comms, and visibility gear as an integrated signal system instead of a random pile of accessories, your riding becomes sharper, safer, and less fatiguing—especially at real-world highway speeds.
This is a deep dive into building a signal-first gear setup: helmet, visor, audio, lighting, and high-viz strategy, built around five technical points that serious riders can actually exploit on the road.
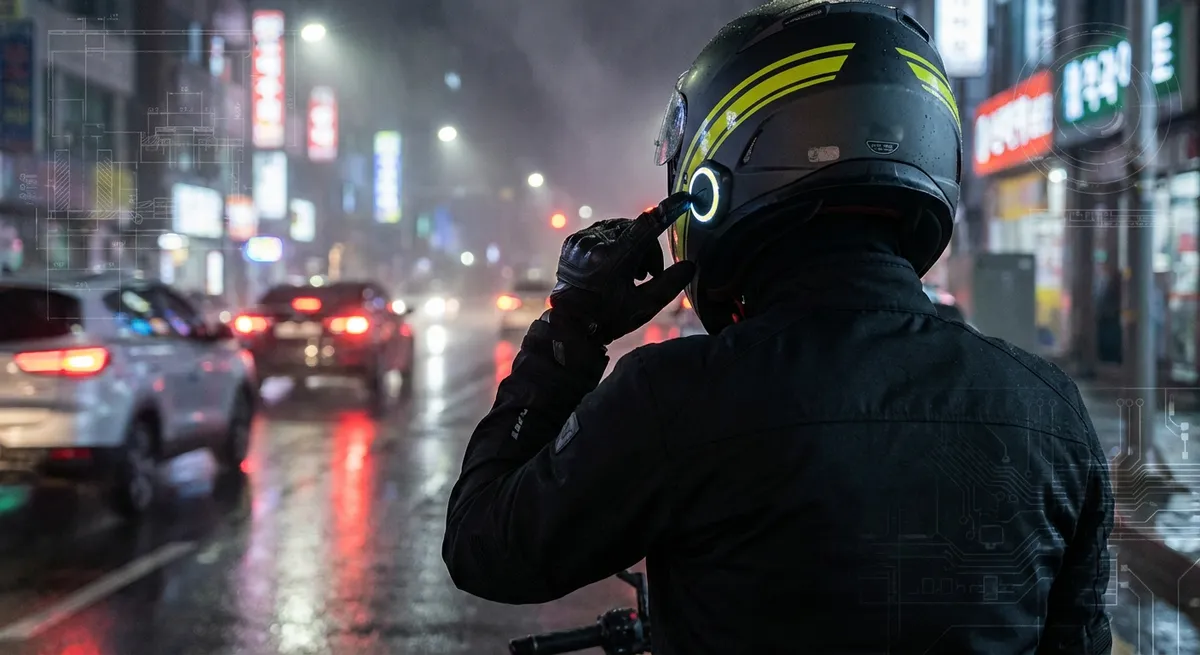
The Helmet as a Sensor Platform, Not Just a Shell
Most riders think of helmets as static protection: EPS liner, outer shell, comfort padding, done. But from an engineering perspective, your helmet is a sensor platform sitting at the convergence of airflow, sound, and vibration. Choosing and configuring the right one changes what information gets to your brain—and how clean that information is.
A good starting point is understanding shell construction and stiffness. Composite shells (fiberglass, carbon fiber, or fiber-reinforced resins) can distribute impact forces more effectively than basic polycarbonate, but stiffness is a double-edged sword. Too stiff with inadequate EPS tuning can spike transmitted acceleration; too soft and the shell bottoms out. Look for helmets where the manufacturer publishes multi-density EPS usage and impact testing beyond the basic regulatory minimums (DOT, ECE 22.06, Snell, etc.). Multi-density EPS lets different zones of the helmet manage different impact energies more precisely.
Next, treat fit as a structural problem, not a comfort issue. A correctly sized shell with the right internal shape (intermediate oval, long oval, round, etc.) ensures the helmet’s energy management system works as designed. If the helmet can rotate or shift under your hands when strapped and snug, you’re compromising the load path in a crash and increasing rotational acceleration to your brain. That rotational component is a major factor in concussion and brain injury, which is why technologies like MIPS and similar slip-liner systems exist—to decouple the shell from the head and reduce rotational forces.
Third, examine visor and seal engineering. A flexible, optically correct visor with a stiff mounting mechanism and even pressure around the gasket does more than keep out rain—it stabilizes airflow, reduces buffeting, and cuts down noise. A warped or poorly sealing visor disrupts boundary layer flow around the helmet, generating turbulent shear layers that your neck and ears have to absorb. The result: more fatigue, less sensory clarity at speed.
Finally, understand that your helmet is not just crash armor; it’s your primary interface with the air. The shell shape, vent layout, and rear spoiler design dictate how stable your head is at 70–90 mph. Aerodynamically efficient helmets minimize yaw and lift moments that try to twist or pull your head when you look over your shoulder, leaving more bandwidth for perception and decision-making. You’re not just buying comfort—you’re buying signal fidelity.
Optical Engineering: Visors, Tints, and Contrast as Safety Tools
Your eyes are your highest-bandwidth sensor. Optical engineering in your visor and eyewear can either sharpen or corrupt that signal. Instead of just choosing “clear vs tinted,” think in terms of contrast management, distortion control, and adaptation across lighting conditions.
Start with optical class and distortion. High-end helmet manufacturers often use visors that meet optical Class 1 criteria (minimal distortion across the field of vision). Distortion creates small but continuous corrections in your eye muscles and brain—harmless for a short ride, but fatiguing over hours. When you pan your head, straight lines (lane markings, utility poles) should remain straight and undistorted; if they warp, your visor is lying to your visual system.
Next, consider tint and spectral response. A dark smoke visor cuts glare, but it also kills contrast in low light and can obscure surface texture on the road—critical for reading gravel, tar snakes, and wet patches. Photochromic (self-tinting) visors and inserts can be a strong compromise, but they respond to UV, not purely visible light, and may lag when moving from bright sun into tunnels or dense shade.
For all-day, variable conditions, look at contrast-enhancing tints similar to those used in performance eyewear (amber, copper, or rose tints). These can enhance contrast by selectively filtering parts of the spectrum, making textures and surface irregularities “pop” more than with neutral smoke. The goal isn’t style; it’s to increase detection probability of threats that only exist as subtle visual cues.
Anti-fog is a thermal and moisture management problem, not just a chemical coating issue. Pinlock-style dual-pane systems effectively create an insulating air gap, similar to double-glazed windows. That reduces the interior surface’s tendency to drop below dew point and fog. Riders in cold or wet climates should treat a proper anti-fog insert as mandatory; a fogged visor is failure of primary sensing, not a minor annoyance.
Finally, don’t neglect night riding optics. Clear, unscratched visors with strong anti-reflective (AR) coatings and well-managed interior reflections dramatically reduce halos and veiling glare from oncoming headlights. Combine this with a correctly aimed, well-patterned headlight and supplemental lighting (more on that below), and you’re no longer guessing at the difference between a pothole and a shadow.
Acoustic Management: Controlling Noise Without Killing Useful Sound
Noise is not just “annoying”—it’s a mechanical load on your auditory and nervous system. At highway speeds, even a quiet helmet can expose you to 95–105 dB of wind noise; long enough exposures in that range contribute to hearing loss and fatigue. The challenge is to reduce non-informative broadband noise while preserving high-value sound cues like sirens, horns, and engine behavior.
Wind noise at the ears is dominated by turbulent airflow and pressure fluctuations around the neck roll and visor area, not just raw volume. A well-designed helmet-necktube-jacket interface acts as a seal, reducing the formation of high-energy vortices that pump noise into your ear canal. This is where neck gaiters, balaclavas, and correctly fitted cheek pads matter more than most riders realize—they are acoustic components in your system.
On the ear protection side, look at filtered earplugs, not just generic foam. Good motorcycle-specific plugs use acoustic filters that attenuate harmful, high-energy broadband noise while preserving relative clarity for speech and sirens. Foam plugs often over-attenuate the entire spectrum, making many riders ditch them because they “can’t hear anything.” The goal is selective attenuation, not total muting.
Your motorcycle’s windscreen and bodywork can be tuned as part of your acoustic system. A screen that dumps turbulent wake right at your helmet is worse than no screen at all. Small changes in screen height, angle, or the addition of a spoiler can shift the turbulent zone above or below your head. Some riders get better quietness by lowering screens to get “clean” airflow at the helmet rather than sitting in a noisy pressure pocket.
Don’t forget the interaction with communication systems. Helmet speakers need to be positioned directly over your ear canals to maintain clarity at lower volumes; off-axis placement forces you to crank the volume, increasing fatigue. Foam spacers behind the speaker pods can move them closer to your ear for a better acoustic coupling without pressing painfully on the ear cartilage.
When you align helmet choice, neck seal, ear protection, and screen aerodynamics, you’re not chasing luxury. You’re preserving cognitive headroom—freeing your brain from the constant mechanical strain of high noise so it can actually process road information more effectively.
Integrated Communications: Designing a Low-Distraction Audio and Control Layout
Helmet comms can either feel like a mission-grade tool or a toy stuck on the side of your head. The difference is whether you treat it like an integrated system or just a Bluetooth sticker. From an engineering perspective, you’re solving three problems: signal quality, input ergonomics, and cognitive load.
On signal quality, prioritize antenna placement and module integration rather than raw feature lists. Integrated helmets (those designed around a specific comms unit) often have antenna channels molded into the shell or lining, improving range and consistency without external draggy modules. If you use a universal clamp-on system, position it where the shell curvature keeps it close to your head but in clean airflow to minimize wind noise around the microphone.
Microphone selection and placement is a directionality and noise-rejection problem. Boom mics and low-profile wired mics can both work if they’re set up in the helmet’s calm air pocket (usually just behind the chin bar vents). Pair that with a properly tuned noise gate and wind noise reduction in the firmware, and you can keep comms intelligible without overdriving the mic. Many riders sabotage their own setups by letting the mic sit too far away or directly in the main vent path.
Controls should be treated like human-machine interface (HMI) design. If you can’t reliably operate volume, call, and music controls with gloves on without glancing at the unit, your layout is wrong. Larger, well-differentiated buttons or jog dials are superior to flat strips with multi-function taps when your hands are cold and your attention is on traffic. Voice control can help, but only when its recognition is reliable and latency is low; otherwise, it adds frustration and distraction.
From a cognitive standpoint, use configuration discipline: pre-set your audio levels, intercom pairings, and navigation prompts before rolling. Avoid constant fiddling on the move. Music and podcasts can be fine at low volumes, but they must never mask important sound cues or navigation prompts. Treat your audio like an information hierarchy—navigation and alerts at the top, intercom next, entertainment dead last.
Finally, integrate your comms with device placement strategy. A phone in a mount on the bars exposes it to vibration that can damage camera stabilizers on some modern phones and tempts you to visually interact with the screen too often. Tank bags with transparent windows or quick glances at a smartwatch running nav prompts can be lower-distraction alternatives. The comms system’s job is to turn that visual information into actionable audio cues, not to be a second screen.
Visibility as a System: Lighting, Contrast, and Motion Cues
Being seen isn’t just about brightness; it’s about conspicuity engineering—how quickly and accurately others can detect, localize, and predict your presence. Instead of throwing random LEDs at the bike, design a visibility system that leverages human perception.
Start with your headlight beam pattern, not just lumens. A well-aimed, properly patterned headlight with a sharp cutoff and even spread helps you see and be seen without dazzling oncoming traffic. Many factory halogen setups are underwhelming; high-quality LED or HID retrofit kits that maintain correct focus and pattern can be a significant upgrade, but only if they’re optically compatible with your reflector or projector housing. Mis-aimed or badly focused “brighter” lights can paradoxically make you less safe by provoking other drivers or washing out your contrast.
Auxiliary lights should be treated as pattern shapers, not just extra brightness. Mounting small “ditch lights” lower and wider on crash bars, fork legs, or engine guards creates a larger light triangle. This triangular light signature is easier for drivers to judge distance and closing speed from compared to a single point source. Some riders pair low-aimed wide floods with a more focused center spot for distance vision.
On the rear, brake light modulation can be effective when used within legal and sane limits. Brief, rapid flashes when you initially apply the brakes, followed by a steady state, can capture attention without being obnoxious. Some aftermarket controllers allow programmable patterns and brightness levels. Side visibility is often ignored—adding reflective wheel tape or side marker LEDs at axle height creates lateral cues that help drivers see you at intersections and during lane changes.
Your gear is also a high-visibility surface. Instead of thinking only in terms of neon yellow vs. black, think in terms of contrast patches and motion cues. High-viz accents at moving joints—shoulders, elbows, knees, ankles—are powerful because the human visual system is tuned to detect biological motion. A black jacket with strong reflective or high-viz articulation at shoulders and elbows can be more effective at night than a solid hi-viz block that blends into other visual noise.
Helmet color and graphics can assist in head localization. Bright or contrasting helmets, especially with reflective elements, make your head movement visible as you shoulder-check, scan, and lean. That small bit of extra dynamic visibility can make drivers more likely to recognize you as a human controlling a vehicle rather than an abstract light source.
Treat visibility as an integrated system where lights, reflectivity, color, and motion all work together. The objective is not to “look bright”—it’s to be rapidly detectable and accurately trackable in the visual chaos of real traffic.
Conclusion
When you stop treating gear as a random collection of products and start treating it as a signal engineering problem, everything about your ride changes. Your helmet becomes a tuned sensor housing, your visor a precision optical element, your comms a low-latency information channel, and your lighting and high-viz setup a conspicuity system built around how human perception actually works.
The payoff is real: lower fatigue, cleaner information, higher confidence at speed, and more margin when things go sideways. Riders obsess over horsepower and tire choice; the ones who last obsess just as hard over the quality of the signals reaching their brain.
Build your kit like an engineer. Your riding will feel different—because, at a fundamental level, it is.
Sources
- [NHTSA – Motorcycle Safety: Helmets](https://www.nhtsa.gov/motorcycle-safety/choose-right-motorcycle-helmet) - U.S. government guidance on helmet standards, fit, and safety considerations
- [Snell Memorial Foundation – Helmet Safety Standards](https://www.smf.org/standards) - Technical details on impact testing, EPS design, and certification criteria
- [CDC – Loud Noise Can Cause Hearing Loss](https://www.cdc.gov/nceh/hearing_loss/what_noises_cause_hearing_loss.html) - Data on noise levels, exposure time, and long-term effects relevant to riding with wind noise
- [IIHS – Headlight Ratings and Visibility](https://www.iihs.org/ratings/headlights) - Research on headlight performance, beam patterns, and their impact on real-world safety
- [3M – High-Visibility Safety Apparel and Retroreflective Materials](https://www.3m.com/3M/en_US/road-safety-us/transportation-safety/high-visibility-safety-apparel/) - Technical information on reflective materials and conspicuity for roadway users
Key Takeaway
The most important thing to remember from this article is that this information can change how you think about Gear & Equipment.


