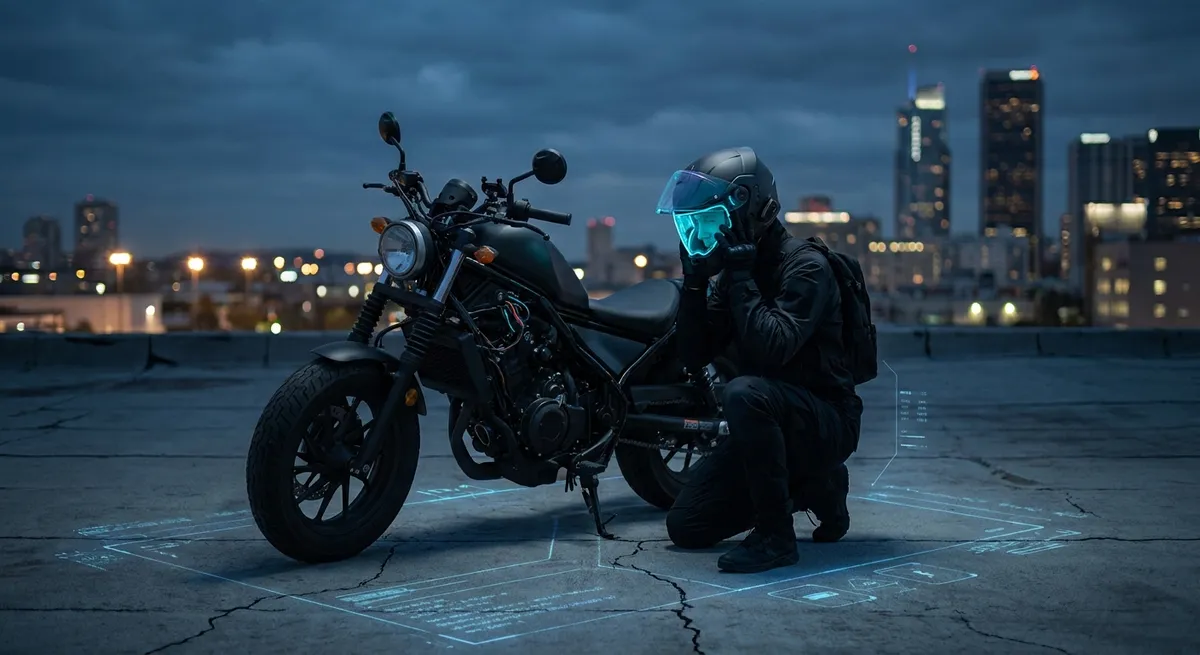
When speeds rise and margins shrink, your helmet isn’t just a shell and a visor—it’s your primary sensor housing, your acoustic chamber, and increasingly, your data display platform. If you care about real-world performance, comfort, and awareness, you should be thinking about your helmet and any heads-up tech as an integrated information system, not just protective gear with a gadget bolted on.
This is about engineering a signal-rich, noise-controlled cockpit right at your head: optical clarity, acoustic management, airflow strategy, and how to integrate cameras, comms, and HUDs without turning your helmet into a turbulent, neck-fatiguing sail.
Below are five technical pillars that turn a “nice helmet with gadgets” into a signal-ready system for serious riders.
1. Optical Clarity: Engineering Your Primary Sensor
Your visor is your main sensor window. If it’s optically sloppy, everything else downstream—reaction time, line choice, hazard detection—gets compromised.
Key technical points:
Optical class and distortion
- Many high-end visors are rated to EN 166 Class 1 or similar optical standards (primarily from industrial eye protection). - Class 1 means minimal refractive distortion across the viewing area; straight lane markings remain straight, not bent or warped at the edges. - Distortion forces your eyes to constantly re-focus micro-corrections, increasing fatigue and subtly degrading depth perception.
- Anti-fog technologies: chemical vs. physical solutions
- Hydrophilic coatings (built-in anti-fog) absorb and spread moisture, but degrade with time, abrasion, and chemical cleaners.
- Pinlock-style double shields use a physical air gap to create a mini “double glazing” effect, dramatically reducing fog because the inner surface is closer to ambient temperature.
- For all-weather riders, a properly tensioned Pinlock insert is more reliable than relying on coatings alone.
Spectral filtering and real-world contrast
- Tinted and photochromic visors aren’t just about comfort; they change how you perceive contrast. - Light yellow/amber tints can increase perceived contrast in flat light by filtering part of the blue spectrum, which can help with mid-day haze or fog. - Dark smoke visors must comply with local light transmission regulations (often around 50–80% for legal use on road); too dark and you lose shadow detail, especially at dusk.
HUD projection and focal distance
- When integrating a heads-up display, the key spec isn’t just brightness; it’s virtual focal distance. - A well-engineered HUD projects data as if it’s several meters ahead (commonly 2–5 m), so your eyes don’t have to snap focus between your dash/HUD and the road surface 30–50 m ahead. - Poorly designed HUDs that appear “on the visor surface” force near-far focus changes, slowing perception and increasing strain.
Glare control and ghosting
- Curved visors can produce internal reflections—your own dash or HUD reflecting back at you in low light. - Look for anti-reflective (AR) treatments on the inside surface where available, and test your setup at night with your dash at full brightness; if your own instruments are ghosting across the visor, dim the dash or reposition HUD elements.
Action point: Treat your visor + HUD as an optical system. Prioritize low-distortion visors, robust anti-fog, and HUDs with proper focal distance. Night-test your setup before committing to long rides.
2. Acoustic Management: Tuning the Helmetscape Instead of Just “Wearing Earplugs”
Helmets are acoustic cavities. The way air flows over vents, neck rolls, and shell shapes determines the sound pressure levels bombarding your eardrums—and the clarity of your comms.
Decibels and fatigue thresholds
- At highway speeds, helmet noise can easily exceed 95–100 dB inside the shell. - Occupational guidelines (like those from NIOSH) consider 85 dB over 8 hours the threshold where hearing protection is recommended; at 100 dB, safe exposure drops to ~15 minutes. - This isn’t just long-term hearing loss; constant high dB accelerates cognitive fatigue and slows reaction time.
- Turbulence vs. pure volume
- Not all noise is equal. Low-frequency “rumble” is less cognitively damaging than chaotic mid/high-frequency turbulence.
- A helmet that is “quieter on paper” but full of high-frequency hiss can be more fatiguing than one with a dull, low roar.
- Turbulent zones often come from the collar area, side pods, and poorly sealed visors/vents, not just overall shell shape.
Neck curtain and pressure equalization
- Adding a well-fitted chin/neck curtain can reduce turbulent inflow under the helmet, cutting both noise and buffeting. - But a fully sealed lower section without appropriate internal vent routing can fog visors faster in humid conditions. - The best solutions combine a snug neck roll with controlled intake/exhaust channels that manage both pressure and temperature.
Speaker placement and noise floor
- Communication systems are limited by the signal-to-noise ratio, not just speaker power. - Once ambient noise inside the helmet is ~80–90 dB, boosting speaker volume just shoves more sound pressure at your ear. - Correct placement—centered over the ear canal, flush with the liner—reduces the needed volume for speech intelligibility.
Earplugs tuned to the task
- Universal foam plugs often cut more high-frequency content, which coincidentally is where a lot of wind noise (and speech consonants) live. - Advanced filtered plugs (musician-style) maintain more natural frequency balance, improving your ability to hear sirens and speech while still lowering overall dB. - Combined with a quieter helmet, you can often hear comms better at a lower perceived loudness level.
Action point: Think like an acoustical engineer. You’re not just trying to “make it quiet”—you’re trying to reduce chaotic turbulence, protect hearing, and preserve clear communication at the lowest possible volume.
3. Aerodynamics and Mass: Helmet Add-Ons Without Punishing Your Neck
Every GoPro, comm unit, or HUD module adds drag, lift, and yaw moments to your helmet. At 120 km/h, these tiny devices can create surprisingly large torque loads on your neck.
Drag grows with the square of speed
- Aerodynamic drag force ≈ ½ × ρ × Cd × A × v². - Add even a small frontal area (A) from a camera sticking into the airstream and the force at 120–140 km/h (75–85 mph) becomes non-trivial. - This is why setups that feel “fine” at city speed suddenly feel like neck workouts on the freeway.
Mounting position and moment arms
- The further away from the helmet’s center of pressure (and your neck pivot) you mount something, the greater the torque. - Top-mounted action cams create lift and can yank your head backward in strong gusts; side mounts generate yaw that twists the neck, especially when checking blind spots. - Tucking devices close to the helmet’s side contours and as low as possible reduces both drag and moment arms.
Shape matters more than weight at speed
- A low-drag, integrated comm unit that adds 50–80 g but sits flush can be less fatiguing than a lighter but boxy camera mount punching into the airflow. - Smooth transitions from shell to device—fairings, tapered mounts—help keep flow attached longer, reducing vortex shedding and buffeting.
Shell design and spoiler function
- Modern sport-touring and track-focused helmets often include tunable spoilers designed to reduce lift and improve stability between ~80–200 km/h. - These spoilers only work correctly within the intended flow regime; bolting gadgets in front of them or altering rear shell shape can negate their benefits. - Match your add-ons to the helmet’s native aero lines; don’t put gear where the manufacturer is visibly trying to keep flow clean.
Weight distribution and dynamic load
- Static weight (helmet + gear on a scale) is only part of the story; dynamic load under braking, acceleration, and crosswinds is what your neck feels. - A 1,600 g helmet with well-balanced, tucked-in accessories can be easier to live with than a nominally lighter setup with high, forward or side-heavy mounting. - Carbon or composite shells reduce base mass, leaving more “aero budget” for electronics before fatigue kicks in.
Action point: Design your helmet setup in profile. Aim to keep all add-ons inside the silhouette of the shell, low and as close to the neck pivot as practical. Treat anything that sticks out into clean airflow as a performance penalty.
4. Power, Cabling, and Weather Sealing: Electrical Systems That Survive Real Road Abuse
Once you introduce HUDs, cameras, intercoms, and possibly integrated brake lights, your helmet turns into an externalized electronics bay. The constraints: impact safety, weather sealing, and field-serviceability.
Battery mass and placement
- On-helmet batteries should be sized for mission length + safe margin, not “as big as possible.” - Concentrate mass near the sides or slightly rearward at the base; avoid heavy packs high and forward where they amplify pitch forces during braking. - If your commuting or touring profile is long, consider bike-powered systems (via power banks in pockets or direct bike-to-device cabling) to keep helmet mass stable.
Ingress protection (IP) ratings
- Look for at least IPX4+ (splash resistant) for external helmet devices; heavy users in rainy climates should look toward IPX5–IPX7 equivalents. - Real-world: grommet seals on wiring pass-throughs and well-designed rubber port covers matter more than marketing terms; inspect how the case actually seals. - Avoid running bare USB connectors on the outside of the helmet without sealed boots; water wicks down cables faster than you think.
Cable routing and strain relief
- Any internal wiring (for speakers, mics, HUD modules) should follow existing liner channels and avoid crossing EPS foam in ways that might interfere with impact performance. - Use soft, flexible, low-gauge wire with proper strain relief at each termination; tight 90° bends at the shell or device entry points are failure magnets. - Externally, minimize exposed cable; anything loose becomes a vibrating whip at speed and can generate both noise and distraction.
- Connector logic: detachable vs. permanent
- Critical helmet systems (like a wired, bike-powered HUD) should use quick-disconnect connectors that separate cleanly in a crash.
- Magnetic breakaway connectors can allow easy on/off while preventing the helmet from being tethered during an incident.
- Permanent, glued-in wiring that snakes through the EPS without manufacturer guidance can void certifications and compromise protection.
Thermal considerations
- Helmets don’t dissipate heat well; sealed electronics can cook on sunny days, especially dark-colored shells. - Devices that quick-charge or overdrive LEDs generate heat spikes—check operating temperature specs and shut down thresholds. - If a device feels hot to the touch after a long sunny ride, consider repositioning for more ambient airflow or reducing continuous high-drain modes (e.g., 4K/60 video recording + Wi-Fi streaming).
Action point: Treat power and wiring as safety-critical. Choose IP-rated hardware, plan clean cable routes with breakaway logic, and keep helmet-mounted batteries modest in both size and placement.
5. Data Priority: Designing a HUD and Comms Stack That Helps, Not Hurts
More information is not automatically better. At 100 km/h, your brain is already ingesting high-bandwidth visual and vestibular data. The goal of helmet electronics is high-value, low-intrusion information.
Information hierarchy
- Tier 1 (always-available): speed, navigation cues (next turn, lane choice), high-priority alerts (fuel, engine warning, hazard warnings). - Tier 2 (glance-only / context): music controls, call ID, ambient info (temperature, range estimates). - Tier 3 (parked/slow-speed only): settings, message content, app browsing, camera mode changes. - A good HUD or audio setup keeps Tier 1 available without demanding focus shifts; Tier 3 should effectively lock out at speed.
- Peripheral vs. foveal placement
- HUD elements are best positioned in peripheral vision, not where they compete with the traffic scene. Bottom or lower-corner zones are usually safest.
- Tiny, high-contrast icons are preferable to large opaque blocks; aim for overlays that your brain can interpret almost subconsciously (color-coded arrows, simple symbols).
- Avoid stacking multiple moving items (e.g., a live map, animated speed tape, and notifications) in one cluster; each moving element draws focal attention.
Alert design and cognitive load
- Audio alerts should be distinct, short, and non-musical; musical tones blend with music and are slower to parse. - Haptic feedback (helmet taps from some systems, or handlebar buzzers paired with comms) can offload some alerts to touch, leaving ears for environmental cues. - Over-alerting (e.g., every speed change, every phone notification) trains your brain to ignore the system entirely.
Latency and refresh rates
- GPS-derived speed and navigation overlays should be responsive; noticeable lag (greater than ~0.5 s) between real-world action and HUD display breaks trust. - Video-based HUDs (AR cameras projecting lane or object cues) must maintain a high enough refresh rate and low motion blur to avoid motion sickness—generally 60 fps or better is ideal. - Bluetooth audio latency affects turn-by-turn prompts: if audio lag is high, prompts might arrive a second too late at speed.
Mode discipline and manual overrides
- Pre-configure riding modes for your electronics: - “Solo focus”: minimal alerts, nav only, music off or low. - “Touring”: nav, gentle music, traffic alerts, intercom. - “Urban”: boosted hazard alerts, high-visibility HUD cues, maybe shorter nav look-ahead. - Ensure any voice-command systems can be hard-muted quickly (single physical button, long-press) if they misbehave. - Ride with the system in “minimalist” mode first; then add features incrementally, evaluating whether each addition actually helps your riding.
Action point: Architect your helmet’s information flow like a mission cockpit: clear priority tiers, peripheral placement for critical data, and ruthless elimination of non-essential stimuli when speeds rise.
Conclusion
Your helmet is more than a passive protector; it’s the front-end of your entire riding information system. When you deliberately engineer optics, acoustics, aerodynamics, electronics, and data flow, you transform your setup from “helmet plus gadgets” into a high-fidelity riding interface.
The goal isn’t tech for its own sake. It’s about clearer sightlines in dirty weather, calmer acoustics at cruising speed, a neck that still feels fresh at the end of a long day, and data that shows up exactly where and when you need it—never when you don’t.
Build your helmet and HUD setup like a race engineer, test it like a skeptic, and refine it like a craftsman. The payoff is measured in confidence at speed, precision under pressure, and miles you can ride harder and longer without your brain or body giving up before the bike does.
Sources
- [Snell Memorial Foundation – Helmet Standards](https://smf.org/standards) – Technical details on impact testing, penetration resistance, and certification processes for motorcycle helmets.
- [U.S. Centers for Disease Control and Prevention – Noise and Hearing Loss Prevention](https://www.cdc.gov/niosh/topics/noise/default.html) – Data on decibel levels, exposure limits, and the effects of prolonged noise on hearing and fatigue.
- [SHARP (Safety Helmet Assessment and Rating Programme)](https://sharp.dft.gov.uk/) – UK Department for Transport resource detailing helmet safety testing, impact performance, and comparative ratings.
- [Shoei Helmets – Technical Information](https://www.shoei-helmets.com/technology) – Manufacturer explanations of shell aerodynamics, ventilation design, and visor technology in modern helmets.
- [National Highway Traffic Safety Administration (NHTSA) – Motorcycle Helmet Use and Effectiveness](https://www.nhtsa.gov/motorcycle-safety/motorcycle-helmet-use-and-headlight-use) – Research and statistics on helmet performance, safety benefits, and regulatory context.
Key Takeaway
The most important thing to remember from this article is that this information can change how you think about Gear & Equipment.


