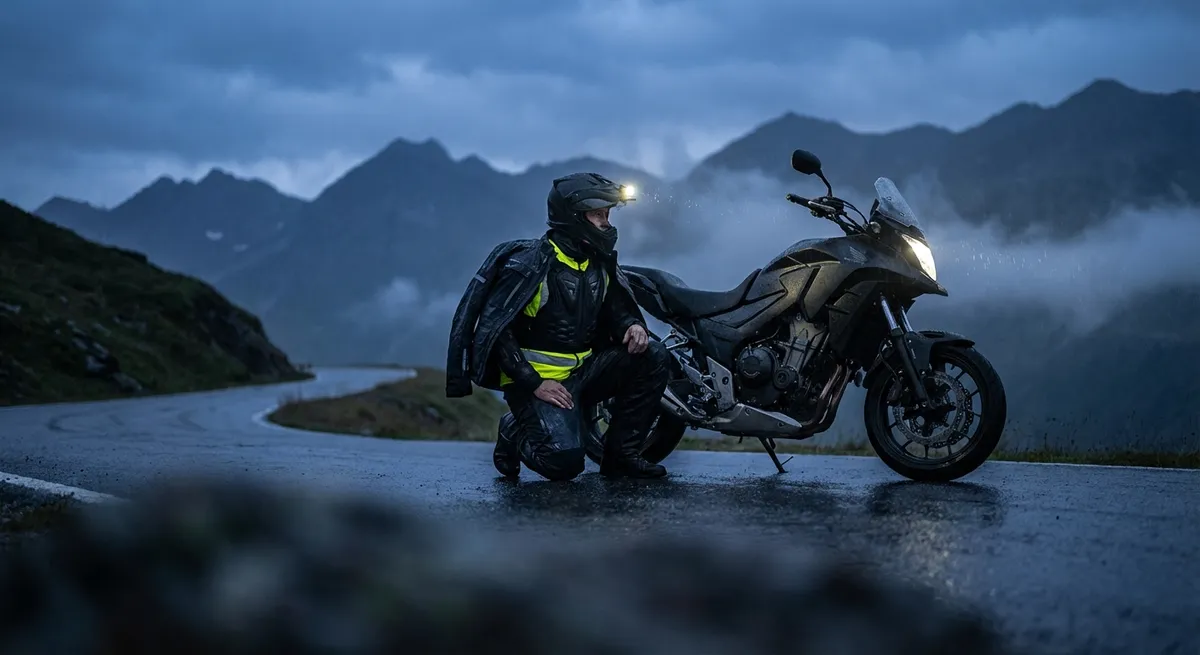
Riding gear isn’t a pile of products—it’s a system of materials, interfaces, and failure modes that either work together or against you when things go wrong. Most riders buy a jacket, then gloves, then boots, and hope it all “adds up.” It rarely does. If you think like an engineer instead of a shopper, you can build a kit that manages impact, abrasion, heat, water, and fatigue as a single integrated package. That’s where real performance—and real safety—lives.
Thinking in Systems, Not Single Items
Stop evaluating gear in isolation. Every piece you wear shares loads, heat, and friction with the others, and those interactions are where the magic (or disaster) happens.
Your helmet doesn’t just protect your head—it influences neck loads if your jacket’s collar is bulky. Your boots don’t just protect your feet—they determine how well you can modulate rear brake and shifter, which changes how you ride in emergency situations. Your base layer doesn’t just “wick sweat”—it affects how body armor stays in place under rotational forces during a slide.
System-level thinking means you ask:
- How do layers slide against each other during a crash?
- Where will water actually pool on this kit in sustained rain?
- What happens to my range of motion when I’m cold, wet, and tired at hour six?
- How fast can I configure this setup from hot/dry to cold/wet without losing protection?
When you start from those questions, you stop building a fashion set and start building a mechanical solution for your body in motion.
Technical Point 1: Impact Protection Is About Deceleration Curves, Not Just “CE Rated”
Most riders stop at “CE Level 1 or 2” and call it good. That rating is just the headline. The real story is how armor manages time under load.
Key engineering realities:
- CE EN 1621-1/-2 ratings are peak-force gates, not full performance maps.
Level 1 limb armor: max 35 kN transmitted.
Level 2 limb armor: max 20 kN transmitted.
But two Level 2 pads can behave very differently in how quickly they reach that peak and how they respond to off-center hits.
- Energy management is about deceleration rate, not just maximum force.
A slower ramp to peak force can be more survivable for soft tissue and bones, even if the max kN is similar. Viscoelastic materials like D3O, SAS-TEC, and Alpinestars Nucleon-like compounds stiffen under impact, buying you a longer deceleration window.
- Coverage and stability matter as much as raw rating.
If your shoulder pad rotates out of position when you reach forward, the effective protection area shrinks. During a tumble, armor can twist off high points like shoulders and knees if it’s not locked to body contours via snug fit and proper pocket design.
- Multi-density vs. single-density.
Multi-density armor (soft backing with a stiffer outer layer) can spread load over a larger area of your body, reducing point pressure. It also handles small hits (like a bar-end punch or curb edge) better than uniform foam.
What to do as a rider:
- Prioritize Level 2 for spine, shoulders, elbows, knees, and hips if possible, but don't accept mushy fit just to get a Level 2 stamp.
- Put the jacket/pants on, then simulate riding posture and a crash position (on your side, arm extended, knees bent) to verify the armor hasn’t drifted off joint centers.
- Look for back protectors that are long and wide, not just “meets EN 1621-2.” Check that they actually cover the lower spine where impacts often occur.
Technical Point 2: Abrasion Control Is a Stack-Up of Layers, Speed, and Seam Failure
Abrasion performance is not just “leather vs. textile.” It’s a stack of fibers, coatings, and seam architectures, all under the thermal load of sliding at highway speeds.
Critical factors:
- Slide time vs. speed.
EN 17092 (the modern garment standard) simulates specific slide durations at defined speeds. AA and AAA ratings correspond roughly to higher impact and slide conditions, but real-world crashes are rarely “single impact then uniform slide.” Expect multiple hits, variable angles, and localized hot spots.
- Fiber type and directionality.
- Leather (1.2–1.4 mm cowhide or kangaroo) still offers superb, predictable abrasion resistance with ductile failure (it stretches and thins before fully tearing).
- High-tenacity nylons (Cordura, 6,6 nylon) and aramids (Kevlar, Twaron) resist melting and maintain structure at higher temperatures than cheap polyesters.
- Many textiles use weave direction to manage tear and burst strength; the “strong” direction may not always align with your likely slide direction.
- Seams are common failure points.
- Double or triple stitching in high impact regions
- Hidden or external safety seams that place the critical stitch away from the primary abrasion surface
- Heavy, high-melt-point threads (often bonded nylon or polyester)
- Reinforcement zones trump uniform thickness.
A jacket with AAA-rated fabric can still fail catastrophically if the construction uses single-needle seams or weak thread on high-risk zones (shoulders, elbows, hips, knees). You want:
Good gear places extra layers or overlays exactly where you’re most likely to hit: outer shoulders, outside elbows and knees, hips, seat, and sometimes upper back. Uniform fabric thickness across the whole jacket usually means the designer didn’t optimize for impact maps.
Smart rider move:
- Aim for AA or AAA jackets and pants for highway riding, especially where you expect higher speeds or limited runoff (urban freeways, twisties with walls or guardrails).
- Inspect the inside of garments: look for reinforcement panels, internal aramid liners, and taped or bound seam finishes.
- Prefer gear where the brand publishes EN 17092 rating and impact/abrasion zone mapping, not just vague “heavy-duty” claims.
Technical Point 3: Thermal Management Is a Power and Concentration Problem
Comfort isn’t about luxury; it’s directly tied to how much cognitive bandwidth you have left for hazard perception, line choice, and micro-corrections. You’re managing a thermal power equation: your body is generating heat, your gear is resisting or dumping that heat, and the environment is either helping or fighting you.
Key realities:
- Your core wants to live around 37°C (98.6°F).
Significant deviation—especially in heat—rapidly degrades reaction time, decision quality, and fine motor control. That’s not opinion; it’s physiology.
- Evaporative cooling requires airflow and low humidity.
Mesh gear works wonderfully in hot, dry environments because sweat can evaporate efficiently. In hot, humid conditions, mesh can just turn you into a convection oven with almost no evaporative benefit.
- Base layers drive moisture transport and feel.
Cotton traps sweat, stays wet, and creates a clammy microclimate that increases perceived cold during night transitions or altitude changes. Technical synthetics or merino wool actually move moisture away from the skin and buffer temperature swings.
- Vent placement and exhaust matter.
- Intake vents in high-pressure areas (chest, shoulders)
- Exhaust vents in low-pressure zones (upper back, rear shoulders)
- Clean airflow path across your torso, not blocked by bulky mid-layers
- Seasonal modularity beats “four-season marketing.”
- Run a highly ventilated outer shell plus add insulating mid-layers when cold
- Or use a laminate shell with controllable vents and layer for insulation and moisture
A jacket with giant front vents but barely any rear exhaust simply inflates and stagnates. You want:
“Four-season” often means “mediocre in every season.” It’s usually smarter to:
Practical setup:
- Pair a synthetic or merino long-sleeve base layer with your main jacket almost year-round, even in heat—it improves sweat handling and reduces chafing and armor hotspots.
- Treat your insulating mid-layer (fleece, synthetic puffy) as a tool you add or subtract during the day, not something permanently sewn into your jacket.
- In real heat (30°C+/86°F), pick gear focused on airflow plus skin coverage, not just maximum mesh area—you still want UV protection and some abrasion defense.
Technical Point 4: Weatherproofing Is About Membrane Architecture and Failure Modes
“Waterproof” is a wildly abused term. What matters is how the membrane is integrated, how seams are sealed, and how the system handles saturation over time.
Key concepts:
- Three main waterproof architectures:
- Drop-liner membranes (floating inside the outer shell): cheaper, decent waterproofing, but outer fabric can soak and get heavy, cold, and clingy—this is “wet-out.”
- Laminated membranes (2-layer or 3-layer): membrane is bonded directly to outer shell, massively reducing water absorption, drying faster, and staying lighter when soaked.
- External rain shells (over-jackets and pants): highest flexibility; you can keep your main gear lighter and only armor it with a waterproof shell when needed.
- Hydrostatic head ratings matter.
A waterproof membrane’s resistance to water pressure is measured in mm (e.g., 10,000 mm, 20,000 mm). Higher numbers indicate better resistance to sustained pressure (like sitting on a wet seat or taking prolonged rain at highway speed).
- Breathability (MVTR) controls internal swamp build-up.
Breathability is often measured as g/m²/24h. Higher numbers indicate better moisture vapor transmission. Low-breathability membranes can be “waterproof” but will drench you in your own sweat during active riding.
- Seam sealing and zip design are common leak points.
If seams in high-exposure zones aren’t fully taped and the main zip lacks a well-designed storm flap or garage, water will eventually find its way in, no matter how “good” the membrane is.
- Wet-out is a thermal and safety problem, not just discomfort.
- You lose insulation (water conducts heat away rapidly).
- Evaporation off the surface can cause aggressive chilling.
- Added weight and cling reduce mobility and increase fatigue.
When your outer fabric saturates:
Smart strategy:
- For serious touring or commuting, favor laminate shells (e.g., Gore-Tex Pro or similar high-end laminates) in your primary jacket/pants if budget allows.
- If you’re cost-conscious or ride in variable climates, run non-waterproof, well-ventilated gear plus a compact, purpose-built over-shell that you can deploy over everything in minutes.
- Always check: taped seams in high-exposure regions, double storm flaps over front zips, and waterproof gaiters or closures at cuffs and hems to keep water from wicking inside via gloves or boots.
Technical Point 5: Fit, Ergonomics, and Control Feedback as a Performance Multiplier
Gear that interferes with your connection to the bike is not neutral—it’s actively reducing your ability to sense and control. Fit is not vanity; it’s signal quality.
Key elements:
- Pre-curved vs. straight-cut patterns.
Good motorcycle gear is patterned for the riding position, not for standing on a showroom floor. Pre-curved arms, articulated knees, and rotated hip panels reduce material bunching at the bars and pegs.
- Tension mapping across joints.
If your jacket binds at the shoulders when you reach full lock or look over your shoulder, you’ll avoid full range-of-motion subconsciously. That’s a direct safety penalty. Conversely, if the fabric is too loose, armor can float and twist during a crash.
- Glove feedback and lever precision.
- Look for pre-curved fingers, minimal seams on the fingertips, and thin but high-performance insulation in control zones.
- Palm materials should strike a balance between abrasion resistance (leather, high-tenacity synthetic) and tactile feedback.
- Boot soles and peg interface.
- Shank inserts to resist flex in the midfoot
- Structured ankle protection that still allows up/down gear shifts
- Sole compounds that maintain grip when wet without being so soft they smear and lose feel
- Neck and helmet interaction.
- Full head turn at highway speeds without the helmet catching on the jacket
- Enough collar height for weather protection without creating a “chin shelf” that the helmet impacts in a tuck or emergency maneuver
Thick, heavily insulated gloves can annihilate brake and throttle feel if not well-designed:
Oversoft soles feel comfy walking but fold on pegs under braking and shifting, costing you finesse and increasing fatigue in the arches. Quality motorcycle boots use:
Bulky collars or stacked neck gaiters can jam against the lower rim of your helmet, limiting head rotation and shoulder checks. A good setup gives you:
How to tune your kit:
- Put on full gear, then sit on your bike on the stand. Run through:
- Full bar lock both sides
- Full rear brake and clutch modulation
- Standing on pegs (if you ride ADV/off-road)
- Full head checks and shoulder checks at simulated speed (tuck slightly, feel for drag or snag)
- Note pressure points, restriction zones, and slipping armor. Adjust, then if needed, change gear. Compromises on the showroom floor become liabilities at 70 mph.
Conclusion
The best motorcycle gear isn’t the most expensive or the flashiest; it’s the kit that has been engineered—by you—to function as a coherent system under impact, abrasion, heat, water, and fatigue. When you understand armor behavior over time, abrasion stack-ups, thermal power balance, membrane architectures, and ergonomic feedback loops, you stop buying products and start building a platform.
This is the difference between “I’m wearing gear” and “my entire setup is working with me at speed.” Riders who think like this ride longer, ride sharper, and walk away from crashes that would have gone very differently with a random mix of parts. Treat your gear like a dynamic engineering problem, and you’ll unlock both performance and protection every time you roll out of the garage.
Sources
- [European Commission – Protective Equipment Standards for Motorcyclists](https://single-market-economy.ec.europa.eu/single-market/european-standards/harmonised-standards/personal-protective-equipment_en) - Overview of harmonized PPE standards, including EN 1621 and EN 17092 for motorcycle protective gear
- [Gore-Tex Technical Information – How Waterproof and Breathable Membranes Work](https://www.gore-tex.com/technology) - Detailed explanation of laminate constructions, hydrostatic head, and breathability concepts relevant to riding gear
- [CDC – Effects of Heat Stress on the Human Body](https://www.cdc.gov/niosh/topics/heatstress/default.html) - Describes how elevated core temperature impacts performance, decision making, and safety
- [Transport Research Laboratory (TRL) – Motorcycle Protective Clothing: Protection from Injury or Just the Weather?](https://trl.co.uk/reports/trl612) - Research report analyzing the performance and limitations of different types of motorcycle clothing in crashes
- [MotoCAP – Motorcycle Clothing Assessment Program](https://motocap.com.au/) - Independent test data on impact and abrasion performance of real-world motorcycle jackets, pants, and gloves
Key Takeaway
The most important thing to remember from this article is that this information can change how you think about Gear & Equipment.


