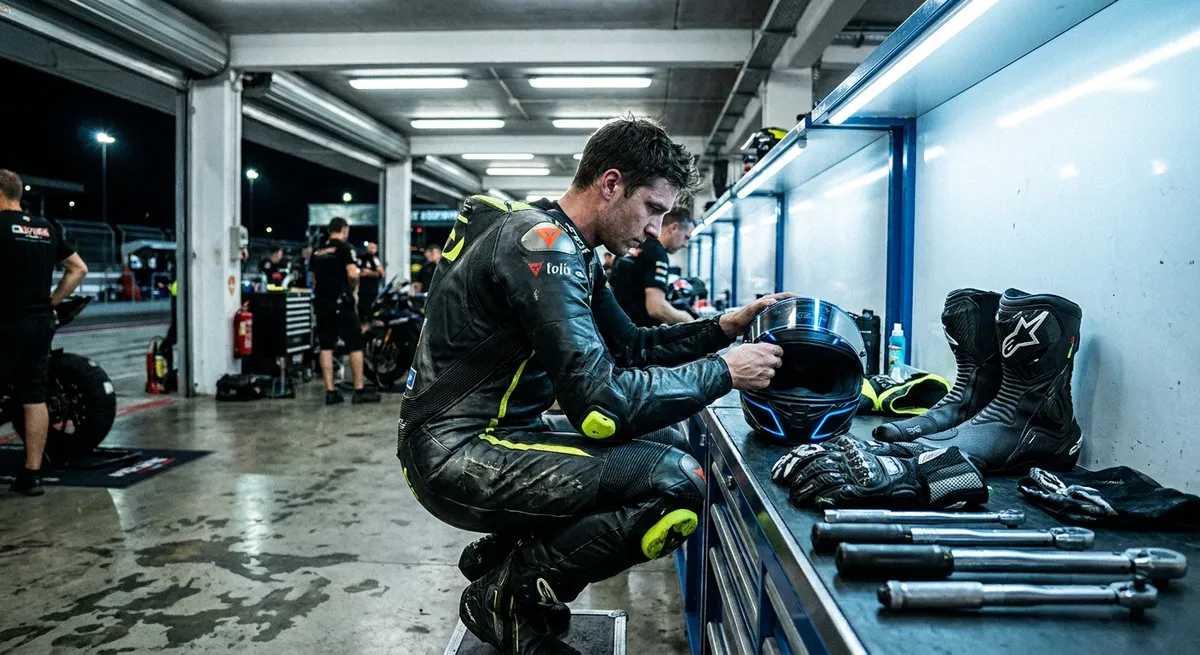
Most riders buy gear by brand, color, and price. Serious riders spec gear the way chassis engineers spec hardware: by load case, failure mode, and performance envelope. When you start treating your riding kit as a distributed safety system instead of “stuff you wear,” your priorities shift fast—and so does your survivability when things go sideways.
This is about building a kit that actually performs at the limit: high-speed slides, violent rotations, heat, abrasion, and blunt impact. Not catalog fantasy—impact physics, textiles engineering, and real-world crash dynamics.
1. Abrasion: Reading CE Labels Like a Materials Engineer
Most riders know “CE-rated” and maybe “AA or AAA,” but they don’t understand what those letters actually represent in physical terms. Abrasion resistance is not a vibe; it’s a quantified duration and energy level.
Under EN 17092 (the current standard for motorcycle garments in the EU):
- Class A/AA/AAA is tested at different impact/slide speeds using a Darmstadt-type machine (EN 17092) instead of the old Cambridge “belt sander” rig (EN 13595).
- AAA is aimed at the highest performance level for road use: higher impact speed and longer exposure time before hole-through.
- Zones are critical:
- Zone 1 (high risk: shoulders, elbows, hips, knees, outer seat) must survive higher loads
- Zone 2 (moderate risk) has slightly lower requirements
- Zone 3 (low risk) is more forgiving
Technical takeaways for actual buying decisions:
- Full-spec shell vs. patchwork: A jacket that is AAA only in the shoulder/elbow patches but A on the entire back is a very different system than one with AA or AAA across every high-risk zone. Look at the garment label, not just the marketing page.
- Textile hierarchy (typical, not absolute):
- Single-layer fashion denim: often barely above casual clothing
- Basic 600D polyester: entry-level A in some zones
- 1000D nylon, Cordura blends, or high-tenacity polyamide: better tear and burst resistance
- Aramid/para-aramid reinforcements or UHMWPE (Dyneema®-type fabrics): significantly improved slide time when correctly weaved and backed
- Premium leather (1.2–1.4 mm, high-quality cowhide or kangaroo): still the gold standard for high-speed friction management
- Seam integrity matters: You don’t slide on “material spec,” you slide on what stays attached. EN 17092 tests seam burst strength; cheap gear often fails not by wearing through the panel, but by splitting along the stitching.
When you see a CE label, decode it like a spec sheet, not a sticker: look for class (A/AA/AAA), garment zones, and any test report details the manufacturer publishes. Gear that’s “AAA in real zones, AA everywhere else” is a different league from “AAA shoulder patches, A shell.”
2. Impact Protection: Matching Armor Types to Real Crash Energies
Impact protectors (armor) are fundamentally energy management devices. Their job is to reduce peak acceleration (g-force) transmitted to bones and organs by spreading impact over time and area.
CE Levels and What They Actually Mean
For limb and back protectors (EN 1621-1 and EN 1621-2):
- Level 1:
- Average residual force ≤ 35 kN
- No single impact above 50 kN
- Level 2:
- Average residual force ≤ 20 kN
- No single impact above 30 kN
Those numbers are not arbitrary. Lower residual force = lower risk of fractures or internal damage for a given impact event. On fast street or track riding, Level 2 for shoulders, elbows, hips, knees, and back should be your default baseline.
Armor Construction: What Actually Works at Speed
Key technical differences:
- Hard-shell + foam hybrids
- Good for dispersing point loads (curbs, pegs, sharp edges)
- Often used in track suits and some ADV gear
- Can be bulkier but excel in sliding scenarios where you want to avoid “grabbing” and tumbling
- Viscoelastic (soft, “memory” armor)
- Flexible at rest, stiffens under impact
- Conforms well to the body, can be more comfortable and keep coverage better during odd body positions
- Performance varies massively by brand and thickness—check CE level and test data, not brand hype
- 3D mesh / multi-layer systems
- Use stacked structures to progressively decelerate impact
- Often used in high-end back protectors and modern chest protectors
Armor performance is also about coverage and stability:
- Full-length back protector vs. short pad that ends mid-spine
- Hip armor that actually covers the femoral head, not just a random foam disc
- Knee armor that tracks the knee cap in flexion, not flopping inside the pocket
If you ride aggressively or at highway speeds, prioritize:
- Level 2 in all major joints and spine
- Chest protection (EN 1621-3) if traffic speeds, group rides, or track are routine
- Garments with tight, adjustable armor pockets to keep everything locked to the joint centers
3. Fit, Kinematics, and How Gear Behaves in a Crash
Most riders test-fit gear in a mirror, standing upright. That’s not how you ride, and it’s definitely not how you crash. You need to think in terms of kinematics: where armor and fabrics move when your body flexes, rotates, and impacts.
Technical fit checks:
- Riding posture audit:
- Does the back protector still cover the full spine down to the tailbone?
- Do the shoulder and elbow pads track the joint centers, or are they drifting off axis?
- Are the knees fully covered when the leg is bent on the pegs?
- High-side vs. low-side movement:
- Low-side: you’re likely sliding mostly on one side; armor must stay centered over contact zones under lateral shear loads.
- High-side: more violent rotations; loose gear can rotate around your body and expose seams or soft tissue.
- Closure and anchor analysis:
- Short jackets without a connection zipper are more prone to riding up and exposing lower back or hips.
- Pants without proper waist closure and ankle tightening can twist or pull down during a slide.
- Tall boots with internal bracing or good shaft height help keep pant cuffs locked and prevent ankle rotation or degloving.
Get on the bike, assume your actual riding stance—sport tuck, ADV neutral, or cruise relaxed. Now check:
One high-value practice: gear system testing. Put on your full kit—base layer, armor, outer shell, boots, gloves—and actually move hard:
- Deep squats, lunges, full lean over the bars
- Roll on the ground (ideally on a clean mat) to see if anything shifts dramatically
- Simulate a slide: lie on your side, twist and extend limbs—look for gaps, exposed skin, or migrating armor
If gear moves excessively in the living room, it will absolutely migrate at 60+ mph on asphalt.
4. Thermal Management: Balancing Comfort and Cognitive Performance
Heat and cold are not just “comfort issues.” They are performance variables that affect reaction time, decision quality, and fatigue. A mentally sharp rider is a safer and faster rider; your gear’s thermal system directly impacts that.
Heat: Managing Sweat, Evaporation, and Core Temp
Key concepts:
- Moisture transport:
- Base layers should be synthetic or merino that wick sweat off the skin. Cotton holds water and kills evaporative efficiency.
- A good base layer under your gear can make a “too hot” jacket workable by improving evaporation.
- Ventilation architecture:
- Intake vents (front) must be paired with exhaust vents (back) to create real airflow, not just “holes in fabric.”
- Large chest/torso vents over large panels of solid armor can be deceptive—air hits armor, not skin. Mesh or channel designs behind armor matter.
- Color and solar load:
- Dark textiles can run significantly hotter in direct sun; if you ride in very hot regions, lighter colors and reflective elements matter beyond visibility—they reduce heat soak.
Performance goal: keep core temperature in a range where your brain stays sharp. Above a certain heat load, reaction times and decision-making degrade measurably, even if you “feel fine.”
Cold: Maintaining Dexterity and Joint Function
Cold impacts:
- Reduced finger dexterity = slower brake/throttle modulation
- Stiff shoulders and neck = worse head checks, slower visual acquisition
- Shivering and muscular tension = fatigue and reduced fine control
Technical solutions:
- Layering logic:
- Base: wicking
- Mid: insulating (fleece, technical insulator)
- Outer: windproof and water-resistant/shell
- Glove strategy:
- Winter gloves with sufficient insulation can reduce feel; heated grips combined with a thinner insulated glove often provide a better balance of dexterity and warmth.
- Wind sealing:
- Neck, cuffs, and waist must be sealed to prevent cold air jets; a small neck draft can chill your core over an hour at highway speed.
Your gear must keep you within a thermal envelope where you can still operate the motorcycle precisely. Comfort is not luxury here; it’s control bandwidth.
5. Visor Optics, Glove Interfaces, and Control Fidelity
You interact with your motorcycle through two primary interfaces: your eyes and your hands. Gear that corrupts either is a performance liability, regardless of impact ratings.
Helmet Optics: More Than Just “Clear vs. Tinted”
Technical criteria:
- Optical class:
- High-quality visors (especially from premium brands) are engineered to be optically correct—minimal distortion across the visual field. Cheap visors often introduce distortions that subtly fatigue your eyes and can mislead depth perception.
- Anti-fog performance:
- Double-pane inserts (Pinlock-style) are effectively a small insulated window; they drastically reduce fogging in cool/humid conditions.
- Anti-fog coatings alone are usually not enough for cold + humidity + heavy breathing.
- Spectral properties:
- Properly certified tinted or photochromic visors are tested for light transmission and UV filtering.
- Non-certified “dark-as-possible” visors may look cool but can severely impair low-light contrast and hazard detection.
A helmet that’s optically clean, quiet, and fog-resistant gives you more visual information, earlier, with less fatigue. That translates directly into better line choices and hazard avoidance.
Gloves: The Control-Information Tradeoff
Gloves are a tension between protection thickness and tactile feedback. The technical goal is to maximize both, not sacrifice one entirely for the other.
Look at:
- Palm construction:
- One or two layers of high-grade leather (or quality synthetic) in the high-wear zone, not five stacked layers of random material.
- External seams in high-pressure grip zones can create hot spots and reduce feel. Internal seams reduce wear on stitching but must be well executed to avoid discomfort.
- Scaphoid and palm sliders:
- Hard or low-friction sliders in the heel of the palm reduce the risk of “grab and tumble” when the hand touches down, letting it slide instead of digging in.
- Finger box design:
- Pre-curved fingers reduce grip fatigue.
- Excessive bulk in finger tips kills lever feel; look for gloves that keep armor coverage without a giant puff at the ends.
For aggressive riding, a high-integrity glove should:
- Use proper abrasion-resistant palm material and a scaphoid slider
- Provide knuckle and finger protection (rigid or advanced viscoelastic)
- Still allow you to feel initial brake pad contact, throttle cable slack (or ride-by-wire pickup), and micro grip pressures
If your gloves feel like oven mitts, you’ve traded too much control for a theoretical safety margin—and you may indirectly increase your crash risk by degrading your ability to modulate inputs.
Conclusion
Spec-driven gear selection is not about fear; it’s about engineering your riding system for performance under worst-case loads. When you start treating your kit as a set of integrated sub-systems—abrasion shell, impact management, kinematic stability, thermal regulation, and control interfaces—the whole decision model changes.
You stop asking, “Is this jacket good?” and start asking:
- What class is it, in which zones, under which standard?
- How does the armor perform and stay indexed when I actually move and crash?
- Does this system keep my brain and hands operating at full resolution for the entire ride?
That’s how you build a rider kit that doesn’t just look ready—it stays ready when the physics get real.
Sources
- [European Committee for Standardization – EN 17092 Overview](https://standards.cen.eu/dyn/www/f?p=204:110:0::::FSP_PROJECT,FSP_ORG_ID:60683,6231&cs=1F2E64E636FEDD6E3B1A1776C5DBD0C7E) – Official information on the EN 17092 standard for protective motorcycle garments
- [British Motorcyclists Federation – Guide to CE Ratings for Bike Gear](https://www.bmf.co.uk/advice/standards-for-protective-motorcycle-clothing/) – Clear explanation of garment classes, zones, and testing methods
- [SHARP – UK Government Helmet Safety Scheme](https://sharp.dft.gov.uk/) – Data on helmet impact performance and visor/optics considerations from a government-backed testing program
- [NIOSH (CDC) – Heat Stress and Heat-Related Illness](https://www.cdc.gov/niosh/topics/heatstress/default.html) – Research-based discussion of how heat affects human performance and safety
- [MotoCAP – Motorcycle Clothing Assessment Program](https://motocap.com.au/) – Independent testing of motorcycle gear for impact and abrasion performance, useful for comparing real-world results across brands
Key Takeaway
The most important thing to remember from this article is that this information can change how you think about Gear & Equipment.


