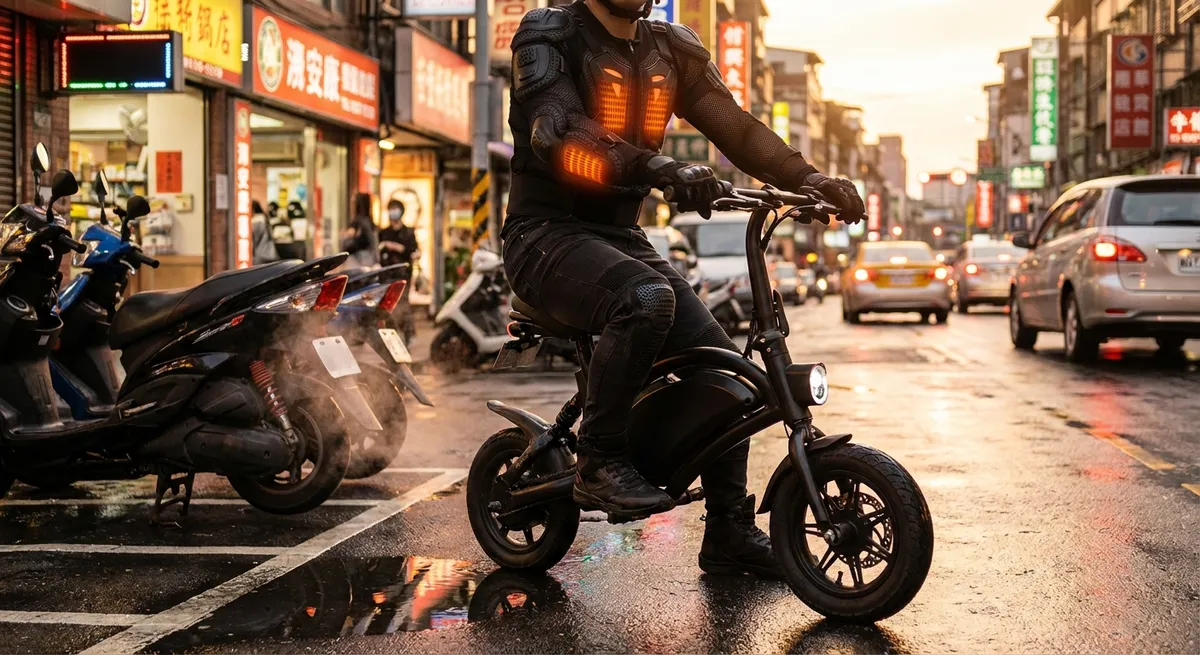
Urban riding isn’t “low risk.” It’s high-frequency, low-margin chaos: short heat cycles, dense traffic, unpredictable surfaces, and non-stop exposure to impact and abrasion threats. Yet most riders still pick city gear like they’re choosing casual clothing, not engineered safety systems. If you split lanes, ride year-round, or hammer through congested downtowns, your gear has to be tuned for micro-mobility: fast on/off, high visibility, and serious protection that still works when the temperature swings 25°F in a single day.
This isn’t about buying more gear—it’s about buying the right architecture of materials, closures, and coverage for how your bike moves through the city. Let’s build an urban kit that treats every red light, every Uber door, and every wet manhole cover like a design problem.
1. Impact Zoning: Matching Armor Levels to Real Urban Crash Patterns
Most gear is built around a generic standard. Urban reality is not generic. Braking, low-side, and car-interaction incidents in the city cluster around specific zones: shoulders, elbows, hips, knees, and the lateral side of the torso. If you ride in dense traffic, your armor layout should reflect that, not just “whatever came in the jacket.”
Key technical points:
- CE levels actually mean something in the city.
- CE Level 1 limb armor (EN 1621-1) allows up to 35 kN of transmitted force.
- CE Level 2 drops that to 20 kN.
In low-speed but high-frequency impact scenarios—exactly what you see in traffic—Level 2 is a major reduction in peak load into your bones and joints.
- Urban riders should prioritize Level 2 for:
- Knees (frequent first impact in low-sides and stoppies gone wrong)
- Hips (side impacts in lane splitting or t-bone scenarios)
- Shoulders (car-door and mirror strikes, plus typical high-side landing point)
- Chest armor is undervalued in town.
Even at 25–35 mph, a direct bar-to-chest or mirror-to-rib hit can break ribs or cause organ bruising. A slim CE chest insert (often EN 1621-3) adds minimal bulk but significantly damps those sudden, focused hits.
- Back protectors: internal vs external.
- Internal: fits in a jacket pocket, less fuss, good for commuters who walk a lot.
- External “strap-on”: generally larger coverage, better stability, and reduced ride-up when sliding.
For aggressive lane splitting or filtering, an external Level 2 back protector plus CE chest is very close to a track-level impact shell in a city context.
- Fit trumps spec sheet.
- Sitting on your bike in riding position.
- Simulating a fall motion with your hands (rolling shoulders, bending knees, rotating hips).
Armor that rotates off your joint in a crash is functionally decoration. Test by:
If armor shifts more than ~2–3 cm from the joint center, you need better cinching, compression layers, or a different pattern cut.
2. Urban Abrasion Strategy: Layer Stacks, Not Just Single Fabrics
At 25–40 mph, abrasion is still your second biggest enemy after blunt impact. But heavy, full-track leathers are often overkill and miserable off the bike. For city work, the smart move is a layered abrasion stack—different materials working in series rather than one thick outer shell trying to do everything.
Key technical points:
- Understand what the CE “A / AA / AAA” actually tests.
- A: Basic urban protection (often lightweight gear).
- AA: Versatile touring / spirited street riding.
- AAA: Track-capable levels of abrasion and tear resistance.
The EN 17092 standard uses the Darmstadt abrasion test and impact seams testing:
In dense city environments with moderate speeds but lots of hard surfaces, AA in the critical zones (shoulders/elbows/knees/hips/seat) is a very rational minimum.
- Reinforcement zones matter more than marketing fabric names.
- AA or better on the entire outer arm, shoulder to cuff.
- AA or better on hips, outer thigh, and seat in pants.
- Ideally AA-rated torso if you ride in tight city grids or multi-lane chaos.
- Hybrid shells: textile + leather in key slides.
- High-denier textile (e.g., 600D+ poly or Cordura) for flexibility and breathability.
- Leather overlays at shoulders, elbows, and seat for first-contact abrasion.
A jacket that’s AA-rated only in shoulders and elbows, with A-rated torso, is optimized for certain crash vectors. If you ride aggressive, upright, or on a supermoto, your sliding profile might expose more torso. Look for:
Urban sweet spot:
This keeps weight down while giving you leather where you’re most likely to touch tarmac or a car’s metal surfaces.
- Denim is not denim.
- Pure cotton with a thin aramid liner (minimal slide time).
- Single-layer technical denim with UHMWPE or aramid fibers woven in (dramatically better).
Casual-looking riding jeans can be:
If your urban riding includes highway stretches, single-layer AA-rated jeans with high UHMWPE content offer a powerful balance of comfort and real protection.
- Internal baselayers as last-resort abrasion buffers.
- Reduce friction burns.
- Keep torn outer gear from grabbing and twisting skin.
A snug, synthetic baselayer (polyester or merino-synthetic blend) helps:
Riders underestimate how much skin shear, not just raw abrasion, wrecks you in even moderate-speed slides.
3. Ventilation vs. Protection: Building a “Thermal Envelope” for Stop-and-Go
Urban heat is brutal: you overheat at every long light, then chill the second you get airflow at 40 mph. Most riders solve this emotionally (“I’m hot, I’ll just wear less”) instead of mechanically. The trick is to think like a thermal engineer: you’re managing a heat envelope, not just temperature.
Key technical points:
- Perforation vs mesh vs solid panels.
- Perforated leather: great for continuous airflow at speed, but heavy and less effective in gridlock because no air = no benefit.
- Mesh: high convective cooling, but often lower tear/abrasion strength; must be backed by strong impact and zone-mapped reinforcements.
- Solid textile with vents: more controlled airflow; can be tuned with zips for stop-and-go.
- Design for worst-case: stationary in full sun.
- Has chest and bicep intake vents that can be opened at 20–25 mph, not just highway speeds.
- Has exhaust vents high on the back to let hot air escape when you’re leaned slightly forward.
- Thermal layering over crash shell, not instead of.
- Add a thin synthetic puffy or insulating mid-layer under it.
- Use a packable wind layer (like a compact rain shell) over it on cold, wet commutes.
Choose a jacket that:
In shoulder seasons, many riders ditch armored jackets for casual layers when it gets cold. That’s inverted logic. Keep the same impact/abrasion shell and:
A 200–300 g windproof shell can add as much perceived warmth as a huge insulated jacket, without compromising your armor.
- Vent management habits.
- Below 20 mph average (heavy congestion): Close major vents to keep your microclimate stable.
- Above 30–35 mph sustained: Open chest and exhaust vents to prevent sweat buildup.
Build the habit around intersections:
The goal is to avoid sweating in your protective layers, because once wet, you’ll freeze the moment temps or speeds drop.
- Color and radiant load are not trivial.
Black gear under summer sun in stop-and-go can spike your surface temperature far above ambient. Light-colored or at least mixed-tone jackets and helmets can noticeably reduce thermal load when you’re stuck at long lights or crawling in construction zones.
4. Visibility as a System: Optics, Contrast, and Urban Light Pollution
Urban riders are surrounded by competing light sources: LED signs, brake lights, street lamps, reflective glass. A tiny reflective strip on a jacket is background noise. Instead of hoping random reflectivity is enough, think in terms of an optical system: how you appear to human drivers and automated driving aids across angles and conditions.
Key technical points:
- Retroreflective geometry, not just presence.
- Car headlights are low-angled and forward-facing.
- Reflective panels on the lower back, shoulders, and outer calves map directly into that headlight cone.
Retroreflective materials send light back toward its source. That matters because:
Reflective patches only on the chest or inner thigh do much less work at night.
- High-contrast blocking in the daytime.
- Bright or contrasting colors across shoulders and helmet line, where drivers expect to see human form.
- Color contrast on gloves so turn signals and hand signals “pop” against the bike.
- Helmet as primary visual anchor.
- Is the highest point on the bike.
- Moves more distinctly than the chassis.
In daylight, bright color contrast blocks (e.g., high-viz shoulders plus dark torso) are more critical than reflectors. Drivers notice edges and patterns, not overall brightness. Look for:
Your helmet:
A bright, patterned, or high-contrast helmet drastically increases your visual signature in mirrors and cross-traffic. Matte black in a city full of grey SUVs is a deliberate trade-off against visibility.
- Brake and indicator redundancy.
- Compensate for SUV and pickup drivers who only see you from roof height.
- Differentiate your deceleration from the sea of car brake lights.
Supplemental brake lights integrated into your topcase or tail tidy, plus well-positioned indicators, help:
For heavy commuters, an auxiliary helmet-mounted brake light synced via accelerometer or wireless module provides a second, higher visual cue.
- Conspicuity vs stealth: choose intentionally.
- High-viz rain shell you throw on in bad weather or at night.
- High-visibility backpack cover or strap system for commuting.
Some riders prefer low-profile aesthetics. That’s valid, but understand the trade: you are objectively harder to see in chaotic visual environments. If you prefer stealthy main gear, consider:
These can turn “tactical black” gear into a bigger optical target only when you need it.
5. Closure Systems, Fit Dynamics, and the Mechanics of Staying Put in a Crash
Most rider conversations end at “it has armor.” That’s incomplete. Your real protection is armor + fabric + closures + fit under load. Urban crashes are often rotational and awkward—off-balance stops, odd-angle low-sides, and collisions with cars that twist your body around contact points.
Key technical points:
- Zippers are structural components.
- Expose your entire torso to abrasion.
- Let armor rotate or eject completely.
- Reputable-brand zippers (YKK, RiRi) on the main closure.
- Backing storm flap with snaps or Velcro to keep the zipper from being a single point of failure.
- A connecting zipper (360° or at least rear) between jacket and pants to prevent them separating in a slide.
- Cinch points and load paths.
- Biceps and forearms keep elbow armor planted and sleeves from twisting.
- Waist and hem keep the jacket from riding up and exposing kidneys/hips.
- Calves and knees on pants keep knee armor anchored directly over the patella.
A main front zipper failure can:
Look for:
Adjustable straps at:
The goal is to lock the textile to the skeleton, not just drape it over the body.
- Glove-gauntlet strategy for city riding.
- Sleeve over glove for safer doffing in emergencies and shorter don/doff times—if the cuffs cinch securely and don’t expose the wrist.
- Hard or soft armor over the scaphoid and knuckles.
- Double-layer leather or synthetic reinforcement on palms and outer wrists.
- Boot shaft height and ankle load.
- Mid-calf shaft (not just ankle height) provide more leverage against twist.
- Rigid or semi-rigid ankle cups reduce inversion/eversion.
- Reinforced shank helps when your foot gets trapped between peg and car or curb.
In the rain or at speed on the highway, you might run gauntlets over sleeves to prevent water entry. In pure city work, you can justify:
Either way, ensure:
Even at 20–30 mph, a simple side-impact or foot-dab gone wrong can torsion-load your ankle. Street boots with:
If you split lanes or ride aggressively in town, casual “moto sneakers” are a deliberate downgrade in torsional resistance.
- Urban-specific ergonomics checks.
- Sit on your actual bike (or similar ergonomics) in the showroom or parking lot.
- Check if the jacket lifts at the back or pants pull away at the waist.
- Turn your head fully left/right while tucked and while upright; a tight collar or stiff shoulders can limit your scan range, which is lethal in dense traffic.
When testing gear, don’t just stand in front of a mirror:
If your gear restricts a full head check or shoulder check, it’s risking more than it protects.
Conclusion
Urban riding compresses risk into small spaces and short distances. It’s not about one big high-speed crash; it’s about thousands of micro-decisions happening in a dense environment where every mistake has a curb, bumper, or guardrail attached to it. Your gear has to be engineered for that reality: tuned impact zoning, layered abrasion resistance, a controllable thermal envelope, a deliberate visibility strategy, and closures and fits that keep everything where it belongs when gravity and metal start arguing with you.
When you treat your city kit like a mechanical system—not fashion, not a vague “safety upgrade”—your confidence on the bike changes. You brake harder, look further, split lanes with intent instead of anxiety, and ride more days of the year because your gear is built for your actual environment, not a catalog photo.
Gear doesn’t replace skill, but it multiplies the value of every precise, disciplined input you put into the bars and pegs. Build your system like it matters—because in the city, it absolutely does.
Sources
- [European Commission – Motorcycle Protective Clothing and PPE Standards](https://road-safety.transport.ec.europa.eu/system/files/2023-03/motorcycle-protective-clothing_en.pdf) - Overview of protective clothing performance, EN standards, and injury mechanisms
- [BMW Motorrad – Guide to Motorcycle Protective Clothing](https://www.bmw-motorrad.co.uk/en/experience/stories/safety/what-protective-clothing-do-you-need.html) - Practical breakdown of impact zones, abrasion areas, and gear selection principles
- [Dainese – Technical Guide to EN 17092 and CE Ratings](https://www.dainese.com/gb/en/ce-standards.html) - Detailed explanation of CE impact and abrasion standards for motorcycle garments
- [REV’IT! – How Motorcycle Apparel Is Tested and Certified](https://www.revitsport.com/en_en/blog/how-motorcycle-apparel-is-tested-and-certified) - Accessible technical explanation of A/AA/AAA ratings and test methods
- [National Highway Traffic Safety Administration (NHTSA) – Motorcycle Safety Information](https://www.nhtsa.gov/road-safety/motorcycles) - Data on motorcycle crashes and risk factors relevant to urban riding conditions
Key Takeaway
The most important thing to remember from this article is that this information can change how you think about Gear & Equipment.


