Every motorcycle eventually tells the truth about its maintenance. You see it in the way the bars stay dead-stable at 160 km/h, the way the chain tracks arrow-straight under load, the way the brake lever feels identical on a cold morning or after a mountain descent. That consistency doesn’t happen by accident—it’s engineered through disciplined, torque-first maintenance. This isn’t about “tight enough” or “I’ve got a feel for it.” It’s about turning your whole bike into a predictable, repeatable system by treating every critical fastener like a calibrated component.
This is maintenance as a mechanical language: torque, stretch, preload, friction, and sequence. Get those right, and your bike stops aging randomly and starts aging predictably.
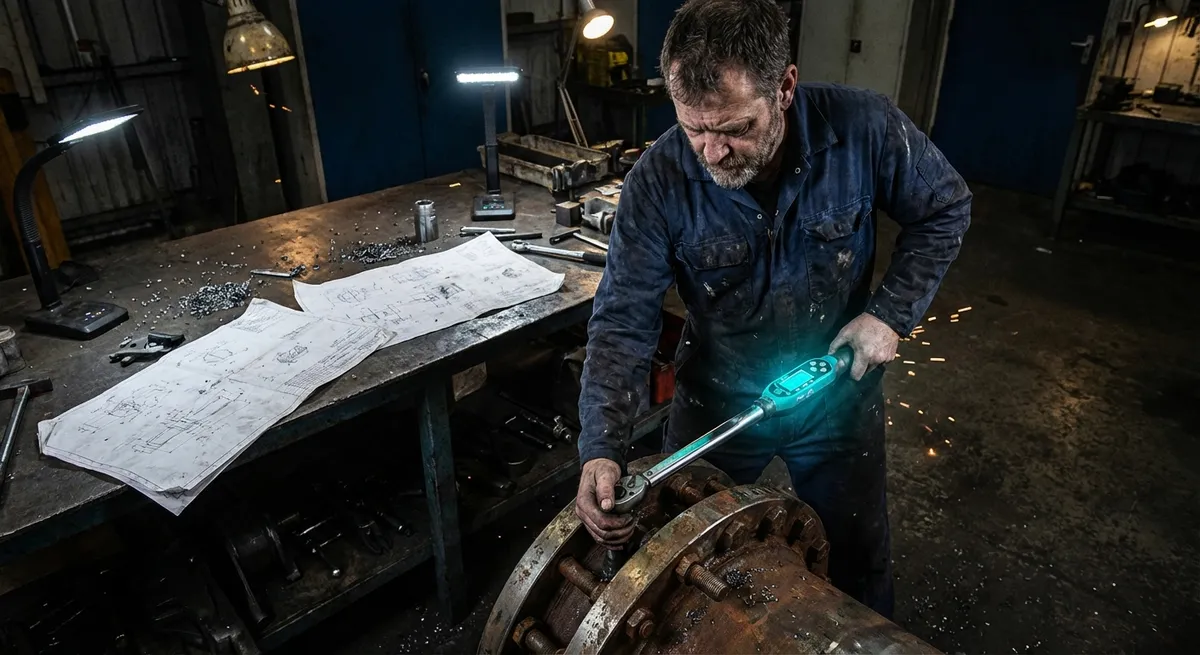
Why Torque Is Not “Just Tightness”
Most riders think of torque as “how hard you tighten a bolt.” That’s the least interesting part. What matters mechanically is clamp load—how much the bolt is stretching to squeeze parts together.
A high-strength bolt behaves like a spring. When you torque it, you are elastically stretching it, creating a precise clamping force between components. Too little torque, and the joint can micro-move, fretting and loosening. Too much torque, and you yield (permanently deform) the bolt, losing predictable preload and risking sudden failure.
Here’s the key: the torque value in your service manual is an estimate that accounts for friction in the threads and under the bolt head. Change that friction—by using dry vs. lubed threads, aftermarket washers, or different coatings—and the same torque can yield radically different clamp loads.
- A dry M10 bolt at 40 N·m might deliver ~18 kN of clamp load.
- A lubricated M10 bolt at the same 40 N·m can exceed 25 kN, pushing the bolt close to yield.
That’s why “snug plus a bit” is engineering roulette on critical parts: brake calipers, triple clamps, axle pinch bolts, and bar clamps. Consistent torque application is not about perfectionism; it’s about converting your bike’s assembly from guesswork into a controlled mechanical system.
Technical Point 1: Build a Friction-Consistent Torque Workflow
If torque is a proxy for clamp load, friction is the variable you must control like a maniac. A disciplined rider treats friction state as part of the torque spec.
Build a repeatable torque workflow around these principles:
- Clean, then torque. Always remove old threadlocker, corrosion, and debris with a brass brush or nylon brush and solvent. Contaminants change friction coefficients and can cause false torque readings.
- Match the manual’s assumed friction. If the service manual assumes “dry threads,” don’t arbitrarily add anti-seize or grease unless the manufacturer explicitly calls for it. If it does specify lubricant (e.g., axle nut, some engine covers), use the same type (moly paste vs. general grease) and apply it consistently.
- Use the right torque tool class.
- 5–25 N·m click or beam wrench: controls small fasteners (bodywork, bar clamps, caliper bolts on some bikes).
- 20–100 N·m: axles, major chassis bolts.
- 100–200+ N·m: big twins’ rear axles, some crank/primary fasteners.
- Chase threads when needed. If a bolt feels “notchy” at low torque, stop. Remove, inspect, and chase threads with the correct tap/die or a thread chaser. A damaged thread can give a correct “click” at a completely wrong clamp load.
- Mark critical fasteners. Apply torque seal (witness paint) on caliper bolts, pinch bolts, and axle nuts. Now you can visually confirm nothing has moved between rides and catch loosening before it becomes a problem.
The outcome: your torque wrench stops being a feel-good accessory and becomes a precision tool in a controlled friction environment. That’s engineering, not superstition.
Technical Point 2: Chain Tension as a Suspension Variable
Chain “tightness” is not a comfort setting; it’s a structural input to your rear suspension and countershaft health. Treat it like a geometry parameter, not an afterthought.
Mechanically, chain tension is lowest when the rear axle, swingarm pivot, and countershaft sprocket form a triangle with slack. As the suspension compresses, the axle moves in an arc about the swingarm pivot. There is a specific alignment—when rear axle, swingarm pivot, and countershaft sprocket are nearly collinear—where chain run is at its tightest.
If you set slack with the bike unladen on a stand and ignore this geometry, you may:
- Over-tighten the chain so that at full compression it’s acting like a solid link.
- Load the countershaft bearing and gearbox output shaft.
- Force the rear suspension to fight chain tension, effectively altering spring rate and causing harshness or traction loss.
A torque-first maintenance mindset applies here via repeatable measurement rather than guesswork:
- Use the manufacturer’s chain slack spec only in the prescribed condition (usually bike on side stand or with specific support).
- If you run non-stock sprockets, linkage, or shock length, do a one-time setup:
- Use a strap or jack to bring the rear to the point where axle, pivot, and countershaft are aligned.
- Set the chain to just avoid being guitar-string tight at this point.
- Return to your normal parking condition and measure slack there—this becomes your personal reference slack.
This way, every time you adjust chain tension, you are indirectly controlling peak chain load at full suspension compression, not just how floppy it looks in the garage.
Technical Point 3: Brake Feel as a Hydraulic Diagnostic Tool
Brake maintenance isn’t just about pad thickness; it’s an ongoing diagnostic of a high-pressure, low-compliance hydraulic system. A disciplined approach treats brake lever/pedal feel as data.
Key technical elements to manage:
- Fluid age and boiling point. DOT 3/4/5.1 fluids are hygroscopic: they absorb moisture, reducing boiling point and increasing corrosion risk. Manufacturers often specify fluid changes every 1–2 years. If you ride hard in mountains or on track, consider annual changes. The difference between “wet” and “dry” boiling point can be more than 70–100°C.
- Micro-bubbles vs. macro-bubbles. A system can be “bled” and still feel spongy. Micro-bubbles adhere to internal surfaces, especially in ABS modulators and at high points in the line. Techniques:
- Tap calipers and lines during bleeding to dislodge micro-bubbles.
- Turn bars fully left/right while pulsing the lever.
- On stubborn systems, use a vacuum bleeder or back-bleed from caliper up to master.
- Caliper service discipline. Every pad change is an opportunity:
- Clean pistons before pushing them back using a soft brush and brake cleaner. Forcing dirty pistons can damage seals.
- Inspect pad wear patterns. Tapered wear = sticking pins or slider; uneven wear = piston imbalance or caliper misalignment.
- Torque-critical brake fasteners. Caliper bolts, disc bolts, and master cylinder clamps are load-path components:
- Under-torqued caliper bolts can allow caliper flex and pad knock-back.
- Over-torqued disc bolts can distort the rotor hat, causing pulsing.
- Uneven torque on master clamps can distort the bar or clamp body, altering lever pivot alignment.
- Lever travel as an early warning. Track your personalized “normal” lever travel:
- Lever gradually coming back toward the bar over weeks: likely pad wear or slight fluid loss.
- Sudden longer travel after storage: possible fluid migration, small leaks, or micro-bubble formation.
When you think of your brakes as a pressure-controlled structural system—rather than just “it stops”—maintenance becomes about predictable, repeatable deceleration, not just panic capability.
Technical Point 4: Electrical Integrity Beyond “Does It Turn On?”
Modern motorcycles are rolling CAN buses and sensor networks wrapped around an engine. Treating electrical systems as binary (“it works/it doesn’t”) is obsolete. Proper maintenance means controlling resistance, voltage stability, and connector integrity.
Key practices with a technical lens:
- Battery as a system anchor.
- Measure resting voltage after 12 hours off charge: ~12.6–12.8 V for a healthy lead-acid, ~13.1–13.3 V for many LiFePO₄ units.
- Measure cranking voltage: if it drops below ~9.6–10.0 V on crank, you’re stressing ECUs, injectors, and fuel pumps.
- Use a smart charger matched to chemistry; avoid generic “trickle only” devices on modern lithium batteries.
- Charging system verification.
- At idle: you should typically see 13.2–13.8 V at the battery (model-dependent).
- At 3000–4000 rpm: 13.8–14.5 V is common. Consistently above 15 V indicates regulator issues; below 13 V suggests stator or regulator trouble.
- Logging these numbers once a season builds a trendline for early failure detection.
- Ground path discipline.
- Clean and re-torque major ground lugs (engine-to-frame, battery negative) with a light coat of dielectric-compatible protectant.
- A weak ground path doesn’t just cause no-starts; it can create noisy sensor signals, intermittent ECU errors, and erratic idle.
- Connector environment control.
- High-vibration, high-heat zones (near headstock, under tail, around regulator/rectifier) deserve periodic inspection.
- Look for green or white corrosion, darkened plastic, or back-out pins.
- Use dielectric grease around seals, not on contact faces of low-voltage signal pins unless manufacturer-approved.
- Load mapping of accessories.
- Document added loads: heated gear, auxiliary lights, GPS, chargers.
- Calculate total draw vs. alternator output and typical operating surplus. Running near or over the charging capacity will slowly kill batteries and regulators.
Electric reliability is not random luck. It’s the cumulative result of managing voltage, resistance, and heat through methodical inspections and measurements.
Technical Point 5: Fastener Lifecycle and Reuse Discipline
Every bolt on your bike lives somewhere on a curve from “freely reusable” to “one-time-only engineered fuse.” Treating all fasteners as equal is how you end up with stripped cases, stretched head bolts, or wandering torque values.
A technical approach to fastener lifecycle:
- Identify torque-to-yield (TTY) or stretch bolts.
- Common on: cylinder heads, some connecting rods, some crank fasteners, select chassis joints on high-end bikes.
- These are designed to be tightened into the plastic (yield) region for highly stable clamp load. Reusing them risks unpredictable clamping and sudden failure. Replace when the manual says so—no exceptions.
- Track-altered fasteners.
- Repeated heat cycles and removals can reduce the effective preload range of critical fasteners (e.g., exhaust studs/nuts, brake disc bolts).
- If you feel a bolt torque smoothly, then suddenly “give” before reaching spec, it’s likely yielding. Stop and replace.
- Threadlocker strategy.
- Medium-strength (e.g., blue) anaerobic locker is appropriate for many vibration-exposed, serviceable joints: caliper bolts (if spec’d), some engine covers, subframes.
- High-strength (e.g., red) is for semi-permanent joints and often requires heat to remove safely—follow the manufacturer’s callout, don’t guess.
- Threadlocker changes friction, which changes torque-preload relationships; always use it only when specifically indicated or when you replicate OEM conditions.
- Washer and spacer condition.
- Deformed or cupped washers can dramatically alter clamp load distribution, especially under rotating components (axles, sprockets, rotors).
- Replace visibly dished or damaged washers; they are part of the engineered joint, not decoration.
- Personal fastener registry.
- For bikes you keep long-term, maintain a digital or notebook log of:
- Which fasteners you’ve replaced with OEM.
- Any that are TTY and when they were last replaced.
- Aftermarket hardware (Ti, stainless) and its class rating vs. OEM.
- This lets you avoid the silent accumulation of borderline fasteners as the bike ages.
You’re not just preventing bolts from falling out—you’re maintaining the designed stiffness and load paths of the whole motorcycle structure.
Conclusion
Torque-first maintenance is not about being obsessive; it’s about aligning your approach with how the motorcycle was actually engineered. When you control friction, clamp load, chain geometry, brake hydraulics, electrical integrity, and fastener lifecycle, the bike stops feeling like a collection of parts and starts behaving like a single, coherent machine.
The reward is not only fewer failures. It’s that rare sensation when everything—steering, braking, drive, suspension—responds with the same character every ride, in every season. That consistency is what high-level riders chase on track, and you can build it into your street bike one calibrated fastener at a time.
Sources
- [NHTSA Motorcycle Maintenance and Safety Guidance](https://www.nhtsa.gov/road-safety/motorcycles) - U.S. government recommendations on motorcycle safety and key maintenance items that affect control and braking
- [Yamaha Motorcycle Owner’s Manuals](https://www.yamaha-motor.eu/gb/en/owner/manuals/) - Factory torque specs, fluid intervals, and service procedures for modern motorcycles
- [Honda Powersports Owner’s Manuals](https://powersports.honda.com/downloads/owners-manuals) - Official maintenance schedules and technical recommendations from a major OEM
- [Brembo Technical Area](https://www.brembo.com/en/motorbike/aftermarket/technical-area) - Detailed information on brake system behavior, maintenance, and performance considerations
- [SAE Technical Paper on Fastener Torque and Preload (Example Abstract)](https://www.sae.org/publications/technical-papers) - Engineering literature on the relationship between torque, friction, and clamp load in bolted joints
Key Takeaway
The most important thing to remember from this article is that this information can change how you think about Maintenance.


