Routine motorcycle maintenance isn’t “keeping it running.” It’s engineering your bike to deliver repeatable performance every time you roll out of the garage. When you treat the machine like a system—load paths, lubrication regimes, heat cycles, and electrical integrity—your maintenance stops being guesswork and starts feeling like controlled experimentation.
This isn’t about polishing chrome. This is about building a motorcycle that feels mechanically predictable at 10/10ths because you know exactly what’s happening beneath you.
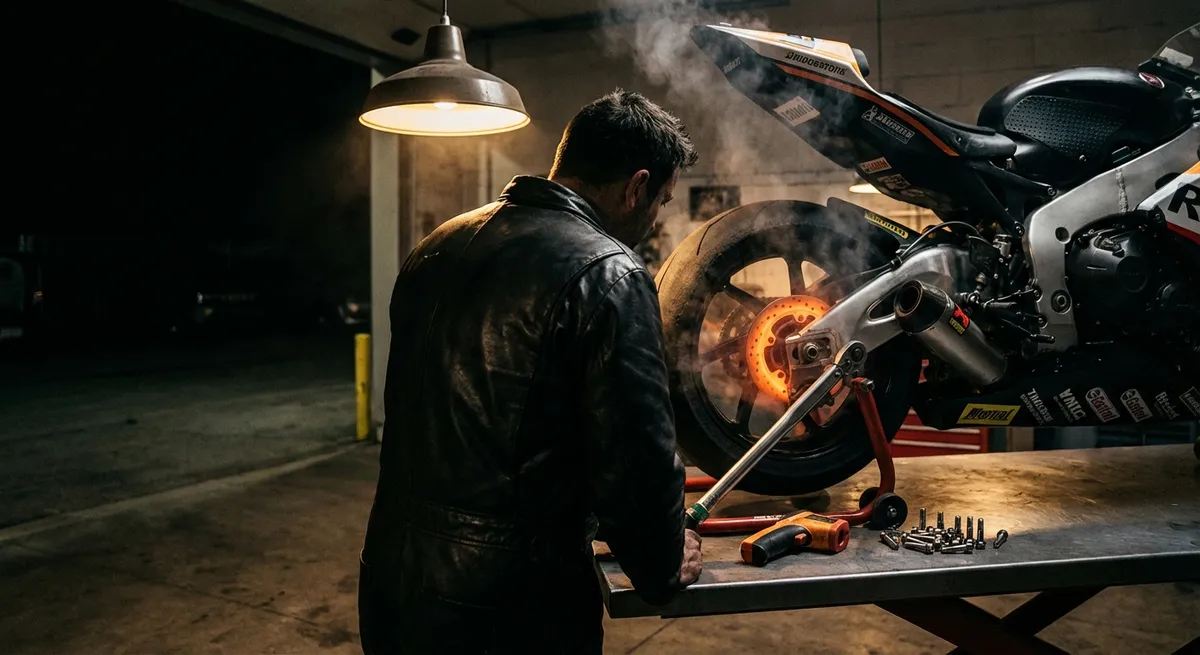
Building a Torque-Accurate Chassis: Fasteners, Threads, and Clamping Force
Most riders think of torque specs as “tight enough so it doesn’t fall off.” That’s crude. The real goal is consistent clamping force without damaging threads, distorting components, or changing alignment.
Every critical fastener (axles, pinch bolts, caliper bolts, triple-clamp bolts, engine mounts) is part of a load path. Over-torque can pinch fork tubes and ruin suspension sensitivity. Under-torque can let your front axle shift under heavy braking.
Key technical habits:
Use a calibrated torque wrench
- Stick to a mid-range torque wrench (e.g., 5–60 Nm) for most chassis work. - Re-calibrate annually or after a hard impact (dropped wrench, etc.). A badly calibrated wrench is worse than none—because it gives false confidence.
Treat threads as a system
- Clean threads with a brass brush or thread chaser, not a tap unless threads are damaged. - Dry vs. lubricated torque matters. If the manual calls for dry torque and you use anti-seize, reduce torque (consult manufacturer guidance) or you’ll over-clamp.
Respect sequence and staging
- Axle pinch bolts and triple-clamp bolts should be tightened in stages, alternating sides. - Example: torque triple-clamp upper bolts to 50%, then lower to 50%, then upper to 100%, then lower to 100%. This avoids twisting the fork tubes in the clamps.
Don’t “feel” aluminum like steel
- Aluminum components (triple clamps, engine cases, bar mounts) are easy to distort or strip. - If the spec is 22 Nm, don’t “round up to 30 because that feels better.” That’s how you ovalize bores and crack castings.
Index alignment before and after
- Scribe or paint-mark critical bolts (axle pinch, caliper bolts, rear axle adjusters). - Fast visual check before every ride: marks should line up. If not, something moved—and that’s data you need.
Well-executed torque work doesn’t just keep parts attached; it keeps geometry, alignments, and component interfaces as the engineers intended.
Lubrication as a Design Variable: Oils, Films, and Heat Cycles
Lubrication isn’t just “use good oil.” It’s a controlled film between surfaces, under specific loads and temperatures, over time. When your maintenance is tuned to how and where your bike generates heat and shear, you’re not changing oil—you’re managing tribology.
Key technical angles:
Match viscosity to thermal reality, not just the manual
- The OEM recommends a viscosity grade for a wide range of climates. - If you ride track days in hot ambient temps, oil temps can be significantly higher and shear stress greater. That can justify sticking to the upper end of the OEM’s allowed viscosity range—but never outside manufacturer limits.
Respect additive chemistry
- Wet-clutch bikes require JASO MA/MA2 motorcycle oil; automotive oils with friction modifiers can cause clutch slip. - Changing brands is fine; mixing partially synthetic with full synthetic is generally safe. What’s not safe: using low-ZDDP oil in engines designed around high-pressure contact (older or high-performance cams).
Oil analysis as a diagnostic
- Periodic used-oil analysis can detect elevated metals (bearing wear, cam wear), fuel dilution, or coolant ingress before catastrophic failure. - If you ride hard, this is like doing a blood test for your engine. Maintenance becomes proactive instead of reactive.
Grease systems, not just parts
- Linkages, swingarm pivot, steering head bearings: use the right grease (often lithium-complex or manufacturer-specified). - If you pressure-wash, you’re likely pushing water into bearings and out of seals. Plan a full grease service if you regularly wash aggressively.
Fluid aging by time AND use
- Brake fluid, coolant, and fork oil degrade with both cycles and time. - Even low-mileage bikes benefit from time-based service: brake fluid every 1–2 years, coolant every ~2–4 years per OEM spec, fork oil often between 15,000–30,000 km or earlier for hard use.
Thinking this way turns lubrication into deliberate engineering: you’re controlling film strength, temperature stability, and wear progression—not just swapping fluids on a calendar.
Load Paths and Bearings: Feeling Mechanical Health Through Free Play
Bearings, bushings, and pivot points define how force travels from the tire into the chassis and ultimately into you. Free play, notchiness, or binding aren’t “minor annoyances.” They’re symptoms of distorted load paths.
Five technical checks that reveal a lot about your bike’s mechanical health:
Steering head bearings
- Put the bike on a stand so the front wheel is off the ground. - Gently move the bars lock-to-lock; feel for a center “notch” (brinelling from impact loading) or roughness. - Lightly push/pull the bottom of the fork legs front-to-back. Any knocking = bearing play or loose adjustment.
Swingarm free play
- With the rear wheel off the ground, grip the swingarm ends and try to move them laterally. - There should be effectively zero side play. Any click/movement suggests worn bearings or incorrectly torqued pivot hardware.
Wheel bearings as rotating sensors
- Spin wheels by hand and listen: grinding, rumbling, or uneven drag are early failure signals. - With the wheel stopped, load the rim laterally and feel for movement relative to the axle.
Linkage and shock bushings
- With the rear wheel supported, compress and release the suspension slowly. It should move smoothly and repeatedly along the same arc. - Clunks at the beginning or end of travel can indicate worn linkage bearings, shock eye bushings, or loose fasteners.
Chain/sprocket interaction
- Rotate the rear wheel and watch the chain’s vertical movement on the top run. A “tight spot” (tension changing significantly over rotation) indicates uneven wear or misalignment. - A heavily hooked rear sprocket tooth profile means the load path between crankshaft and tire is no longer controlled. Replace as a set: front sprocket, rear sprocket, chain.
When you routinely feel for play, roughness, and binding, you’re not just “checking bearings.” You’re monitoring how faithfully the bike transfers your inputs into tire forces.
Thermal Management: Brakes, Coolant, and Heat-Soak Behavior
Your motorcycle is a heat machine. Combustion, friction, and electrical losses all convert to heat that must be controlled and expelled. When maintenance acknowledges heat as a design constraint, you gain predictability under stress—track days, aggressive canyon runs, loaded touring.
Five heat-focused technical practices:
Brake fluid as a consumable, not an accessory
- DOT 3/4/5.1 fluids are hygroscopic—they absorb water over time, lowering boiling point and increasing corrosion risk. - If your lever feels spongy after repeated hard braking, suspect fluid boiling or microbubbles. Flushing with fresh, correctly spec’d fluid restores thermal margin.
- Pad compound vs. operating range
- OEM pads are typically tuned for cold performance and low dust/noise. Aggressive riding may demand a pad with a higher temperature ceiling.
- But track-only pads can be dangerously weak when cold. Match pad compound to your real-world temperature range, not your ego.
Coolant isn’t just antifreeze
- Modern coolants carry corrosion inhibitors and cavitation-suppression additives. Old or contaminated coolant raises operating temps and silently attacks aluminum surfaces. - Always maintain the correct water-to-coolant ratio and never mix incompatible coolant chemistries unless the manufacturer explicitly allows it.
Radiator and airflow hygiene
- Bent fins, bug layers, and mud cakes all increase thermal resistance. Clean carefully with low-pressure water and a soft brush—never beat fins flat with high pressure. - Check fan operation: does it trigger at the correct temperature? A non-working fan often shows up first as slow-speed overheating, not highway temps.
Understand heat soak behavior
- Some bikes naturally run hot after shutdown due to residual heat migrating into components (fuel rail, airbox, electronics). - If you notice hard starting or rough idle after short stops, inspect heat shields, routing of fuel lines, and coil or sensor proximity to hot surfaces. Maintenance may mean restoring OEM routing or adding spec-approved shielding—not just “living with it.”
Controlling heat isn’t just comfort. It’s ensuring consistent braking, stable combustion, and electronics that don’t drift when the bike is fully heat-soaked.
Electrical Integrity: Voltage, Resistance, and Signal Reliability
Modern motorcycles are rolling networks: ECUs, sensors, CAN buses, and actuators all living on a fragile foundation—clean power and stable grounds. Electrical maintenance is about preserving signal integrity as much as delivering voltage.
Five technical points that dramatically reduce electrical gremlins:
Battery as a reference, not just a lump of electrons
- Check resting voltage after the bike sits 12+ hours: - ~12.6–12.8 V = healthy lead-acid - Under ~12.3 V repeatedly = chronic undercharge or battery aging - Start the bike and check charging voltage at ~3,000 rpm: typically ~13.5–14.5 V for most systems. Outside that range suggests charging system issues.
Ground strategy
- High-resistance grounds cause weird, intermittent issues: flickering lights, sensor codes, misfires under load. - Periodically disconnect main ground points, clean mating surfaces lightly, and reassemble to spec. Don’t over-tighten and crack lugs.
Connector hygiene and strain relief
- Look for green corrosion, moisture traces, or heat-discolored plastic at connectors—especially those near the engine and front fairing. - Ensure wiring isn’t tensioned at full lock or full suspension compression. A wire that flexes at the same stress point will eventually fail.
Load mapping when adding accessories
- Auxiliary lights, heated gear, GPS, and chargers add up. Consult the bike’s alternator output spec and typical running loads. - Use fused distribution blocks or quality switched power modules instead of piggybacking off random OEM circuits. Avoid backfeeding sensitive ECU lines.
Sensor-awareness as troubleshooting
- Modern bikes depend on accurate input from MAP/MAF, TPS, O2, wheel-speed, and temperature sensors. Dirt, oil mist, or poor connections induce false readings. - When a warning light appears, don’t just clear codes; inspect relevant connectors, harness routes, and the sensor’s physical environment.
A well-maintained motorcycle electrical system is invisible in daily use. That invisibility is engineered: stable voltage, low resistance, and clean signals.
Conclusion
Maintenance, at its highest level, is engineering repeatability into a complex, dynamic machine. When you dial in torque accuracy, lubrication regimes, load paths, heat management, and electrical integrity, the result is a motorcycle that stops surprising you mechanically—so you’re free to push yourself as a rider.
This isn’t about obsession for its own sake. It’s about coherence: every bolt, bearing, fluid, and sensor working in a predictable, controlled envelope. Do that consistently, and your bike becomes something rare in the real world—a machine you can absolutely trust when the road is anything but predictable.
Sources
- [Motorcycle Maintenance and Safety – NHTSA](https://www.nhtsa.gov/motorcycle-safety/motorcycle-maintenance) – U.S. government guidance on key maintenance areas affecting safety and reliability.
- [Motorcycle Owner’s Manuals – Yamaha Motor USA](https://www.yamahamotorsports.com/motorsports/pages/owner-s-manuals) – Factory specifications for torque values, fluids, and service intervals across multiple models.
- [Motorcycle Lubricants Guide – Motul Technical Documents](https://www.motul.com/us/en-US/lubricants) – Detailed information on oil standards (JASO/ACEA/API), viscosity, and lubrication applications for motorcycles.
- [Brake Fluid and Thermal Performance – Brembo Technical Area](https://www.brembo.com/en/company/news/brembo-brake-fluid) – Explains brake fluid characteristics, boiling points, and maintenance considerations.
- [Basic Motorcycle Electrical Systems – MSF Library](https://www.msf-usa.org/downloads/Street_Motorcycle_Tips.pdf) – Educational overview from the Motorcycle Safety Foundation including electrical checks and general maintenance best practices.
Key Takeaway
The most important thing to remember from this article is that this information can change how you think about Maintenance.


