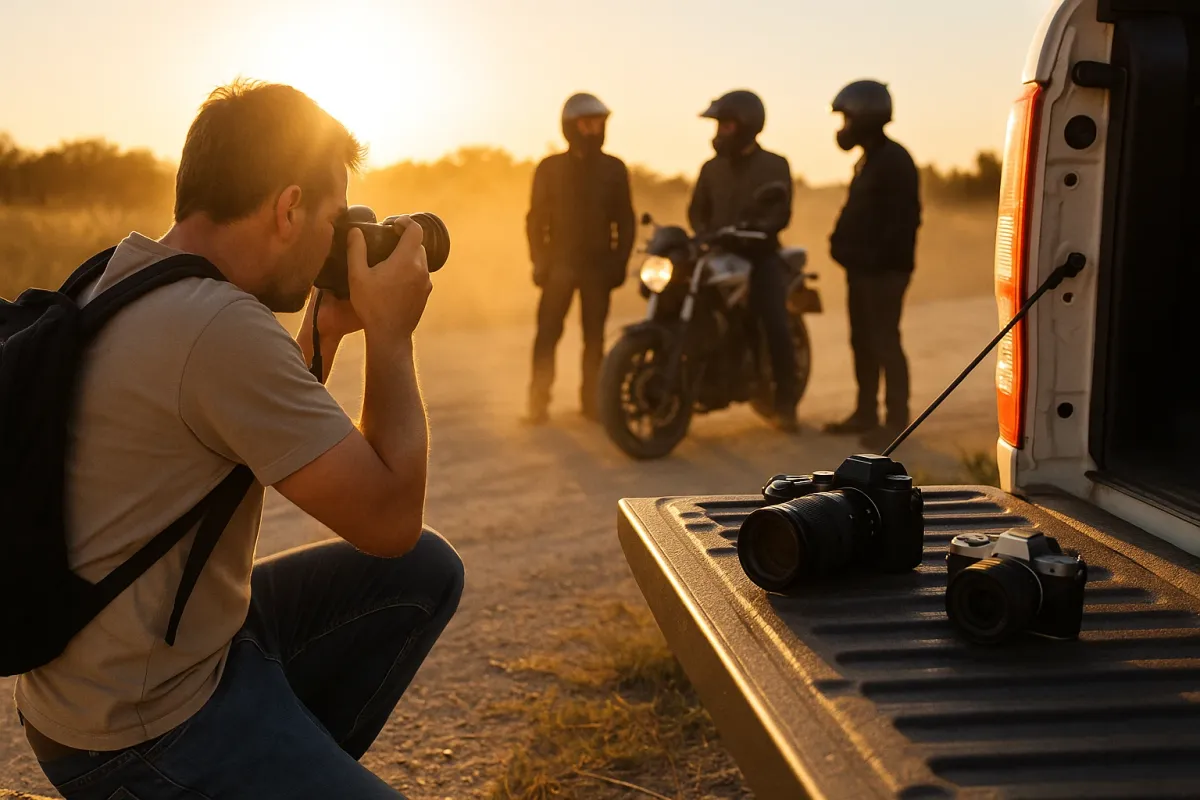
Nature Photographer of the Year 2025 just dropped its winning images, and if you care about gear, the real story isn’t just the jaw‑dropping wildlife shots—it’s the equipment behind them. The same cameras, lenses, stabilization rigs, and weatherproof systems that let pros sit in freezing marshes for 12 hours are exactly the tech patterns riders should be stealing for their own setups.
Moto travelers, ADV riders, and track‑day junkies are quietly rebuilding their everyday carry around the same principles these award‑winning shooters live by: ruggedized optics, shock‑managed mounting, clean power delivery, weather sealing, and workflow that survives abuse. If you’ve ever watched a helmet cam smear into useless blur or had a “trip of a lifetime” recorded in 720p potato‑vision, this is the moment to rethink your kit.
Below, we break down five technical lessons hidden in the 2025 nature‑photo buzz—and translate them directly into motorcycle‑ready gear choices.
1. From Telephotos to Action Cams: Why Sensor Size and Bitrate Matter on the Bike
Look at the EXIF data being shared around the Nature Photographer of the Year 2025 winners: full‑frame sensors, fast glass, and RAW capture are the norm. The moto version of that isn’t “buy a DSLR for your helmet”—it’s understanding what actually affects your video when everything is vibrating and moving at 120 km/h.
Key points riders should care about:
- Sensor size vs. pixel size
- Prefer 1" or at least 1/1.3" sensors over tiny 1/2.3" units.
- Larger pixels = cleaner night riding footage, readable license plates, and usable shadow detail in tunnels.
- Bitrate is non‑negotiable
- Look for minimum 100 Mbps at 4K60.
- Lower bitrate = compression mush on fast scenery, unreadable road signs, and blocky artifacts in rain.
- Dynamic range over fake sharpness
- High dynamic range helps keep the sky from blowing out when you crest a hill.
- Enable “Flat” or “Log‑like” color profiles if your camera offers it; they preserve highlight and shadow detail for later editing.
- Optical vs. digital stabilization
- E‑stabilization eats into field of view and can add wobble at night.
- Prefer cameras offering gyro‑based stabilization metadata you can fine‑tune in post, or at least multiple stabilization modes (moto = less hyper‑aggressive, more linear).
Pros are flocking to cameras with larger pixels, not just bigger megapixel counts, because they control noise and dynamic range in ugly light. For action cams:
Those award‑winning wildlife clips are often shot with bitrates above 200 Mbps. On bikes:
Photographers obsess over dynamic range so they can hold detail in both bright clouds and dark forests. On a bike:
Wildlife shooters rely on optical stabilization in lenses; moto cams typically lean on electronic stabilization:
Build your kit like a photographer: prioritize image quality fundamentals over “8K!” marketing.
2. Long‑Session Power: How Wildlife Rigs Inspire Smarter Camera Power on the Road
Many of this year’s winning nature shots came from hours‑long stakeouts in brutal environments. Those rigs run on carefully managed external power, not dinky internal batteries—and riders should copy the same architecture.
Here’s how to translate pro endurance into moto reality:
- External power banks, but vibration‑qualified
- Choose power banks with metal shells and robust USB‑C ports, rated for >20W output.
- Mount in a foam‑lined pouch or tank bag pocket, not hard‑clamped to a vibrating bar.
- Use bikes’ 12V system properly
- Install a fused, direct‑to‑battery 12V line with a weatherproof SAE or DIN connector.
- Feed a hard‑mounted USB‑C PD converter (prefer IP65 or better) that steps down to 5/9/12V as your cameras require.
- Cable strain relief is not optional
- Use right‑angle USB‑C connectors at the camera to reduce leverage.
- Zip‑tie and loop slack so the cable can move without loading the port.
- Battery strategy, not “charge and pray”
- One fresh internal battery per half‑day, external power for the long hauls.
- Swap batteries at fuel stops, not when the low‑power warning ruins the best part of your ride.
Photographers use high‑quality USB‑C PD banks; you need similar, but mounted for constant shock:
Instead of random cigarette‑lighter adapters:
Wildlife shooters tape and route their cables like they’re part of the camera:
Think in segments, just like field photographers:
Pros don’t accept missed shots because of power. Neither should you.
3. Weather Sealing and Optics: Borrowing From Outdoor Photo Gear for Real ADV Conditions
The Nature Photographer of the Year 2025 winners feature tundras, deserts, and salt‑spray coastlines—and the cameras survived because the ecosystems around them were built for those environments. Riders chase the same conditions, but most “action cam kits” are sold like toys.
Upgrade your gear stack like an outdoor photo pro:
- Ingress protection ratings matter
- Aim for IP67 or IP68 on cases and power converters.
- “Splash resistant” means “dead after one pressure washer pass.”
- Optical glass vs. plastic windows
- Replace stock action cam “protectors” with tempered glass, AR‑coated front elements when available.
- The difference at night (headlight flare, ghosting) is enormous.
- Anti‑fog management copied from housing systems
- Use silica gel packs in any enclosed camera housing.
- Tiny ventilation holes oriented away from oncoming spray balance airflow and sealing.
- Hydrophobic coatings for real‑world rain rides
- Apply a hydrophobic treatment rated for optical glass (not just a random automotive product).
- Reapply regularly; the micro‑coating wears off faster under road grit.
- Redundancy like a field kit
- Your moto kit should carry at least two microfiber cloths, a travel blower, and a small bottle of lens cleaner in a sealed bag.
- Commit to cleaning optics at every fuel stop; grime build‑up is exponential, not linear.
Lens manufacturers brag about gasketed mounts and IP ratings for a reason:
Photographers pay extra for fluorine‑coated front elements; you get the cheap version as lens protectors:
Underwater housings run anti‑fog inserts and controlled airflow:
Photo filters with hydrophobic nano‑coatings shed water; same idea for your visor and camera lens:
Every pro bag has backup lens caps, cleaning cloths, and blower bulbs:
If your camera, visor, and nav screen aren’t being treated with the same care as a front element on a $3,000 lens, you’re leaving performance on the table.
4. Stabilization, Mounts, and Micro‑Vibrations: Lessons from Tripod Geometry
Look at the BTS (behind‑the‑scenes) setups from this year’s nature contests: massive tripods, gimbal heads, and carefully tuned center of gravity. It’s not fashion—it’s physics. On a motorcycle, your mounts are your tripod, and most of them are garbage.
Here’s how to apply tripod logic to your bike:
- Shorter moment arm = less wobble
- Mount your action cam as close to the mount base as possible—avoid tall risers and “selfie stick” extensions for your primary view.
- Every extra centimeter is multiplied by vibration frequency at highway speeds.
- Use the right materials and clamp geometry
- Prefer machined aluminum or steel mounts with a single solid clamp over multi‑piece plastic kits.
- A larger contact patch on bars or fairings spreads the load, reducing micro‑oscillations.
- Frequency tuning with interface layers
- Introduce thin, dense rubber or polyurethane shims between clamp and mounting surface.
- This shifts the vibration resonance out of the frequency range where your engine and road usually live, giving stabilization algorithms an easier job.
- Helmet vs. chest vs. bike mount strategy
- Helmet mount = most immersive, but also most prone to high‑frequency shake from head movement.
- Chest mount = lower center of mass, better stability, but more affected by body breathing and gear fit.
- Bike mount (fairing, frame, or fork) = highly dependent on chassis harmonics; often best for “cinematic” wide shots, not technical riding analysis.
- Lockdown discipline
- Use blue threadlocker on semi‑permanent camera mounts.
- Check all interfaces every fuel stop—camera plate, pivot joints, clamp bolts.
Wildlife pros keep the camera’s center of mass close to the tripod head:
Good tripod heads are overbuilt for capacity:
Photographers use different tripod leg designs to avoid sympathetic resonance. On bikes:
Think like choosing tripod height and angle:
A tripod isn’t “good enough hand‑tight”; pros torque their knobs:
Treat your camera like a long lens on a $1,000 carbon tripod. Mount quality is a performance part, not an accessory.
5. Data Workflow: How Archiving Nature Shots Maps to Moto Dash Cams and Crash Evidence
The photographers behind the 2025 award‑winners don’t just shoot; they archive, back up, and catalog their work meticulously. Riders should be doing the same—not only for memories, but for evidence in the case of an incident.
Translate their workflow to the road:
- Use high‑endurance cards, not whatever was on sale
- For dash‑cam‑style looping, choose “high endurance” microSD cards designed for surveillance or automotive DVRs.
- Capacity sweet spot for daily riding is 128–256 GB; large enough not to overwrite critical clips during a long day.
- Segmented recording, not single massive files
- Configure your camera for loop recording in 5–10 minute segments.
- After an incident or memorable stretch of road, lock those segments by copying them immediately off the card at home.
- Versioned backups like a photo library
- Create a simple structure:
/Moto/Year/Month/RideName/CameraAngle. - Use an external SSD at home and a cloud backup service that automatically syncs your moto folder overnight.
- Metadata discipline
- Maintain a simple ride log: date, route, weather, notable events.
- This massively speeds up finding relevant footage months later and is invaluable if you ever need to hand video to an attorney or insurance.
- Privacy and share‑ready edits
- Make a “Share” copy of key clips where you blur plates, faces, and addresses before posting.
- Keep original, unedited footage uncompressed and private for legal/insurance purposes.
Wildlife shooters who hammer burst mode rely on cards rated for constant writes:
Many pro cameras roll in chunks to reduce corruption risk:
Photographers run multi‑location backups (laptop + external + cloud):
EXIF notes are how pros remember locations, species, and conditions:
Nature shooters carefully curate what they publish; riders should too:
A disciplined data workflow turns your cameras from toys into tools—part storytelling device, part black box recorder.
Conclusion
The Nature Photographer of the Year 2025 winners are more than pretty pictures; they’re a masterclass in how serious outdoor people build systems that survive abuse and still deliver clean, usable data. Riders live in the same world of cold dawns, brutal rain, endless vibration, and zero do‑overs.
If you rebuild your motorcycle camera and electronics kit with a photographer’s mindset—prioritizing sensor quality and bitrate, power architecture, real weather sealing, tripod‑grade mounting, and a professional‑level archive—you’ll ride with the confidence that every session is documented cleanly, and every “you wouldn’t believe this road” story has hard proof behind it.
You don’t need a $5,000 lens to think like a Nature Photographer of the Year winner. You just need to start treating your gear like it’s that important to your ride.
Key Takeaway
The most important thing to remember from this article is that this information can change how you think about Gear & Equipment.


