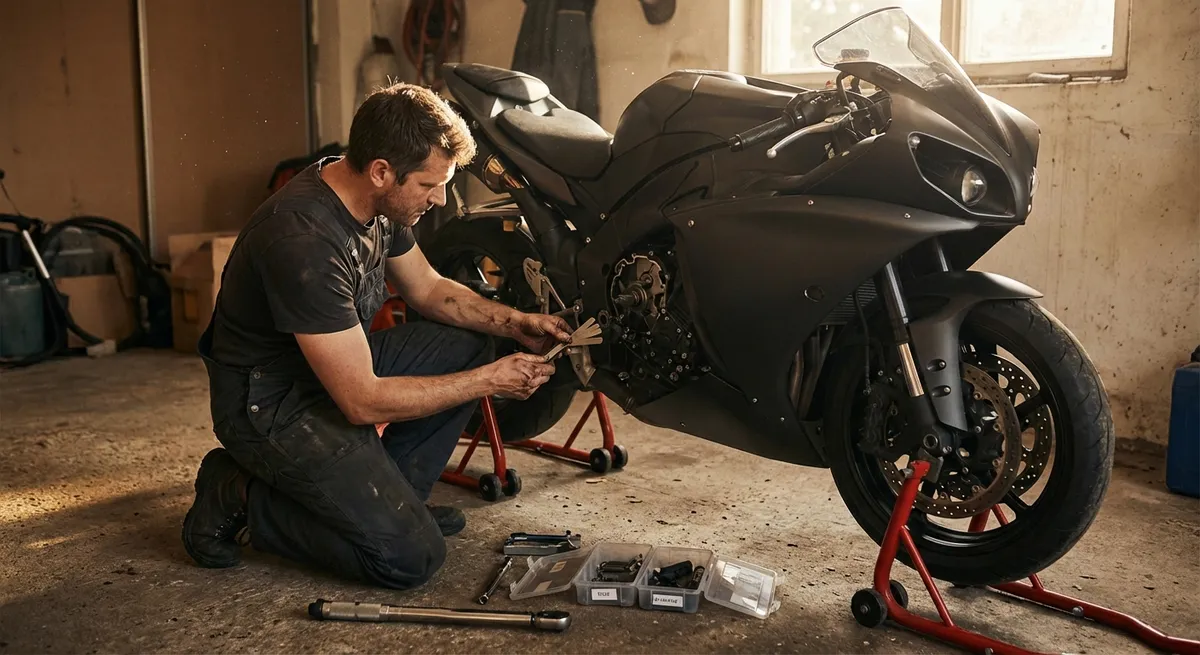
Motorcycles don’t “slowly go bad.” They drift—one click of preload here, two psi of tire pressure there, a chain half a turn tighter than last time. Eventually the bike you’re riding is nowhere near the machine the engineers designed. Maintenance isn’t just about reliability; it’s about holding the bike to a technical standard so the feedback you feel in the pegs, bars, and seat actually means something. This is your guide to keeping the system tight, the signals clean, and the ride mechanically honest.
Building a Baseline: Reference Settings, Not Vibes
If you don’t know where “zero” is, you can’t measure change.
Start by building a baseline configuration for your bike, the way a test rider or race engineer would. Record your suspension settings (preload turns or ring positions, compression and rebound clicks, fork height in triple clamps), tire brand/model and cold pressures, chain slack range, lever positions, and bar/peg/seat settings if they’re adjustable.
Use your owner’s manual and, if available, the service manual to ensure you’re inside factory tolerances. This isn’t just paperwork—those numbers represent millions of engineering dollars and test miles. Once you’ve locked in a baseline, document it: a shop notebook, spreadsheet, or even a note in your phone. Every time you change something, log it with mileage and conditions.
The goal: when something feels “off,” you don’t chase ghosts. You can see what changed—one click, one psi, one millimeter at a time—instead of guessing.
Technical Point 1: Chain Tension as a Dynamic System, Not a Static Number
Chain slack is one of the most abused specs in motorcycling, and it directly affects throttle response, shock performance, and drivetrain wear.
The number in your manual is usually measured with the bike on its wheels, unladen, at a specific location in the chain’s arc. But in motion, slack changes with suspension travel. As the rear axle, swingarm pivot, and countershaft sprocket move into alignment, the chain is at its tightest. If you set slack too tight on the stand, you risk over-tension at full compression—this loads your countershaft bearings, restricts suspension movement, and can prematurely stretch the chain.
A more technical approach:
- Identify the tightest point in the chain by rotating the rear wheel and measuring slack at multiple positions. Set slack to spec at the tightest spot, not the average.
- Periodically confirm slack correlation: with a friend compressing the rear suspension (or using a ratchet strap carefully on a stand), bring the swingarm close to the line where axle, pivot, and countershaft visually align. The chain should be firm but not piano-wire tight.
- Keep the chain aligned: don’t trust swingarm marks blindly. Use a chain alignment tool or measure from the swingarm pivot to the rear axle on both sides.
- Maintain consistent lubrication intervals based on miles and conditions, not just time. Wet / dirty environments may require lubrication every 300–400 miles; dry highway use may stretch that to 600–800 miles.
What you’ll feel: cleaner on/off throttle transitions, more predictable drive out of corners, and reduced driveline snatch, especially at low speed.
Technical Point 2: Tire Pressure as a Tuning Input, Not a Guess
Tires are your only contact patches. Treat their pressure as a controlled variable, not a rough estimate.
Factory pressures are usually a compromise for load, speed, and comfort. Enthusiast-level maintenance means intentionally setting and verifying pressures for how you actually ride:
- Use a good-quality, dedicated gauge (preferably 0.5–1 psi resolution) and check against a known reference occasionally. Cheap gauges can be off by several psi.
- Always set pressures cold, before riding, and at roughly the same ambient temperature. A 10–15 °F swing can move pressures ~1 psi or more.
- Understand heat rise: spirited riding will typically increase pressure by ~10–20% from cold. If your cold rear is 36 psi, hot might be 40–43 psi. Use this to diagnose load and pace: if you’re seeing huge pressure rises, the tire may be working too hard or underinflated.
- Do not blindly run “track pressures” on the street; those numbers assume higher temperatures, different tire constructions, and sometimes tire warmers.
What you’ll feel: sharper turn-in, more consistent feedback pacing through a corner, improved stability under braking, and tires that wear evenly instead of developing odd cupping or flat bands.
Technical Point 3: Brake System Integrity Beyond “Pads and Fluid”
The braking system is a hydraulic network, and any compliance (flex, air, contamination) shows up directly as vague lever feel and longer stopping distances.
Elevate your brake maintenance from “still works” to “fully optimized”:
- Pad wear: don’t wait until backing plates are close. Inspect pad thickness and wear pattern. Uneven wear between inner and outer pads can indicate sticky caliper pistons or improperly torqued caliper bolts.
- Rotor health: measure thickness with a micrometer and compare to the minimum spec stamped on the rotor carrier. Check runout with a dial indicator if you feel pulsing under light braking. Warped rotors or pad material deposits present similarly but are diagnosed differently.
- Fluid condition: brake fluid absorbs moisture over time, lowering its boiling point and increasing corrosion risk. Change fluid at least every 1–2 years (more often if you ride hard in mountains or on track). Use freshly opened DOT-spec fluid recommended by the manufacturer, and bleed until the fluid runs clear and bubble-free.
- Hose performance: rubber hoses can expand under pressure over the years, softening lever feel. If your bike is older, consider braided stainless lines that hold pressure and feedback more consistently.
- Lever setup: free play should be within spec so the master cylinder port isn’t covered at rest. Over-adjusted levers can cause dragging brakes when the system heats up.
What you’ll feel: a firm, predictable lever that ramps braking force linearly, powerful initial bite without harshness, and consistent braking lap after lap or pass after pass down your favorite road.
Technical Point 4: Suspension Health as a Fluid and Friction Problem
Most riders think of suspension as “set-and-forget knobs,” but underneath that are fluids, seals, and sliding surfaces that absolutely degrade over time.
Forks and shocks are essentially precision hydraulic devices:
- Fluid aging: fork oil shears and oxidizes, changing its effective viscosity. This alters damping characteristics and can turn a composed fork into a vague, wallowy mess without you noticing it gradually. Adhering to fork and shock service intervals (often 15,000–30,000 km / ~10,000–20,000 miles, or sooner with aggressive use) resets damping performance.
- Seal integrity: fork seals don’t just keep oil in; they keep contamination out. A slightly weeping seal is not just cosmetic—damping performance will suffer as oil level drops. Dust and grit increase stiction, which you’ll feel as a reluctance to initial movement over small bumps.
- Bushing and shaft condition: worn fork bushings or shock shafts introduce play and inconsistency. That can manifest as instability at lean or a “stepped” feeling in compression.
- Static and rider sag: this is your first-line indicator of spring health and correct rate. If you can’t get sag within recommended ranges with adjusters near mid-range, your springs are not matched to your weight or have fatigued.
What you’ll feel: a cleaner initial stroke over small bumps, predictable mid-corner support, more confidence on the brakes, and a bike that tracks the line you choose instead of “suggesting” its own.
Technical Point 5: Electrical and Charging System Reliability as Risk Management
Modern motorcycles are electrically dense: ABS, ride-by-wire, traction control, TFT displays, CAN bus networks. Neglecting the electrical system is a reliability risk, especially on longer trips.
Treat the charging system as a critical subsystem:
- Battery health: don’t just guess by whether the bike starts. Measure resting voltage after the bike sits overnight (a healthy, fully charged 12 V lead-acid will typically read ~12.6–12.8 V; lithium variants differ by chemistry and manufacturer spec). If you see chronic low values, test capacity under load or have it tested.
- Charging voltage: with the bike warm, measure across the battery at idle and at ~3,000–4,000 rpm. You should see something like 13.5–14.5 V (consult your manual). Too low suggests stator/regulator issues; too high can cook your battery and electronics.
- Connector integrity: inspect high-current connectors (regulator/rectifier, stator output, main grounds) for heat discoloration, corrosion, or looseness. Resistance at these junctions turns into heat and voltage drop.
- Ground paths: ensure frame and engine grounds are clean and tight. Many intermittent electrical gremlins trace back to poor grounding.
- Preventive attention: if you add accessories (aux lights, heated gear, GPS, chargers), use proper fused circuits and, ideally, a relay-controlled accessory block. Avoid randomly tapping into existing harnesses.
What you’ll feel (or avoid): fewer “mystery” cutouts, more reliable cold starts, consistent behavior from electronic aids, and a bike that doesn’t strand you because a single marginal connector finally gave up.
Integrating Maintenance Into Your Riding Life
High-level maintenance is not about becoming a full-time mechanic. It’s about turning your bike into a predictable platform—where every twitch, bobble, and surge means something you can interpret instead of background noise from neglect.
Build a recurring checklist that’s synced to mileage and use, not just calendar time: chain and tire checks every ride or two, pressures and controls weekly, fluids and adjustments at defined mileage intervals, deeper suspension and brake work on a seasonal or annual cycle depending on how hard you ride.
The payoff isn’t just fewer breakdowns; it’s clarity. When the bike is mechanically honest, your inputs map directly to outputs. You feel the chassis talk to you in real time, and you can trust what it’s saying. That’s when maintenance stops being a chore and becomes part of the riding craft itself.
Sources
- [U.S. National Highway Traffic Safety Administration (NHTSA) – Motorcycle Safety](https://www.nhtsa.gov/road-safety/motorcycle-safety) - Federal guidance on motorcycle safety, including proper maintenance considerations
- [Motorcycle Safety Foundation – Maintenance Tips](https://www.msf-usa.org/library.aspx) - Rider-focused maintenance and inspection information from a leading training organization
- [Honda Powersports – Owner’s Manuals](https://powersports.honda.com/downloads/owners-manuals) - Example of OEM maintenance schedules, torque specs, and service recommendations
- [KTM Service Information – Scheduling and Maintenance](https://www.ktm.com/en/service/service-information.html) - Factory perspective on periodic maintenance and component service intervals
- [Pennsylvania Department of Transportation – Motorcycle Operator Manual](https://www.dot.state.pa.us/Public/DVSPubsForms/BDL/BDL%20Publications/Motorcycle%20Manual/English/pub%20147.pdf) - Includes a structured pre-ride inspection and ongoing maintenance checklist
Key Takeaway
The most important thing to remember from this article is that this information can change how you think about Maintenance.


